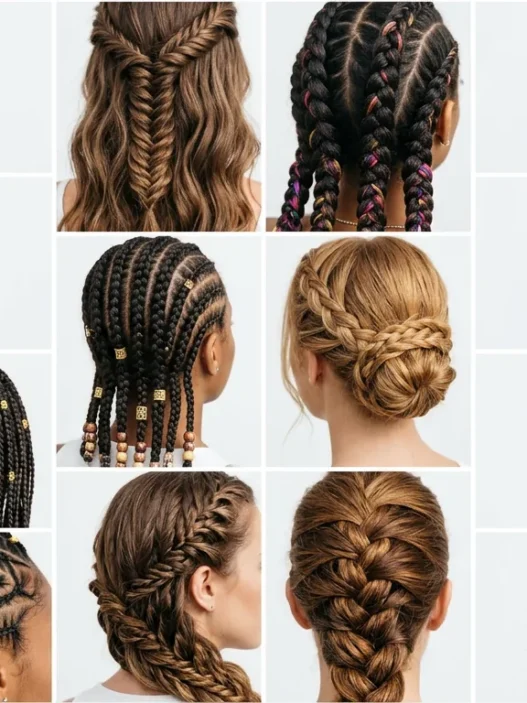









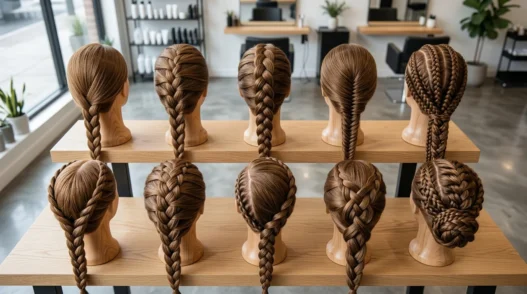
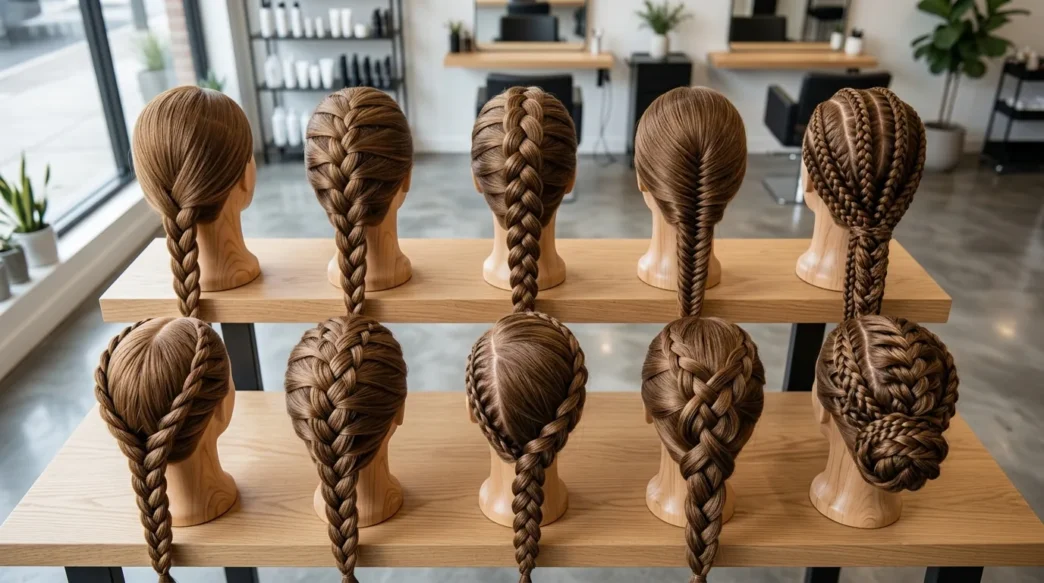
I’ve been braiding hair since I was eight years old, starting with my younger sister’s unruly curls. What began as a way to keep her hair tidy for school photos turned into my go-to styling solution for everything from lazy Sunday mornings to formal events. The best part about braids? There’s literally one for every skill level and time crunch.
Quick Braided Hairstyles by Difficulty Level
- Beginner Friendly: Simple Three-Strand Braid
- Beginner Friendly: Side Braid Sweep
- Easy Level: French Braid Foundation
- Easy Level: Dutch Braid Basics
- Intermediate Challenge: Fishtail Perfection
- Intermediate Challenge: Rope Braid Twist
- Advanced Level: Four-Strand Basket Weave
- Advanced Level: Waterfall Braid Magic
- Expert Level: Crown Braid Mastery
Beginner Friendly: Simple Three-Strand Braid
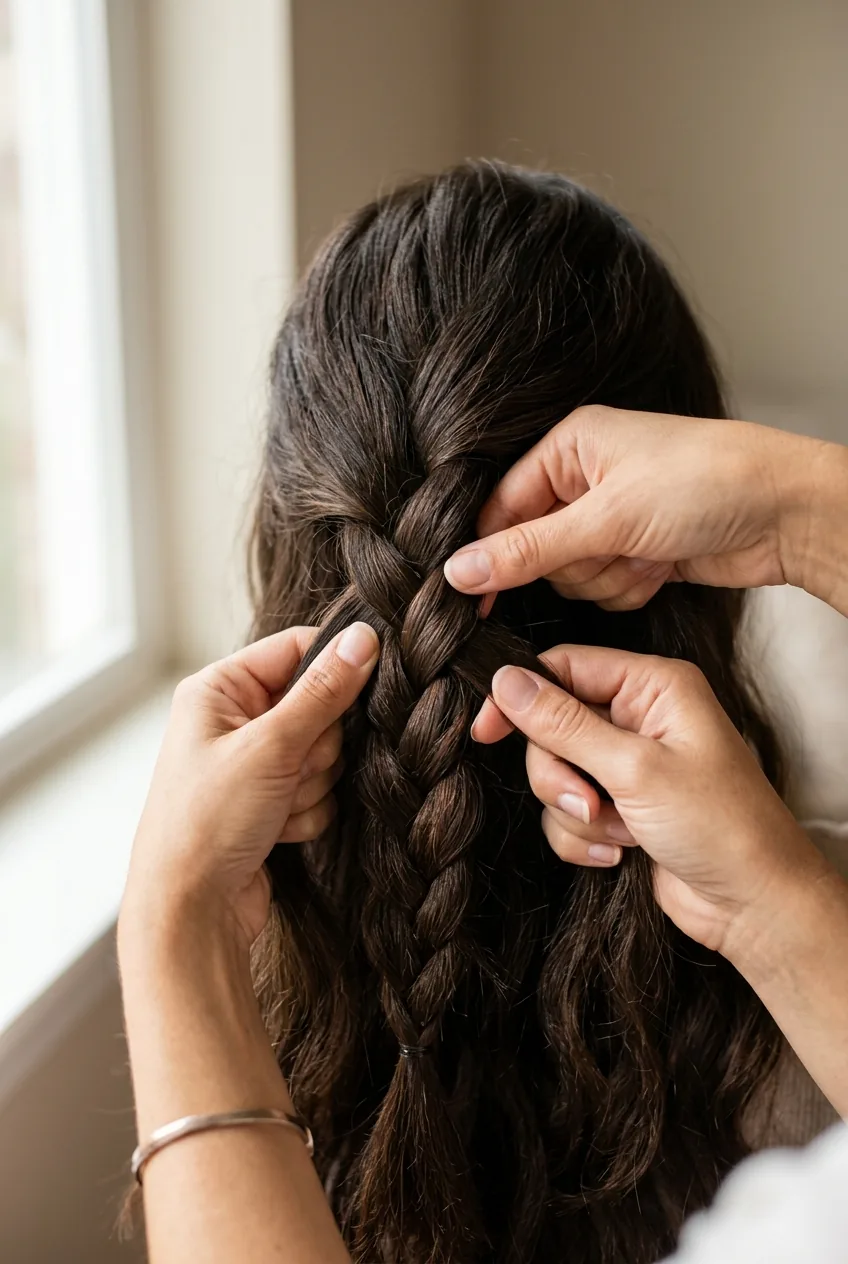
Difficulty: ⭐☆☆☆☆ | Time: 2 minutes | Tools: Hair elastic
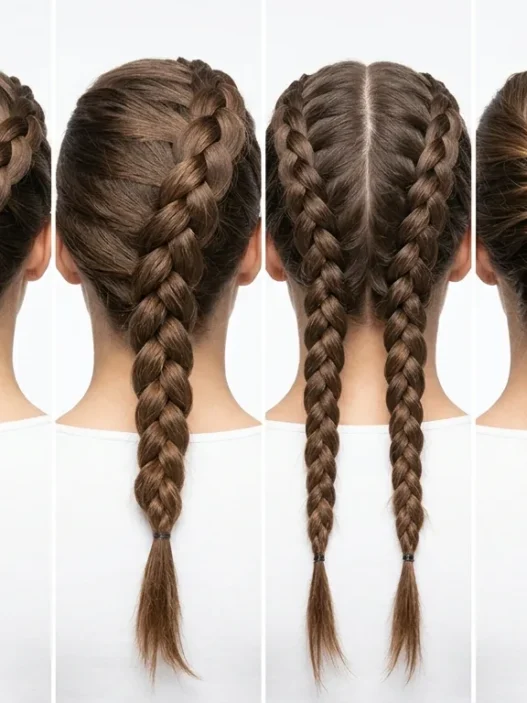
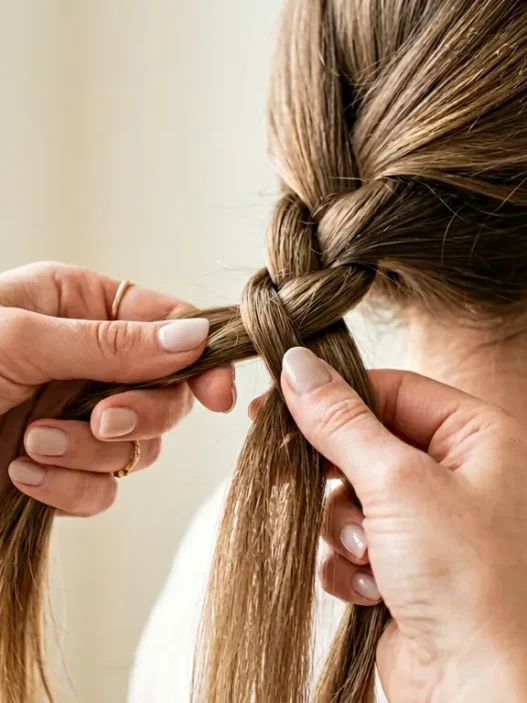
This is where everyone starts, and honestly, it’s still my fallback when I’m running late. The classic three-strand braid works on virtually any hair length past the shoulders. I love how it looks effortlessly polished whether you’re wearing it tight and neat or loosely tousled.
The key is getting your sectioning right from the start. Divide your hair into three equal parts at the nape, then simply cross the right section over the middle, then left over middle, repeating until you reach the ends. Don’t overthink it – muscle memory kicks in faster than you’d expect.
Beginner Friendly: Side Braid Sweep
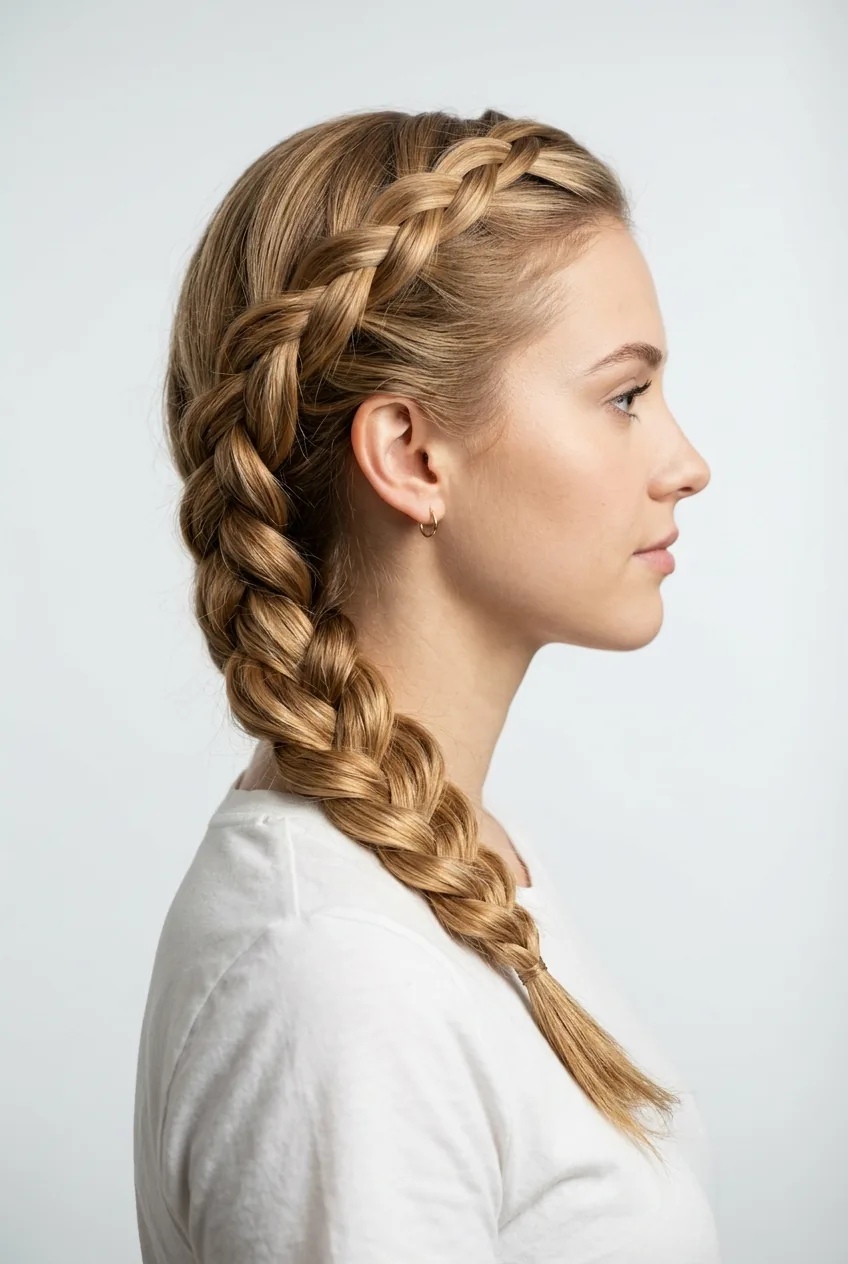
Difficulty: ⭐☆☆☆☆ | Time: 3 minutes | Tools: Hair elastic, bobby pins
Perfect for when you want something a little more romantic than a basic braid. I discovered this style during a particularly humid summer when my usual center part wasn’t cooperating. The side sweep adds instant elegance to what’s essentially the same three-strand technique.
Start with a deep side part, then gather all your hair to one side at the base of your neck. Braid as normal, but the asymmetrical placement makes it look way more intentional. Gently tug at the crown sections to add some volume – this prevents the “flat head” look that side styles sometimes create.
Easy Level: French Braid Foundation
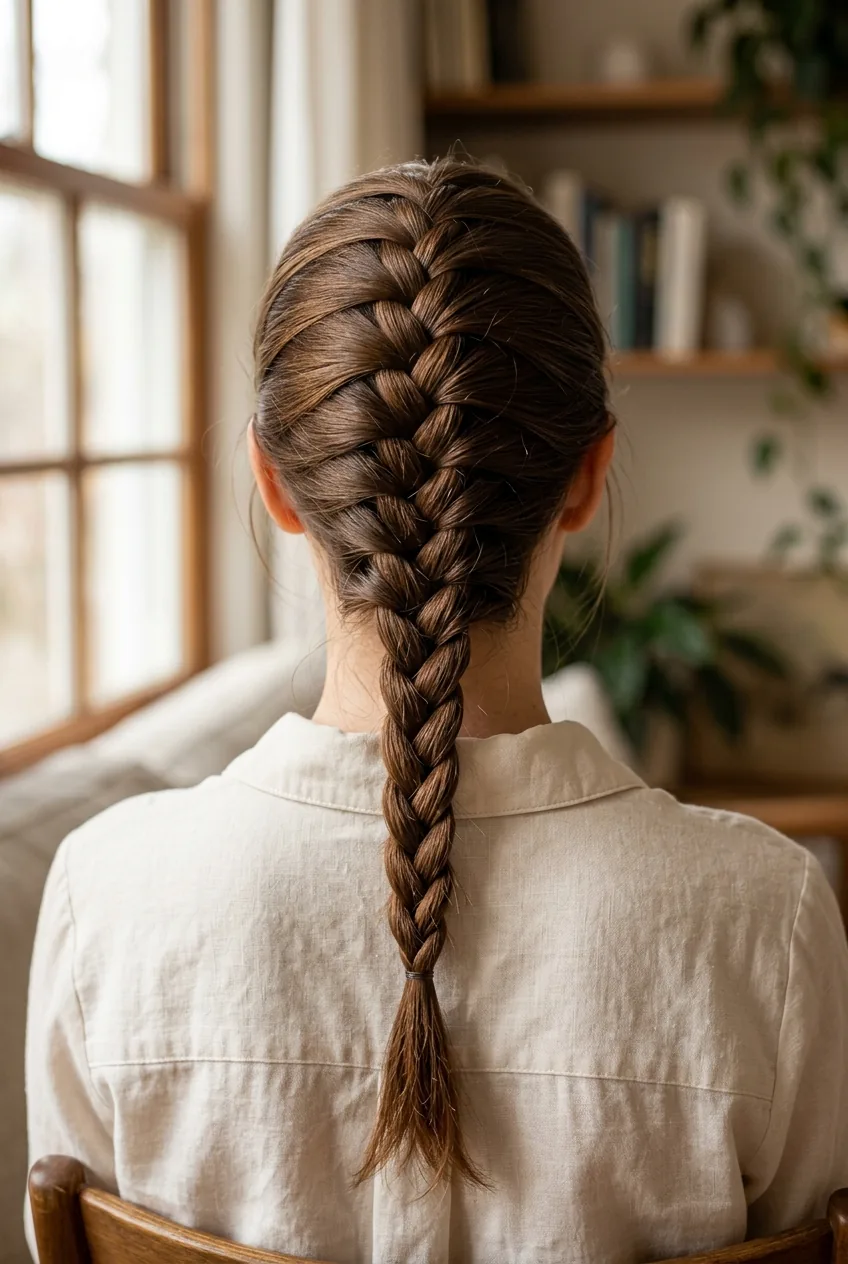
Difficulty: ⭐⭐☆☆☆ | Time: 5-7 minutes | Tools: Hair elastic, light-hold hairspray
The French braid intimidated me for years until I realized it’s just adding hair as you go. Once that clicked, everything changed. This style keeps shorter layers locked in place better than any other braid I’ve tried – a godsend if you’re growing out a shorter cut.
Begin with a small section at your crown and divide into three pieces. As you cross sections, continuously add small amounts of loose hair to the outer strands before crossing them over the middle. The rhythm becomes automatic after a few tries. Detailed video tutorials really helped me nail the hand positioning.
This Tutorial Finally Made It Click
Easy Level: Dutch Braid Basics
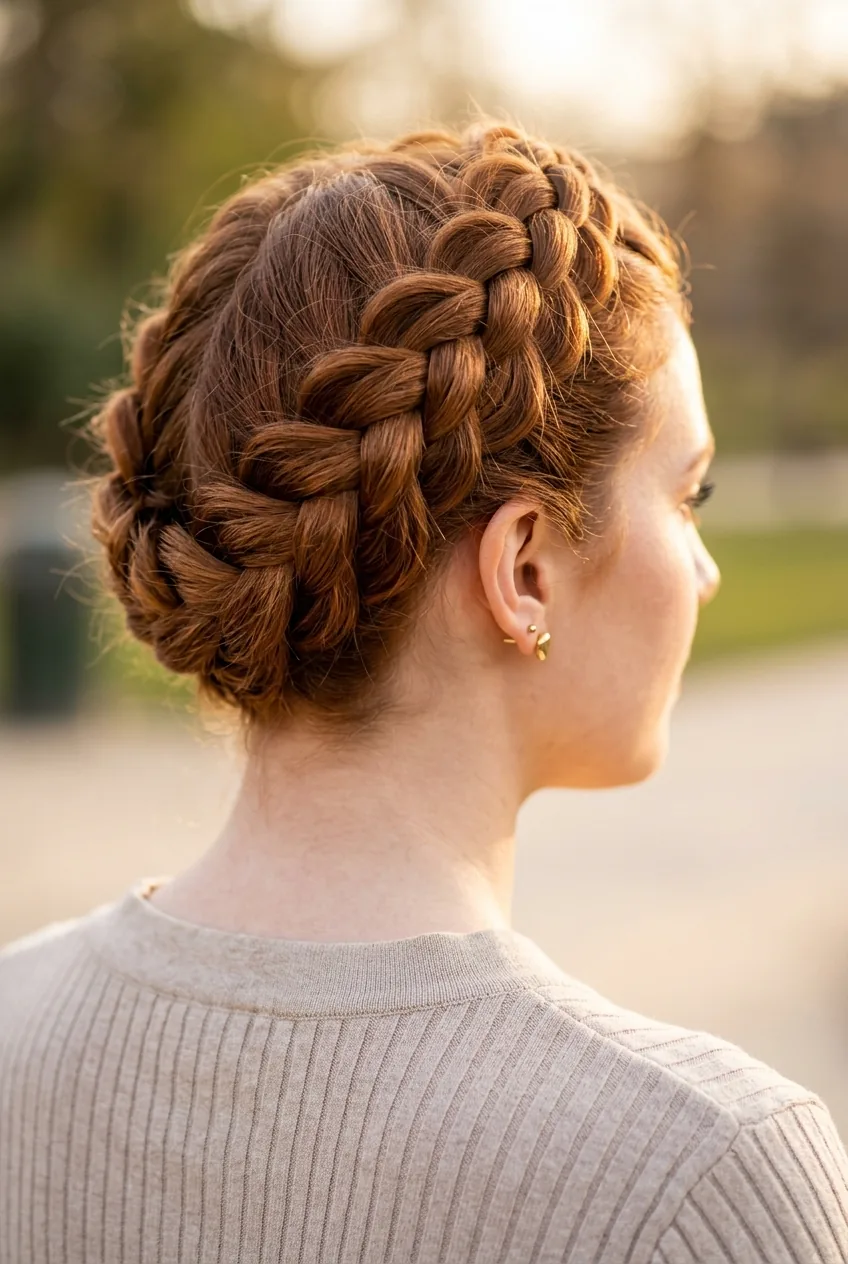
Difficulty: ⭐⭐☆☆☆ | Time: 5-8 minutes | Tools: Hair elastic, texturizing spray
Think of this as the French braid’s cooler sister. The Dutch braid sits on top of your head instead of weaving into it, creating this gorgeous raised effect. I wear mine when I want my braid to be the star of the show rather than blending seamlessly.
The only difference from French braiding? Cross your sections under the middle strand instead of over. It feels backwards at first, but the dimensional result is so worth the learning curve. This technique works beautifully for creating those Instagram-worthy chunky braids that photograph so well.
My Personal Pick: The Dutch braid is my absolute favorite for workout days. It stays put through hot yoga, looks intentionally messy when pieces fall out, and gives me that “I definitely didn’t just roll out of bed” vibe even when I totally did.
Intermediate Challenge: Fishtail Perfection
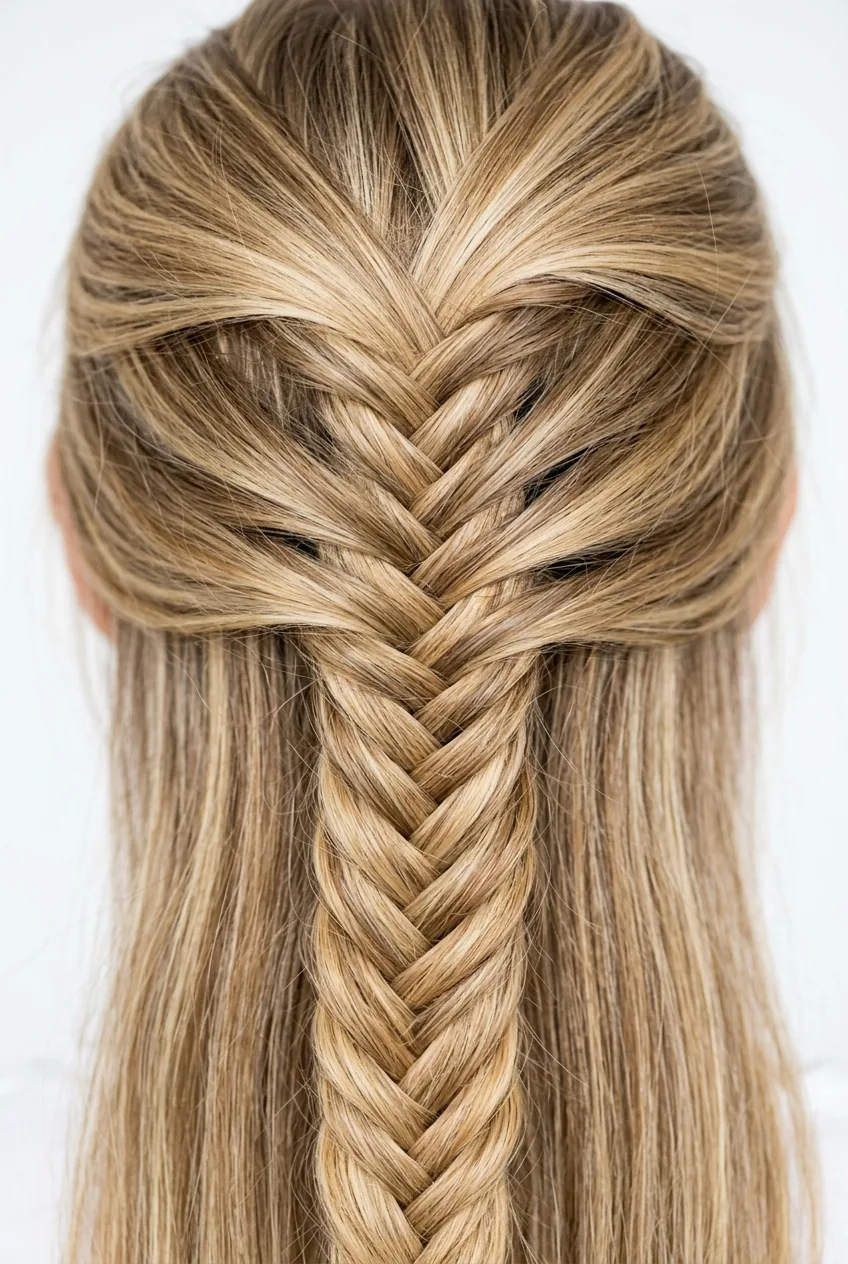
Difficulty: ⭐⭐⭐☆☆ | Time: 8-12 minutes | Tools: Hair elastic, fine-tooth comb
The fishtail braid looks incredibly complex but uses only two sections of hair. That’s the magic – it’s actually simpler in theory than a French braid, just more time-consuming. The intricate pattern develops naturally as you work tiny pieces back and forth.
Start by dividing your hair into two large sections. Take a thin strand from the outside of the right section and cross it to the inside of the left section. Then take a thin strand from the outside of the left section and cross it to the inside of the right. The smaller your strands, the more detailed the final pattern will be.
Intermediate Challenge: Rope Braid Twist
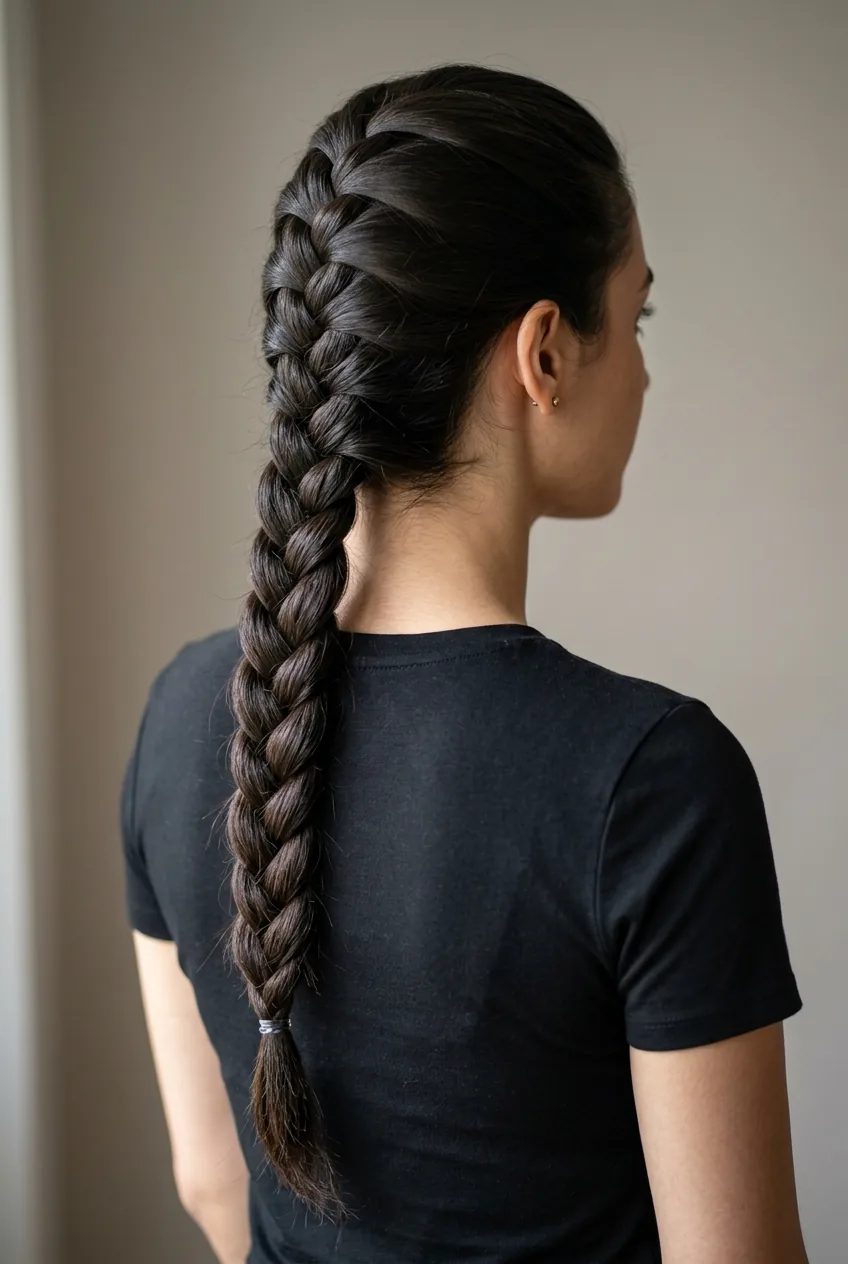
Difficulty: ⭐⭐⭐☆☆ | Time: 6-10 minutes | Tools: Hair elastic, strong-hold gel
This twisted beauty creates the most gorgeous spiral pattern down your back. I learned this technique from watching Professional styling videos, and it’s become my go-to for formal events. The continuous twisting motion is actually quite meditative once you get into the flow.
Split your hair into two sections and twist each section clockwise. Then wrap the twisted sections around each other counter-clockwise. The opposing directions create tension that locks the braid in place. This technique works especially well on slightly dirty hair that has some natural grip.
Advanced Level: Four-Strand Basket Weave
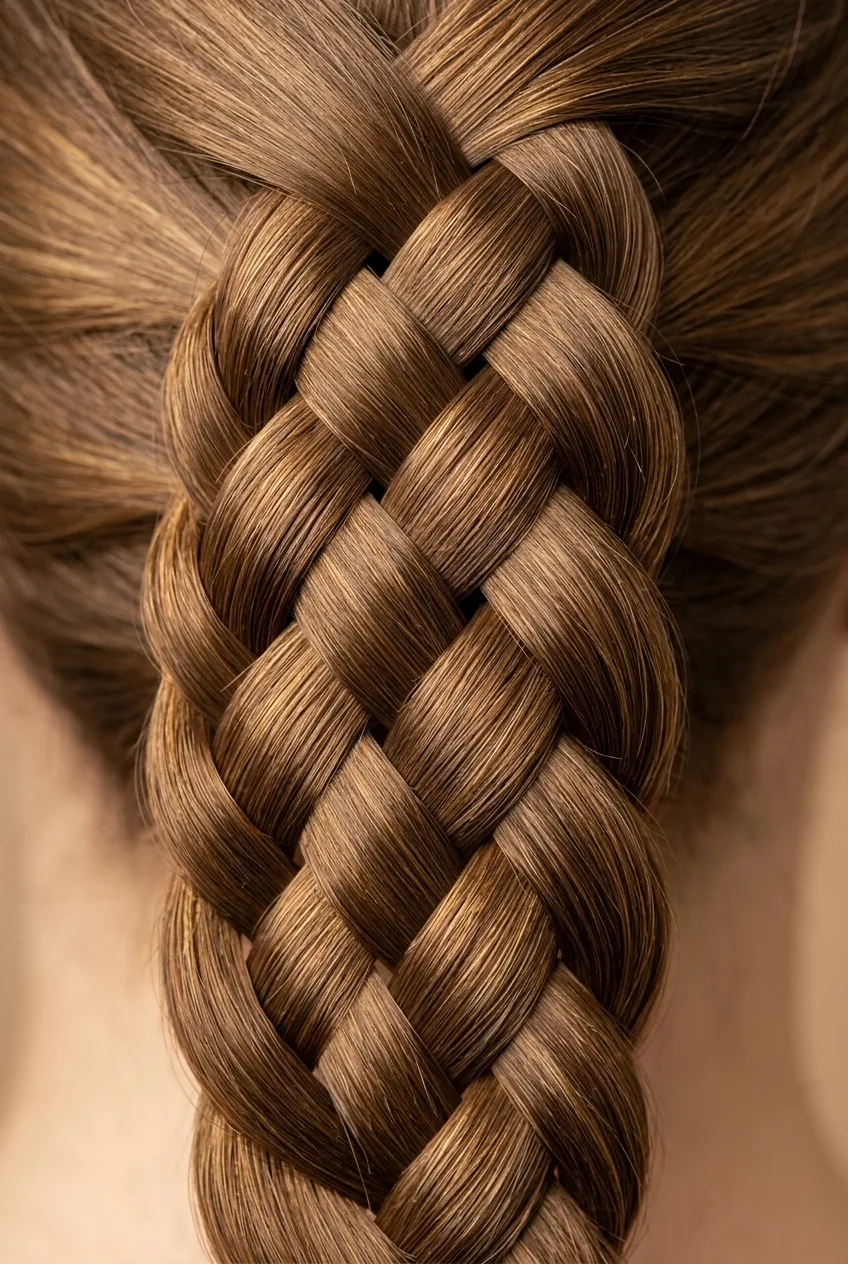
Difficulty: ⭐⭐⭐⭐☆ | Time: 15-20 minutes | Tools: Hair elastic, sectioning clips, patience
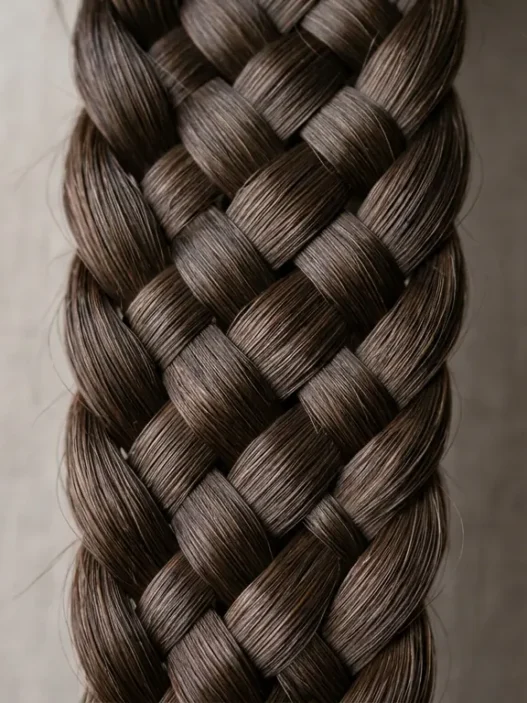
Now we’re getting into serious territory. The four-strand braid creates this incredible basket-weave texture that looks almost too perfect to be handmade. I won’t lie – this one took me several attempts to master, and I still need to concentrate while doing it.
Number your four sections 1, 2, 3, 4 from left to right. The pattern is: 1 under 2, over 3, under 4. Then renumber your strands and repeat. It sounds confusing written out, but your hands will learn the pattern faster than your brain will. For wedding hairstyles, this creates the most stunning foundation.
Advanced Level: Waterfall Braid Magic
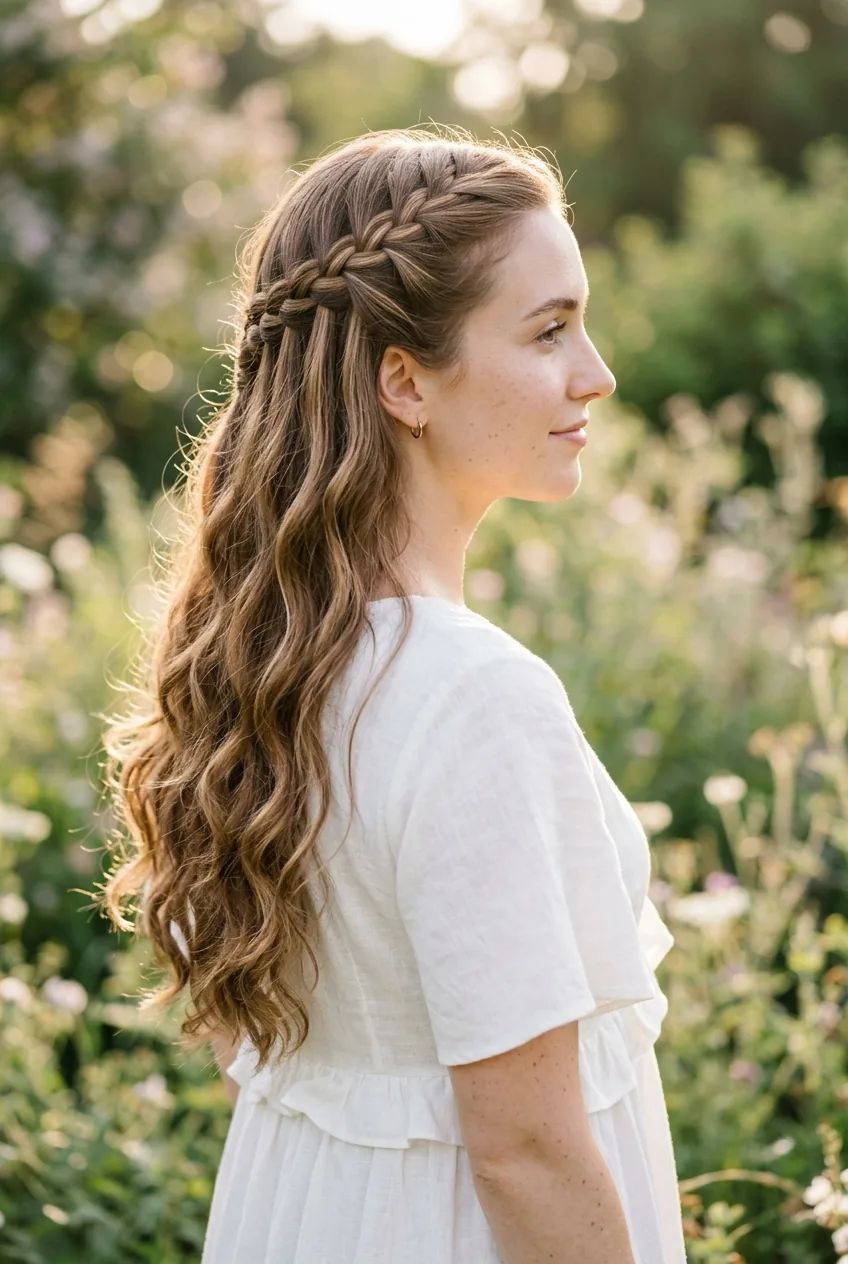
Difficulty: ⭐⭐⭐⭐☆ | Time: 12-18 minutes | Tools: Hair elastic, bobby pins, curling iron
The waterfall braid is pure poetry in hair form. Strands cascade down like water while the braid continues horizontally across your head. It’s the perfect hybrid of “hair up” and “hair down” that works for literally any occasion.
This technique requires you to “drop” strands as you braid, replacing them with new sections from above. Start with a small section at your temple and begin a regular three-strand braid. After the first cross, drop the bottom strand and pick up a new section from behind it. Continue this pattern around your head, always dropping and replacing the bottom strand.
Expert Level: Crown Braid Mastery
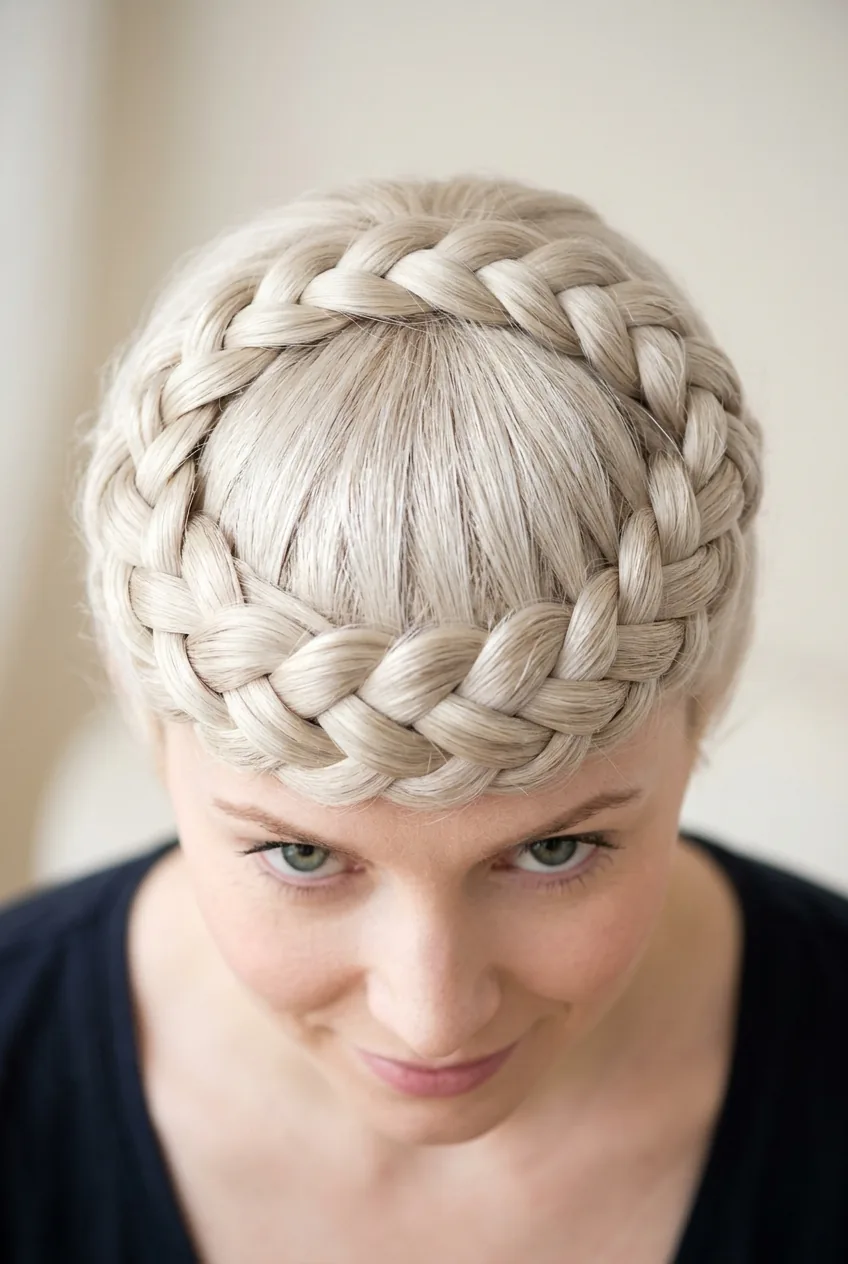
Difficulty: ⭐⭐⭐⭐⭐ | Time: 25-35 minutes | Tools: Hair elastics, bobby pins, texturizing spray, mirror setup
The crown braid is the Mount Everest of braided hairstyles. It requires serious dexterity, spatial awareness, and honestly, a bit of luck with your hair’s natural fall. But when you nail it? You feel like an absolute queen.
This style combines Dutch braiding technique with circular placement around your entire head. Start behind one ear and work around your hairline, incorporating hair as you go and maintaining consistent tension. The tricky part is connecting the end seamlessly back to where you started – this usually requires some strategic bobby pin placement and possibly a small prayer to the hair gods.
The most important tip I can give you? Don’t attempt this style for the first time on the morning of an important event. Give yourself several practice runs when you have nowhere to be and unlimited time to start over if needed.
Quick Questions About Braided Styles
How long does hair need to be for braiding?
Most braids work best with shoulder-length hair or longer, but I’ve successfully braided bob-length hair using texturizing spray and strategic bobby pins. The key is having enough length to cross sections at least three times.
Should I braid clean or dirty hair?
Day-old hair is actually ideal for braiding because it has natural texture and grip. Freshly washed hair can be too slippery, especially for complex styles like the four-strand braid.
Why do my braids always look loose and messy?
Consistent tension is everything. Most people start tight then gradually loosen their grip as they work down the braid. Practice maintaining the same pressure from start to finish – your arms might get tired at first, but muscle memory develops quickly.
Can fine hair handle advanced braided styles?
Absolutely, but you’ll need extra grip products and possibly some teasing at the roots for volume. Fine hair actually shows off intricate braid patterns beautifully because there’s less bulk obscuring the weave details.
Master these braided styles in order, and you’ll have a foolproof system for any hair day. I still default to that simple three-strand when I’m rushing, but having the advanced techniques in my back pocket makes me feel capable of handling any hair emergency that comes my way.