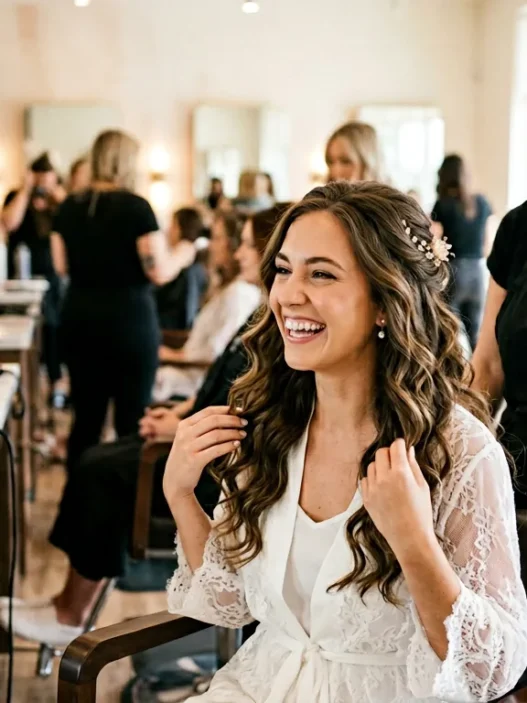


I’ll be honest — I used to think bridal buns were impossible to do on yourself. Every tutorial I tried left me with a lopsided mess that fell apart before I even finished. Then my sister asked me to do her hair for her wedding, and I knew I had to figure this out. After months of practice (and a lot of bobby pins), I finally cracked the code for a bun that actually stays put for 12+ hours.
What You’ll Need for This Look
Don’t overthink the products here. I’ve tried every fancy styling cream on the market, but honestly, drugstore basics work just fine:
- 20-30 bobby pins (get the wavy ones — they grip better)
- 5-6 clear elastic hair ties
- Wide-tooth comb
- Rat-tail comb for precise sections
- Strong-hold hairspray
- Light-hold mousse or texturizing spray
- Hair donut or sock bun maker (optional but helpful)
- Small mirror for checking the back
That last one is crucial. Trust me, you can’t see what’s happening back there without it.
Step 1: Prep Your Hair
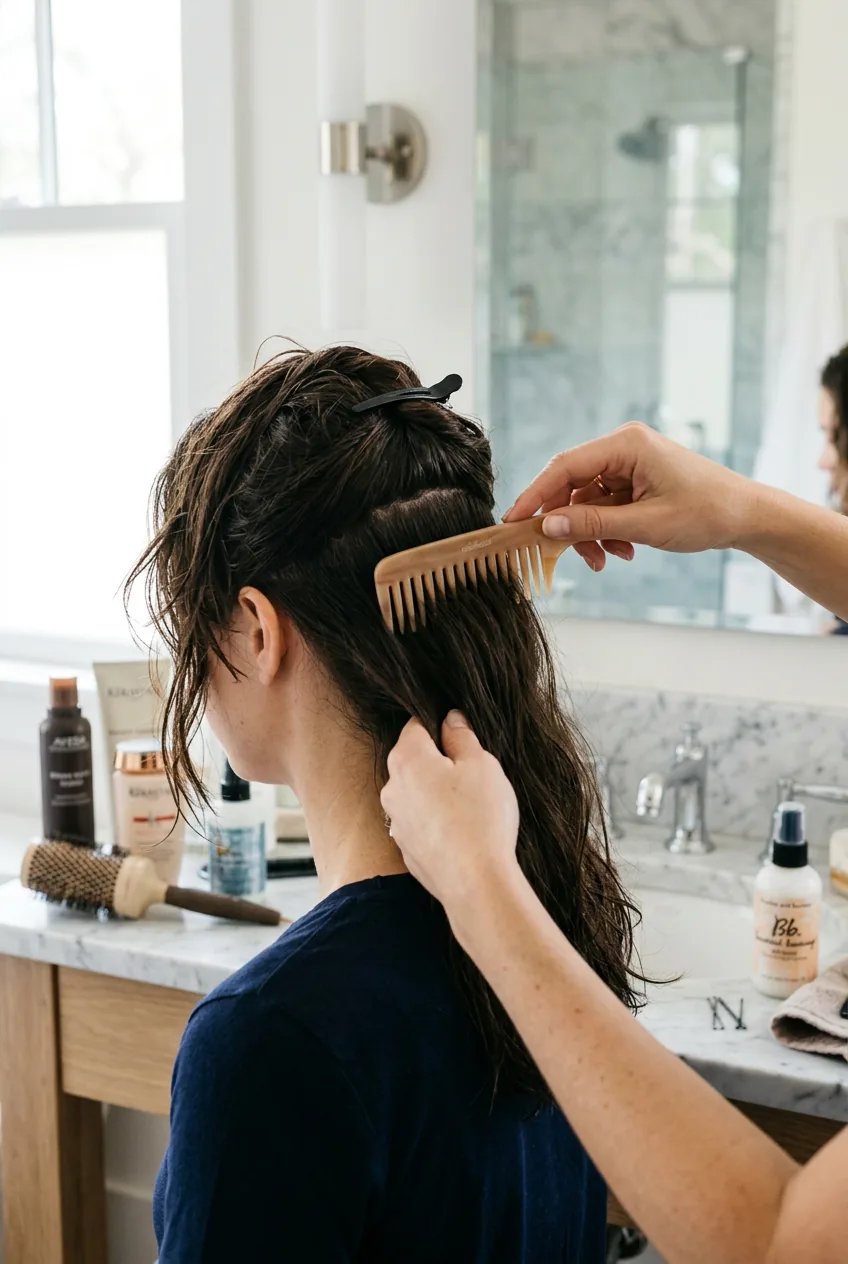
Start with day-old hair. I know that sounds counterintuitive for a wedding, but freshly washed hair is too slippery to hold a bun properly. If you absolutely must start with clean hair, work some texturizing spray through damp strands and let it air dry completely.
Brush everything straight back with your wide-tooth comb. No part, no side-swept anything yet — we’re building the foundation first. The goal is smooth, tangle-free hair that all flows in the same direction.
Here’s where most people skip ahead, but don’t. Spray a light mist of mousse from mid-length to ends. This gives your hair just enough grip without making it crunchy or stiff.
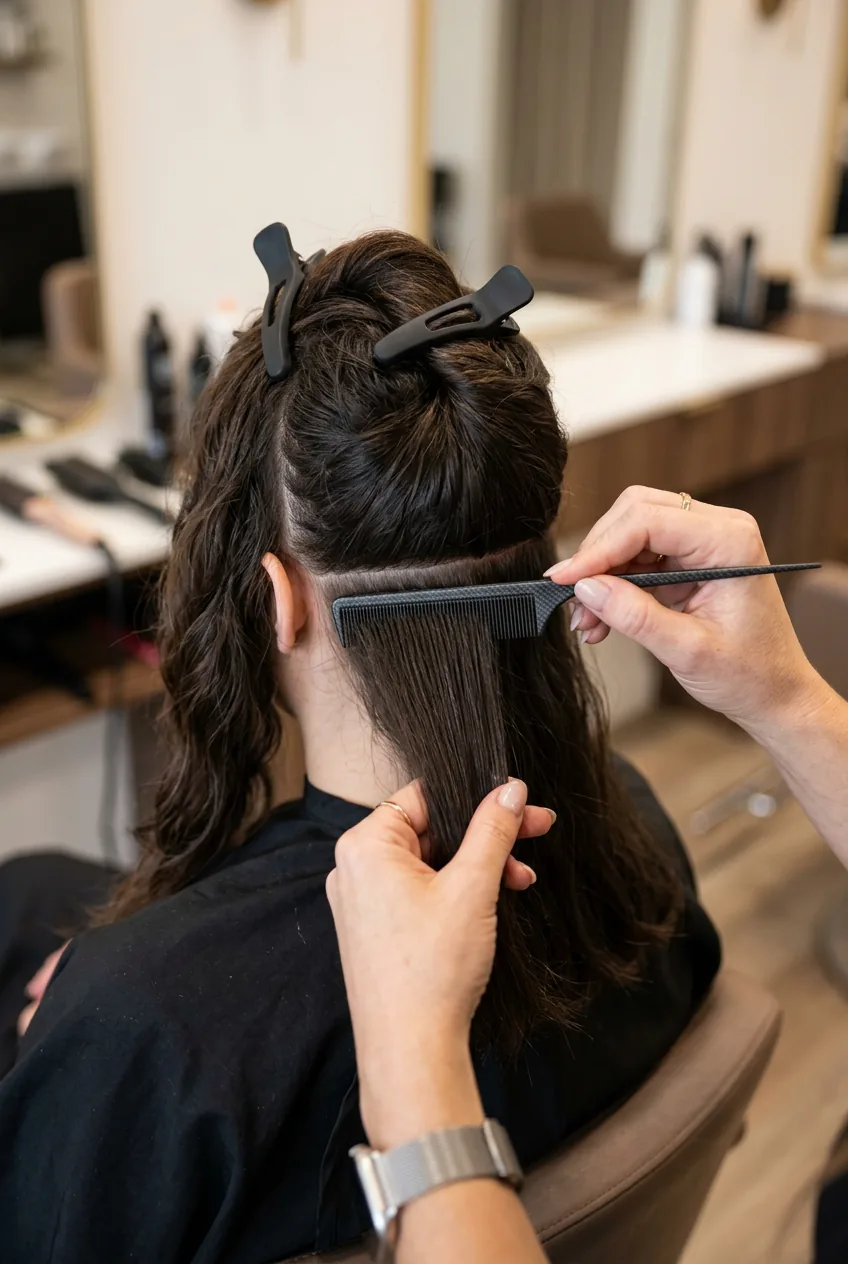
Step 2: Create the Base Section
Use your rat-tail comb to section off the top portion of your hair — from temple to temple, about 3 inches back from your hairline. Clip this section up and out of the way. We’ll deal with it later.
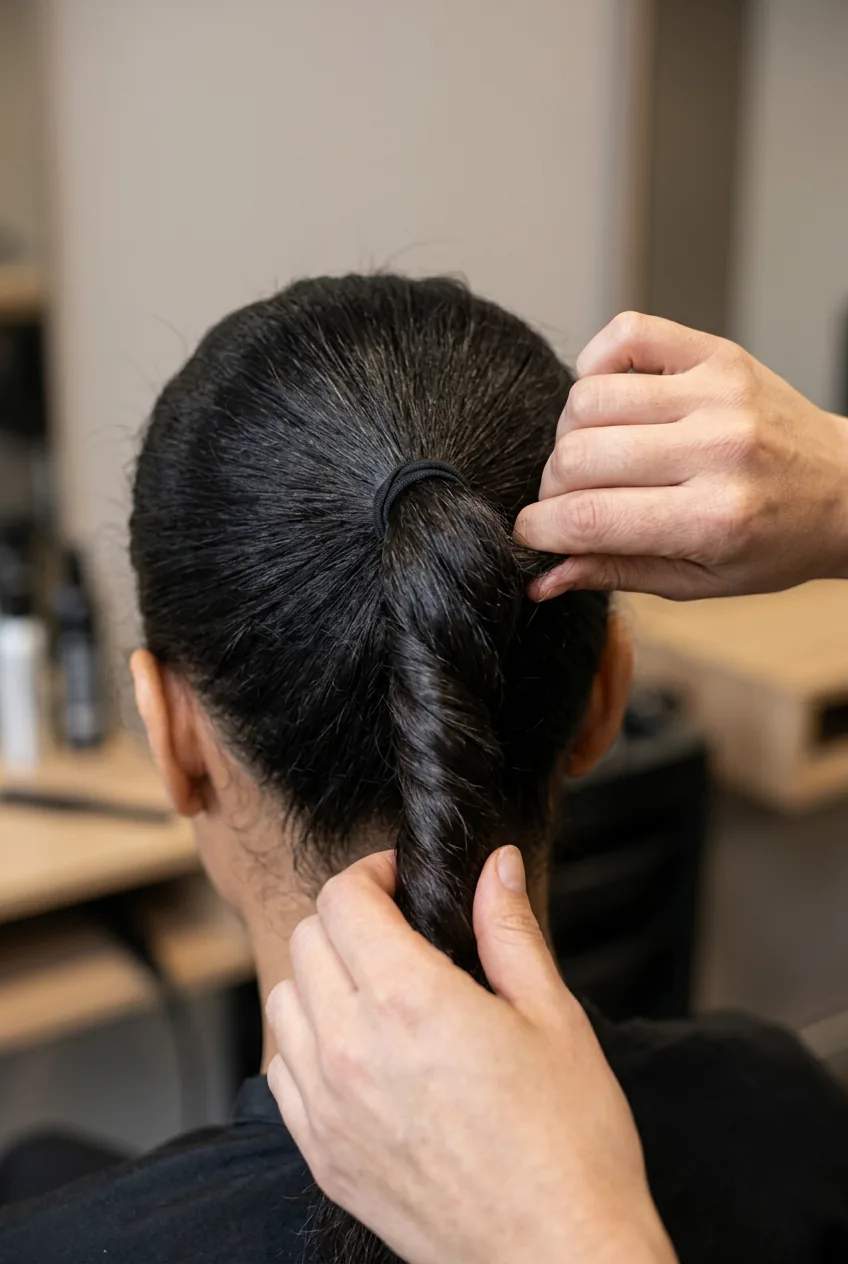
Now gather the remaining hair (everything from ear level down) into a low ponytail at the nape of your neck. The placement matters here — too high and your bun will stick out awkwardly, too low and it disappears behind your neck. Aim for right where your hairline meets your neck.
Secure with one elastic, then add a second elastic about 2 inches down the ponytail. This creates stability and prevents the whole thing from sliding around.
Step 3: Build the Foundation Twist
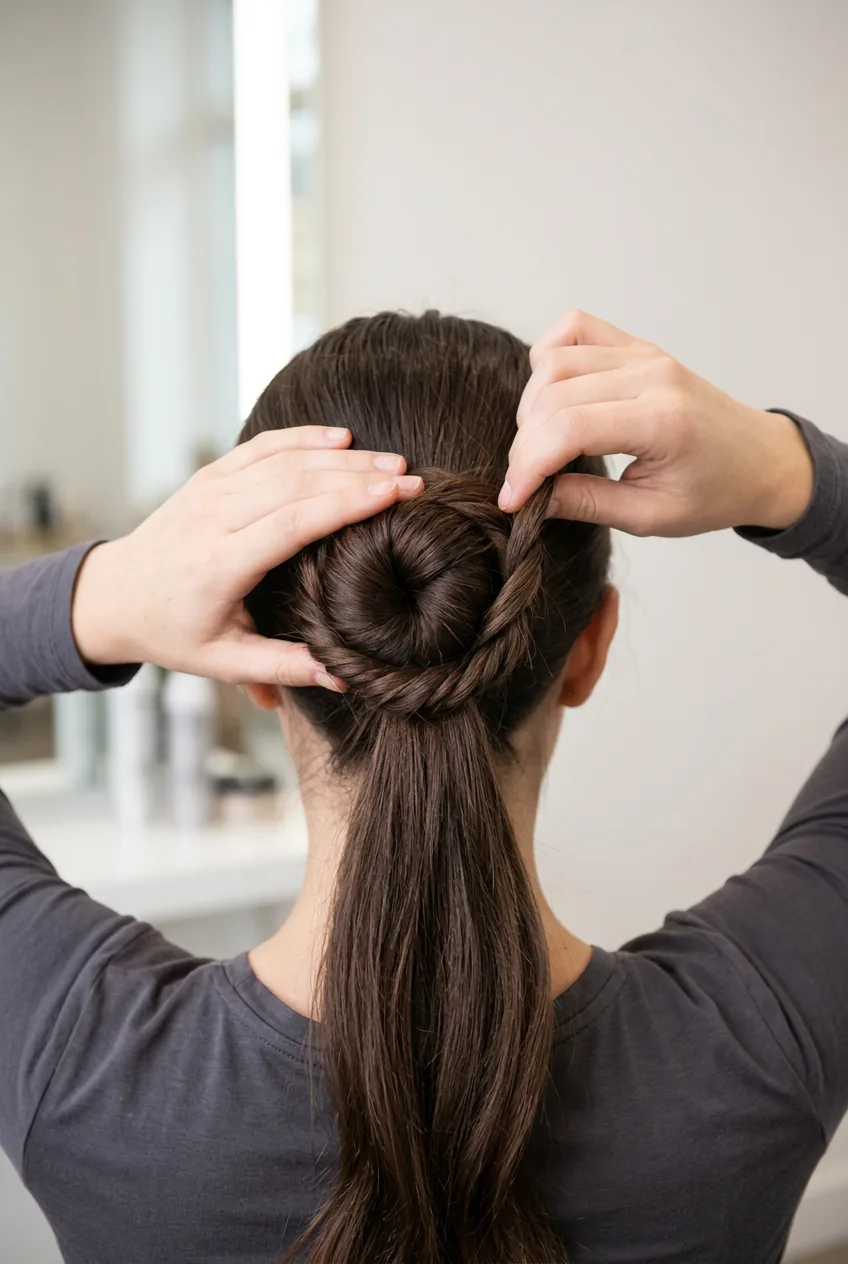
Here’s where the magic starts. Take your ponytail and twist it clockwise (or counterclockwise if you’re left-handed — whatever feels natural). Keep twisting until the hair wants to coil back on itself.
The twist should be firm but not so tight that it creates tension headaches. You’ll know it’s right when the hair feels substantial in your hands but still has some give to it.
If you’re using a hair donut, slide it up the ponytail now, positioning it right at the base where the elastic sits. If you don’t have one, that’s fine — the twist method works without it, you’ll just need a few extra bobby pins later.
I used to twist way too tightly, thinking it would hold better. Wrong. Over-twisted hair creates a rigid coil that fights you when you try to shape it into a bun. Learn from my mistakes — firm but flexible is the sweet spot.
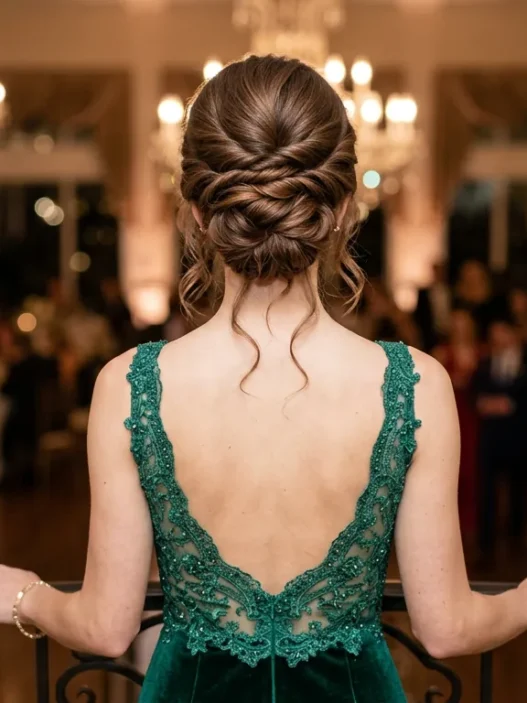
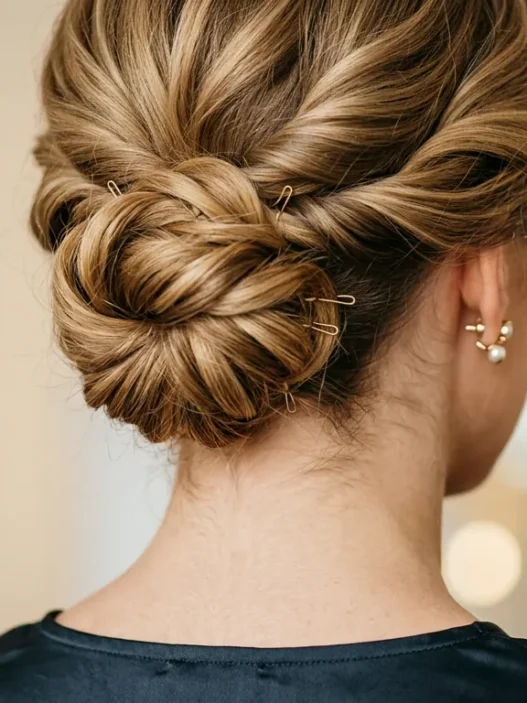
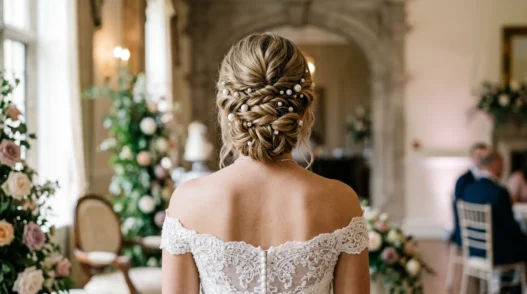
Step 4: Form the Bun Shape
Now comes the part that used to make me want to give up. Take your twisted ponytail and wrap it around the base in a circular motion. Don’t overthink the direction — clockwise usually feels most natural.
As you wrap, tuck the end of the ponytail under the coil you’re creating. This is crucial for a clean finish. The bun should look like a neat, round coil with no visible tail sticking out.
If your hair is on the thicker side, you might need to wrap around twice to use up all the length. Thinner hair usually wraps once with maybe a partial second loop. Work with what you’ve got rather than forcing a specific shape.
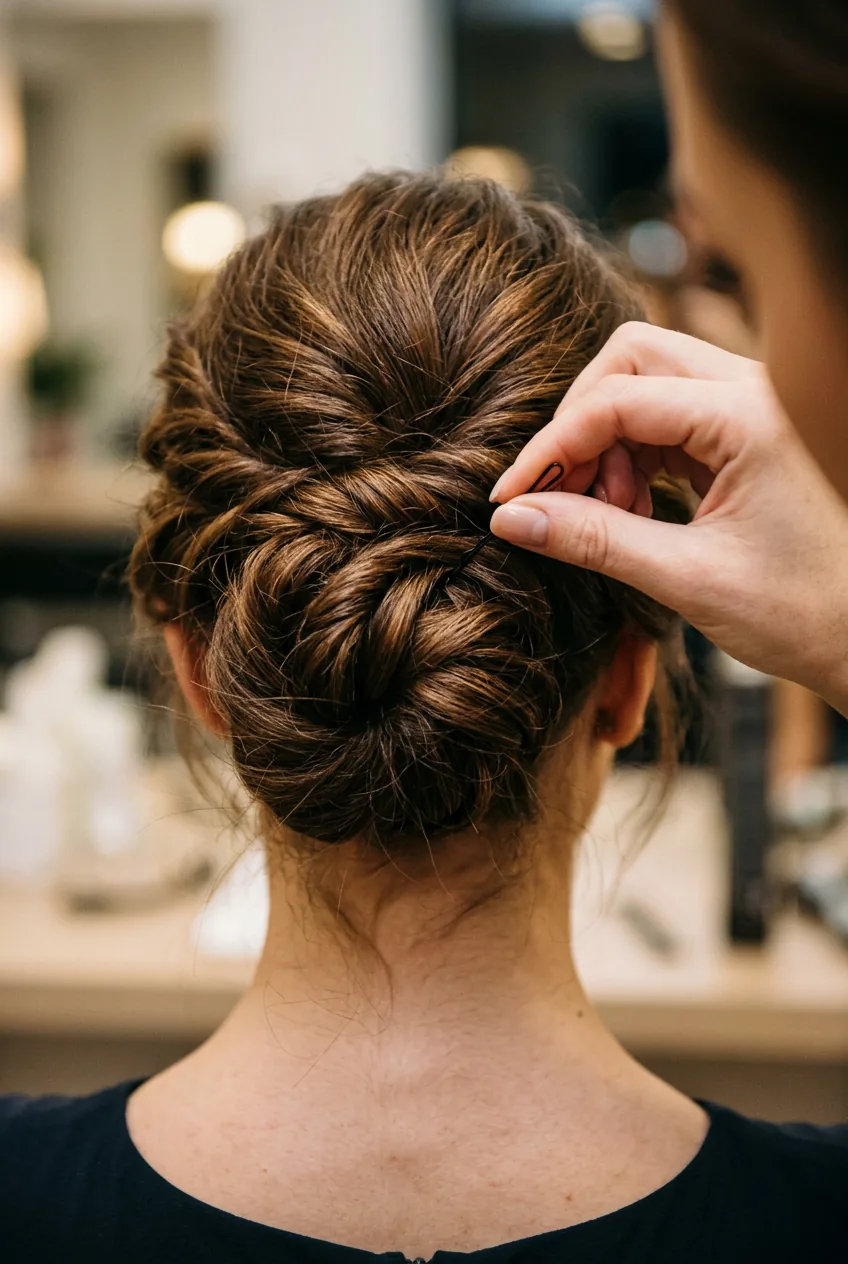
Step 5: Secure with Strategic Pinning
This step separates the amateurs from the pros. Don’t just stab bobby pins randomly around the bun. There’s a method here.
Start by inserting pins at the “corners” of your bun — think 12, 3, 6, and 9 o’clock positions. Slide each pin under the bun and up into your natural hair, catching both the bun and the hair underneath. The pins should disappear completely.
Then fill in with additional pins wherever you feel looseness. I usually end up using 12-15 pins total. Professional styling pins make a huge difference in hold if you want to invest.
Test your work by gently tugging different sections of the bun. If anything shifts, add more pins. Better to over-secure now than have it fall apart during the ceremony.
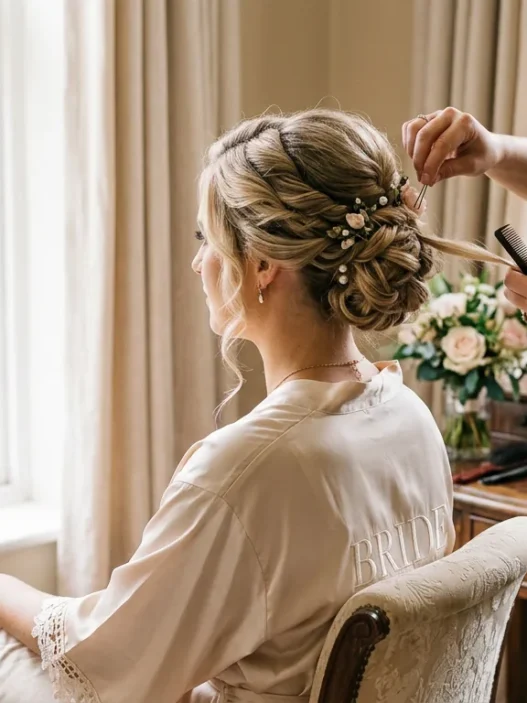
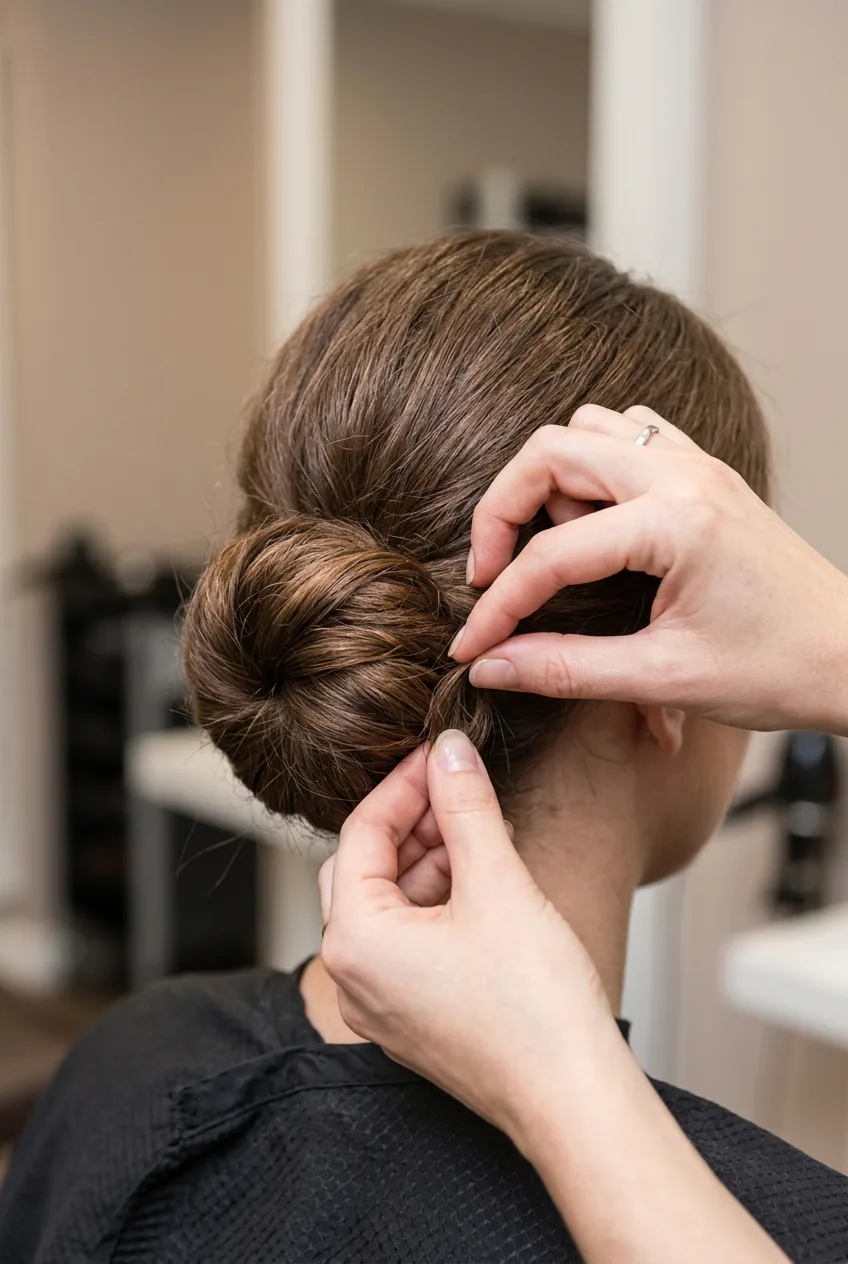
Step 6: Tuck and Hide Loose Ends
Even with perfect wrapping, you’ll have some whispy pieces that didn’t make it into the main bun. Don’t just pin them down flat — that looks obvious and harsh.
Instead, take each loose piece and twist it gently, then tuck it into the existing bun structure. Use your fingers to work the ends into the coils you’ve already created. This makes everything look intentional and seamless.
For really stubborn pieces that won’t stay tucked, use tiny bobby pins (the kind that match your hair color exactly) to secure them. But only as a last resort — the tucking method usually works if you’re patient with it.
Step 7: Final Lock-Down and Texture
Now for the front section we clipped away earlier. Release it and decide on your face-framing style. I love a soft side part with some gentle volume at the crown, but you can also do a deep side part or even keep it center-parted if that’s more your style.
Smooth this front section back toward your bun, leaving just enough looseness to avoid that slicked-back severe look. Secure the ends into your existing bun with a few more bobby pins.
Here’s my secret weapon: take a few wisps from around your hairline and gently tug them loose. Not enough to look messy, just enough to soften the whole look. Finishing techniques can make the difference between looking severe and looking romantic.
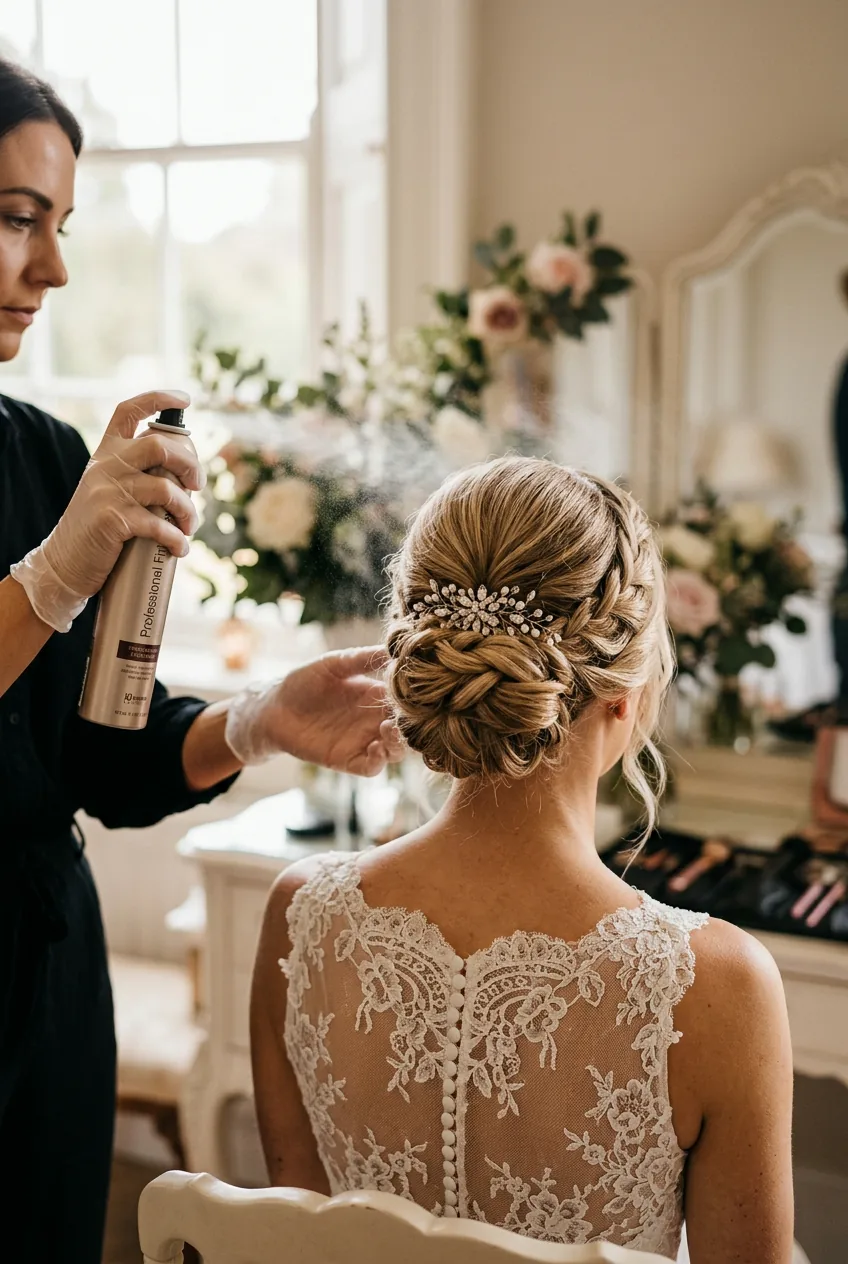
Finish with hairspray, but don’t go crazy. A light mist from 8 inches away is perfect. You want hold, not helmet hair.
Questions I Get About This Technique
Can I do this on myself for my own wedding?
Absolutely. I actually prefer doing my own hair because I know exactly how tight feels comfortable and what angle looks best. Practice a few times before the big day, and have someone check the back for you.
How long will this bun last?
With proper pinning, this holds for 12-15 hours easy. I’ve had brides tell me their hair still looked perfect at the after-party. The key is using enough bobby pins and not skimping on the prep work.
What if my hair is too short for this technique?
You need at least shoulder-length hair to create a substantial bun. If your hair is shorter, consider bridal half up half down styles that work beautifully with medium-length hair.
Should I use extensions for more volume?
Only if your hair is very fine or thin. Most people have enough hair for a lovely bun without extensions. Adding fake hair can actually make the styling harder if you’re not used to working with it.
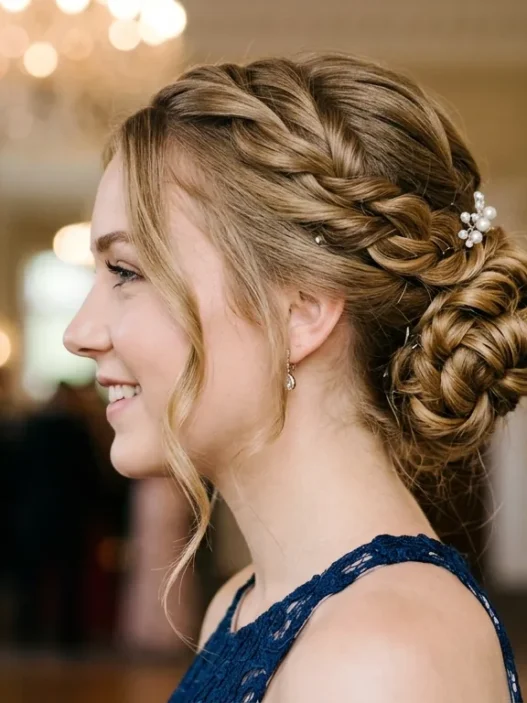
Can I add accessories to this bun?
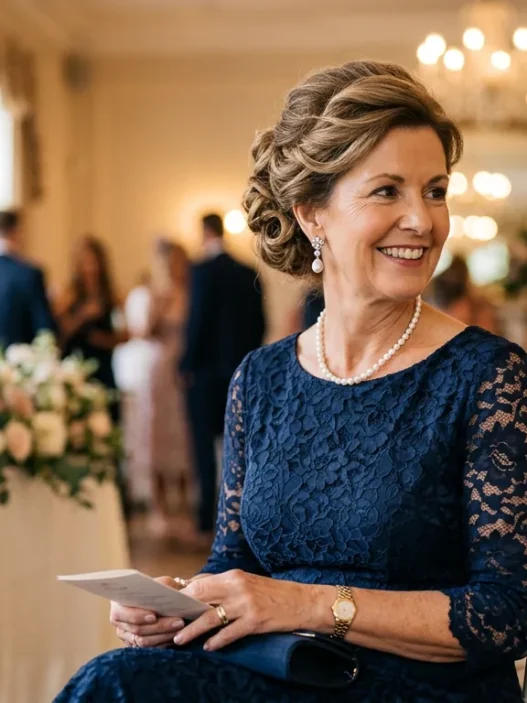
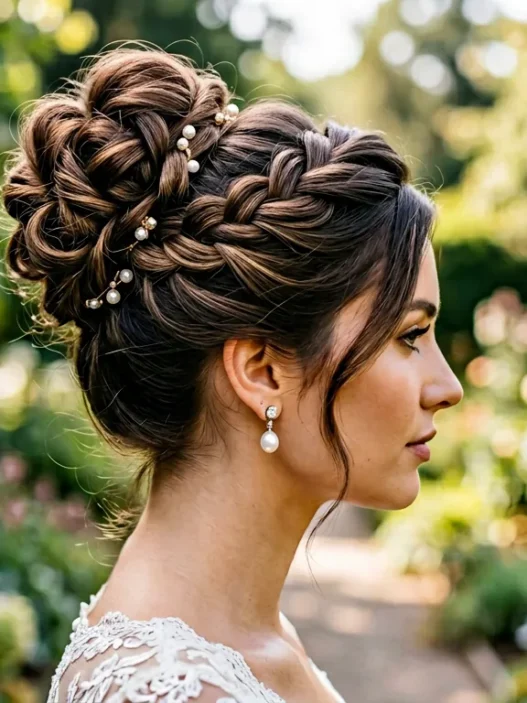
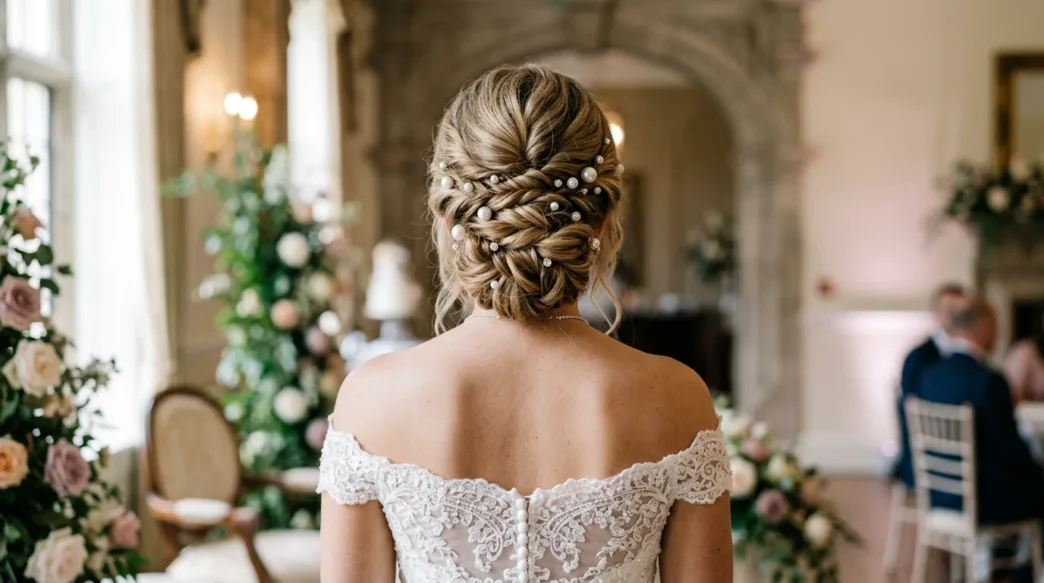
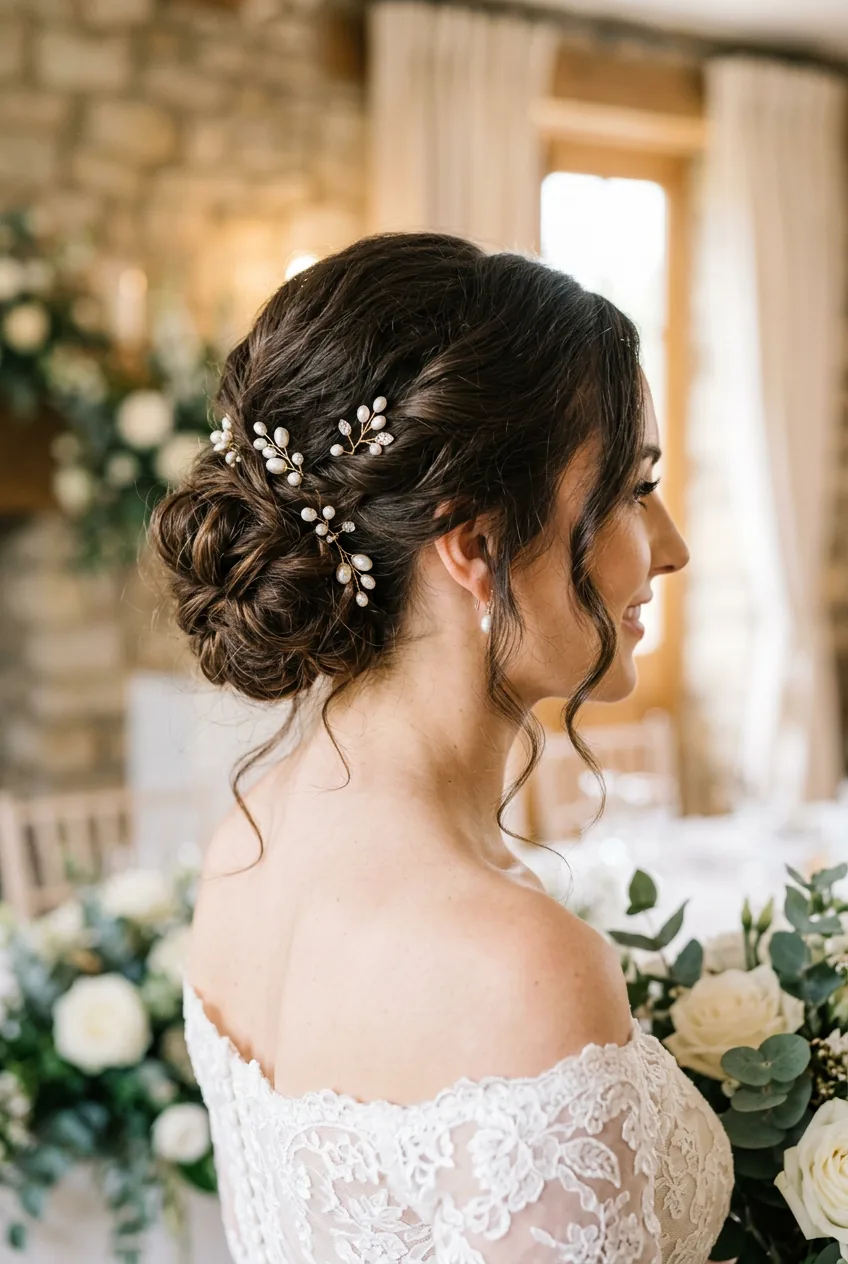
Yes! Hair pins with pearls or crystals work beautifully tucked into the bun after step 7. Avoid heavy accessories that might weigh down the style — delicate pieces are perfect for stunning bridal hairstyles.
The first time I successfully created this bun, I literally cried happy tears. It held perfectly through a 6-hour outdoor wedding and still looked polished in all the late-night photos. That’s when I knew this technique was something special — and now it’s my go-to for any formal event where I need hair that won’t quit.