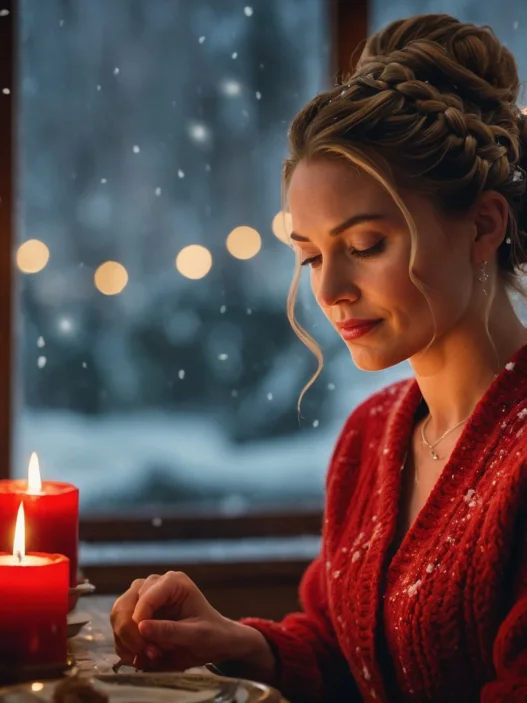


I’ve been there — standing in front of the mirror at 6 PM on prom night, realizing that Pinterest “easy” tutorial was anything but easy. After years of experimenting (and some spectacular hair failures), I’ve learned that the key to gorgeous prom hair isn’t complexity. It’s knowing exactly what your skill level can handle.
Your Perfect Prom Hair Awaits
- Beginner Friendly: Classic Low Ponytail
- Super Easy: Half-Up Twist
- Still Simple: Side-Swept Hollywood Waves
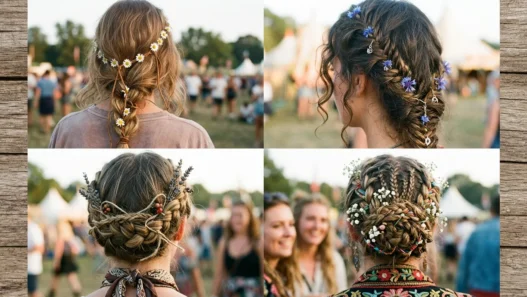
- Beginner Plus: Braided Crown
- Intermediate: Low Chignon
- Getting Trickier: French Twist
- Intermediate Challenge: Braided Updo
- Advanced Friendly: Textured Top Knot
- Skill Required: Romantic Side Bun
- Most Advanced: Multi-Braid Crown Updo
1. Beginner Friendly: Classic Low Ponytail
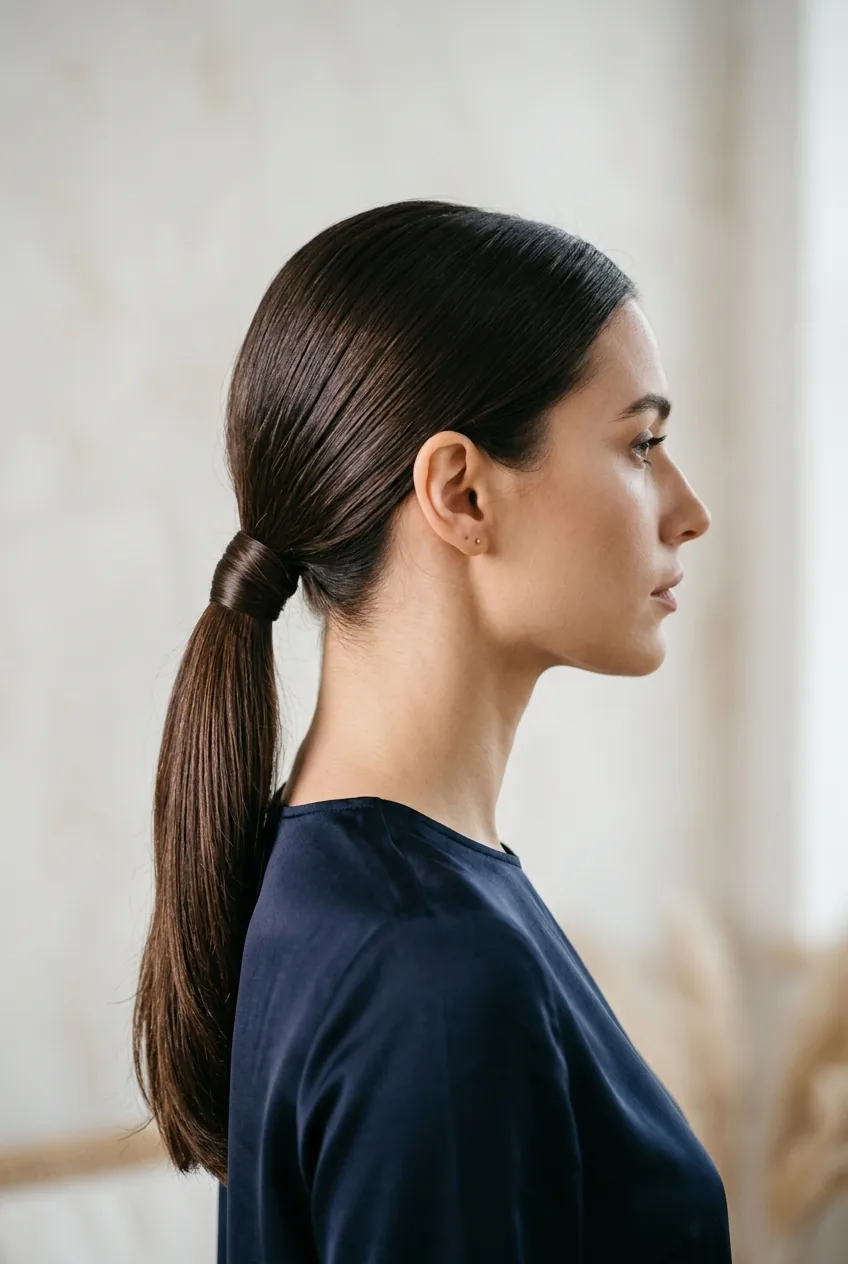
Difficulty: ⭐ (1/5)
Time: 5 minutes
Tools needed: Hair tie, brush, bobby pins
Don’t underestimate the power of a sleek low ponytail. I wore this to my own prom fifteen years ago, and honestly? It looked more elegant than half the complicated updos in our group photos.
The trick is in the smoothing. Brush your hair straight back, secure at the nape of your neck, then wrap a small section of hair around the elastic to hide it. Simple styling techniques can transform this basic look into something truly sophisticated.
What makes this foolproof? Even if your sectioning isn’t perfect, the sleek finish covers any mistakes. Plus, it works on literally every hair type and face shape.
2. Super Easy: Half-Up Twist
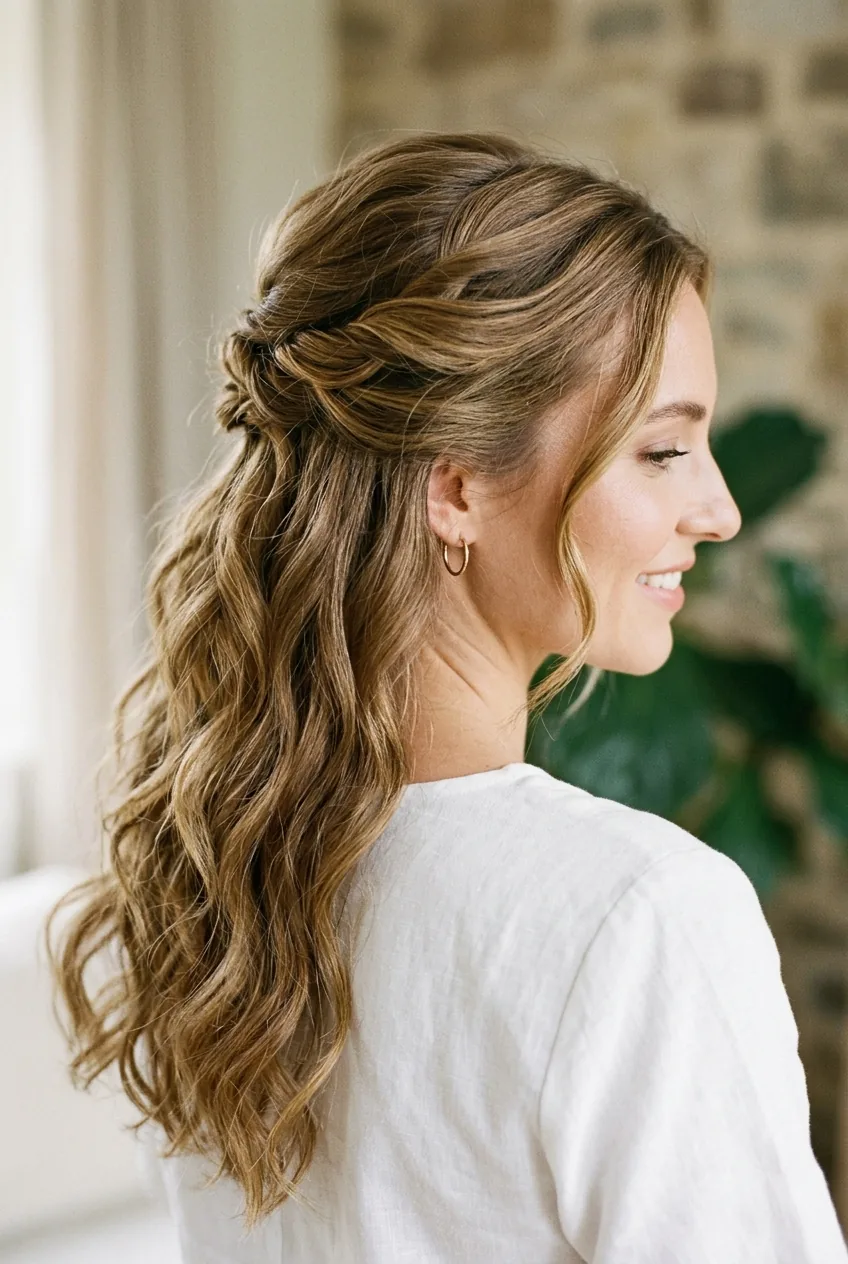
Difficulty: ⭐ (1/5)
Time: 3 minutes
Tools needed: Bobby pins, light-hold hairspray
This is my go-to recommendation for anyone who’s genuinely nervous about doing their own hair. You literally just take sections from each side of your head, twist them back, and pin them together. That’s it.
The beauty lies in its imperfection. Loose pieces around your face? Gorgeous. Slightly uneven twists? Adds character. I’ve never seen this look bad on anyone, which is saying something.
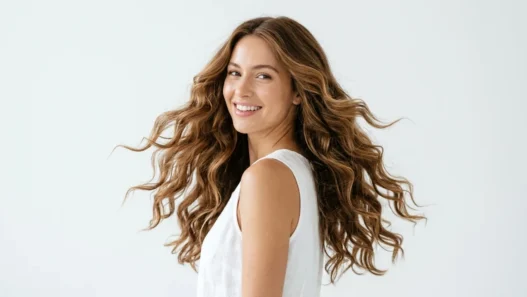
3. Still Simple: Side-Swept Hollywood Waves
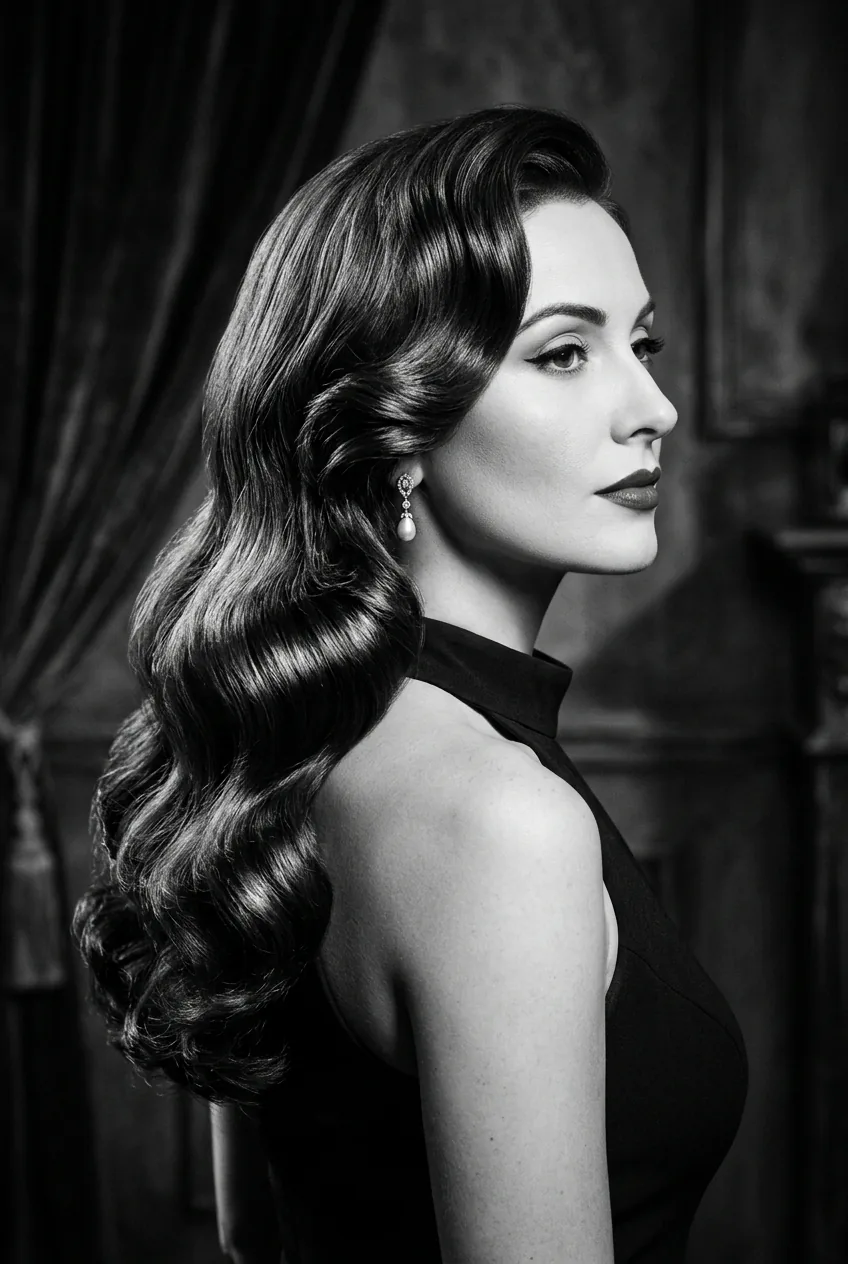
Difficulty: ⭐⭐ (2/5)
Time: 15 minutes
Tools needed: Large barrel curling iron, clips, strong-hold hairspray
Old Hollywood glamour never goes out of style, and these waves are surprisingly manageable once you get the rhythm. Start with clean, dry hair and work in sections — that’s the only “technique” you need to master.
I curl away from my face, let each curl cool completely in my palm, then brush them out gently with my fingers. The key is patience during the cooling phase. Rush it, and your waves fall flat within an hour.
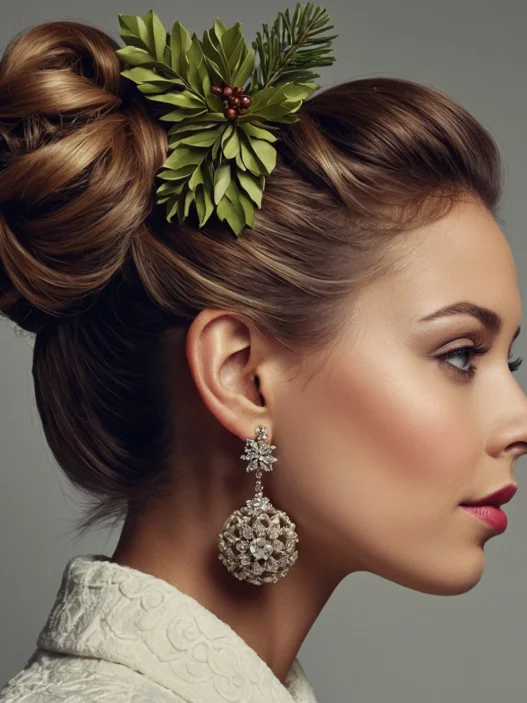
4. Beginner Plus: Braided Crown
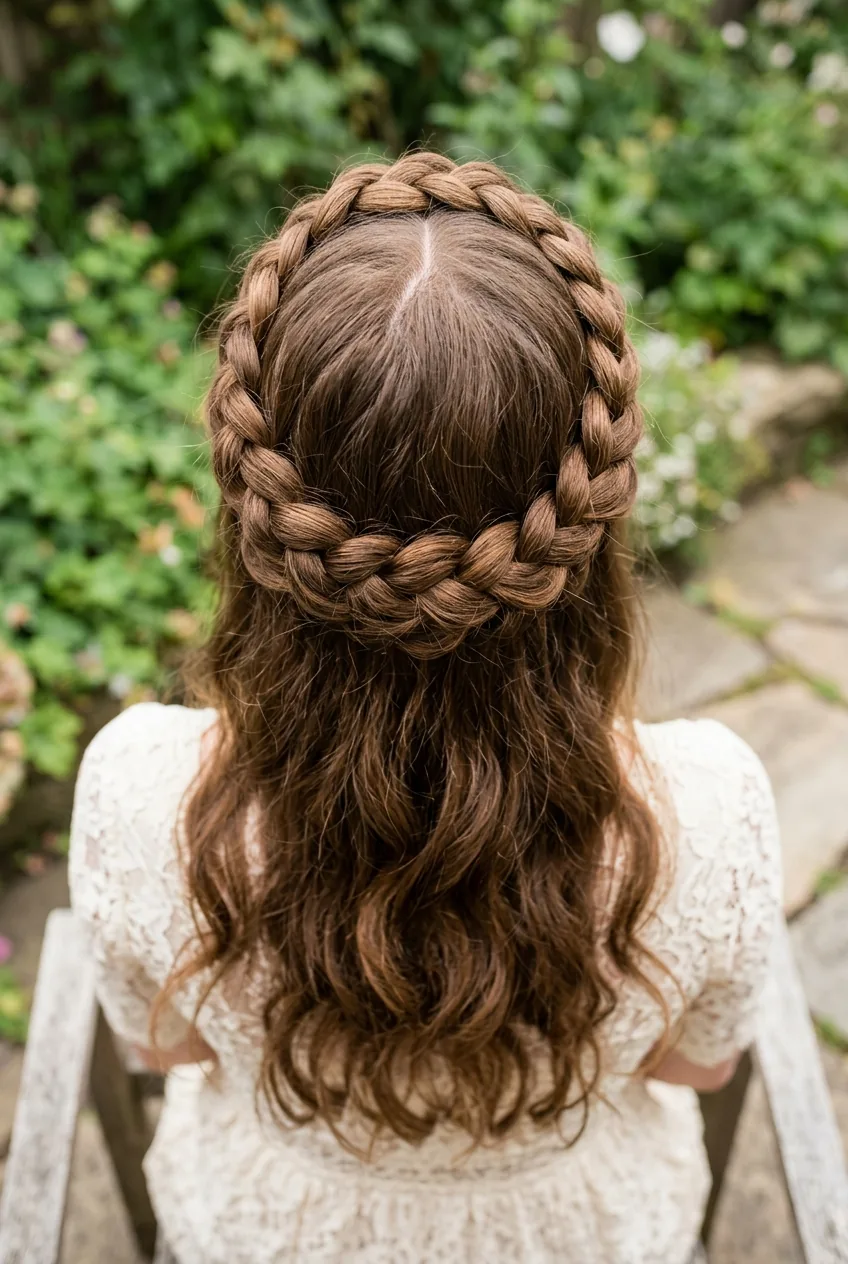
Difficulty: ⭐⭐ (2/5)
Time: 8 minutes
Tools needed: Small clear elastics, bobby pins
If you can do a basic three-strand braid, you can master this. Start a regular braid at one ear, work it across your hairline like a headband, and secure behind the opposite ear. The rest of your hair stays loose and flowing.
This braided crown is my personal pick for girls with fine hair. It creates the illusion of thickness while keeping everything secure for hours of dancing.
Pro tip I learned the hard way: braid slightly loosely. You can always gently tug the sections apart afterward to create that effortlessly thick, bohemian texture.
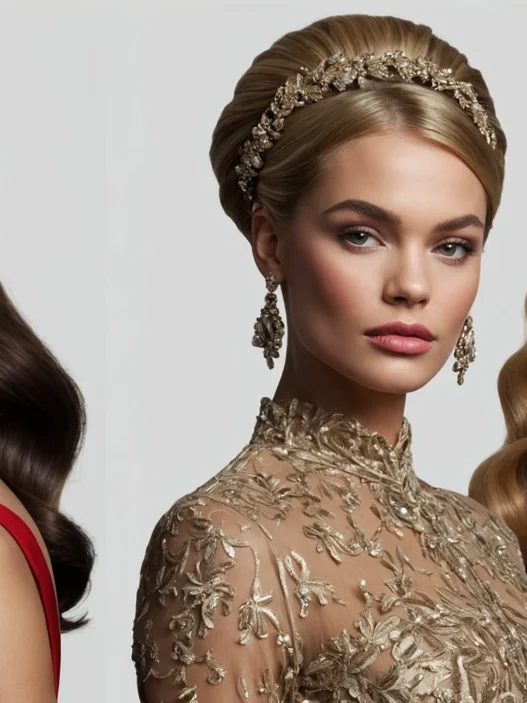
5. Intermediate: Low Chignon
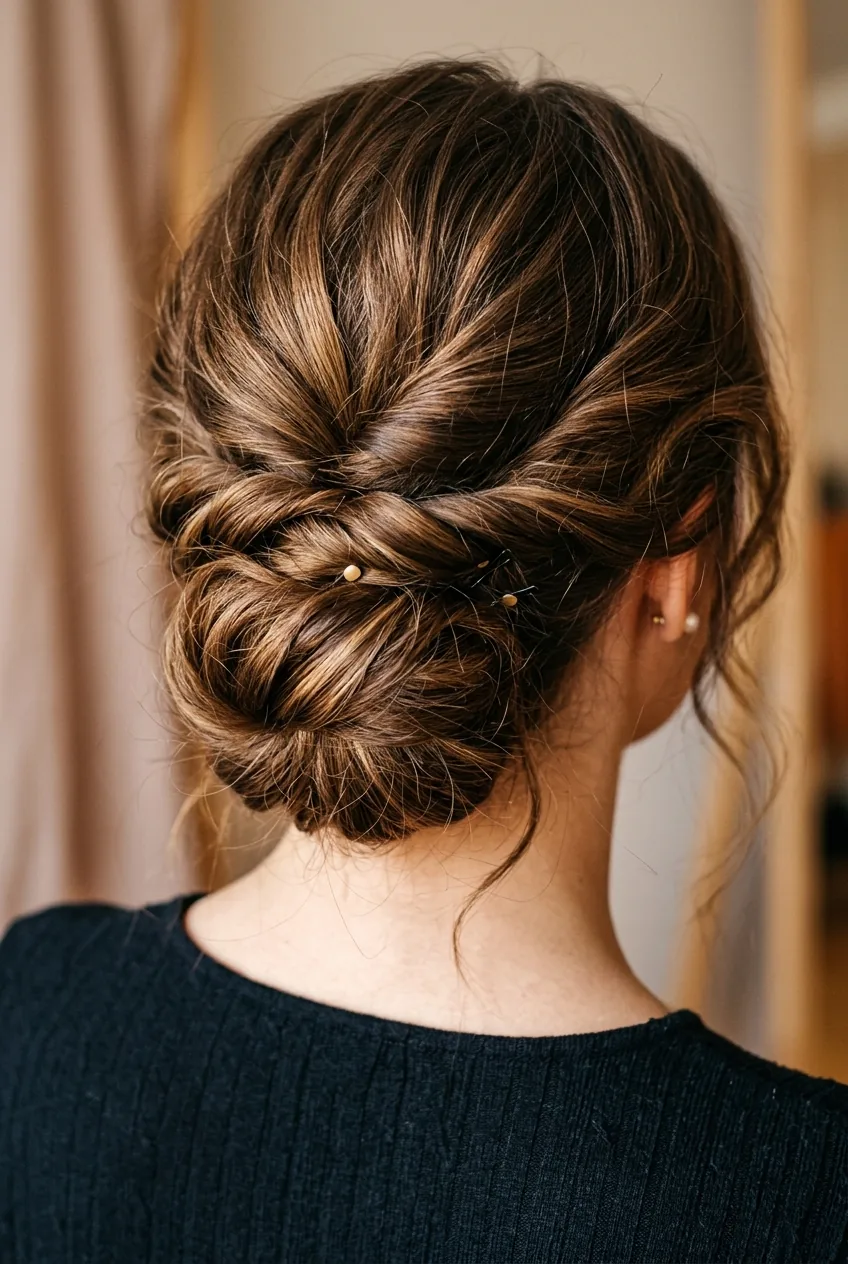
Difficulty: ⭐⭐⭐ (3/5)
Time: 12 minutes
Tools needed: Hair tie, bobby pins, texturing spray
This is where things get interesting. A chignon looks incredibly sophisticated, but it’s really just a low bun with better technique. You create a loose ponytail, twist the length, then wrap it around the base in a figure-eight pattern.
The magic happens in the tucking and pinning phase. Don’t aim for perfection — those slightly messy, pulled-out pieces around the nape create the most beautiful texture. This style has rescued me from countless bad hair days.
6. Getting Trickier: French Twist
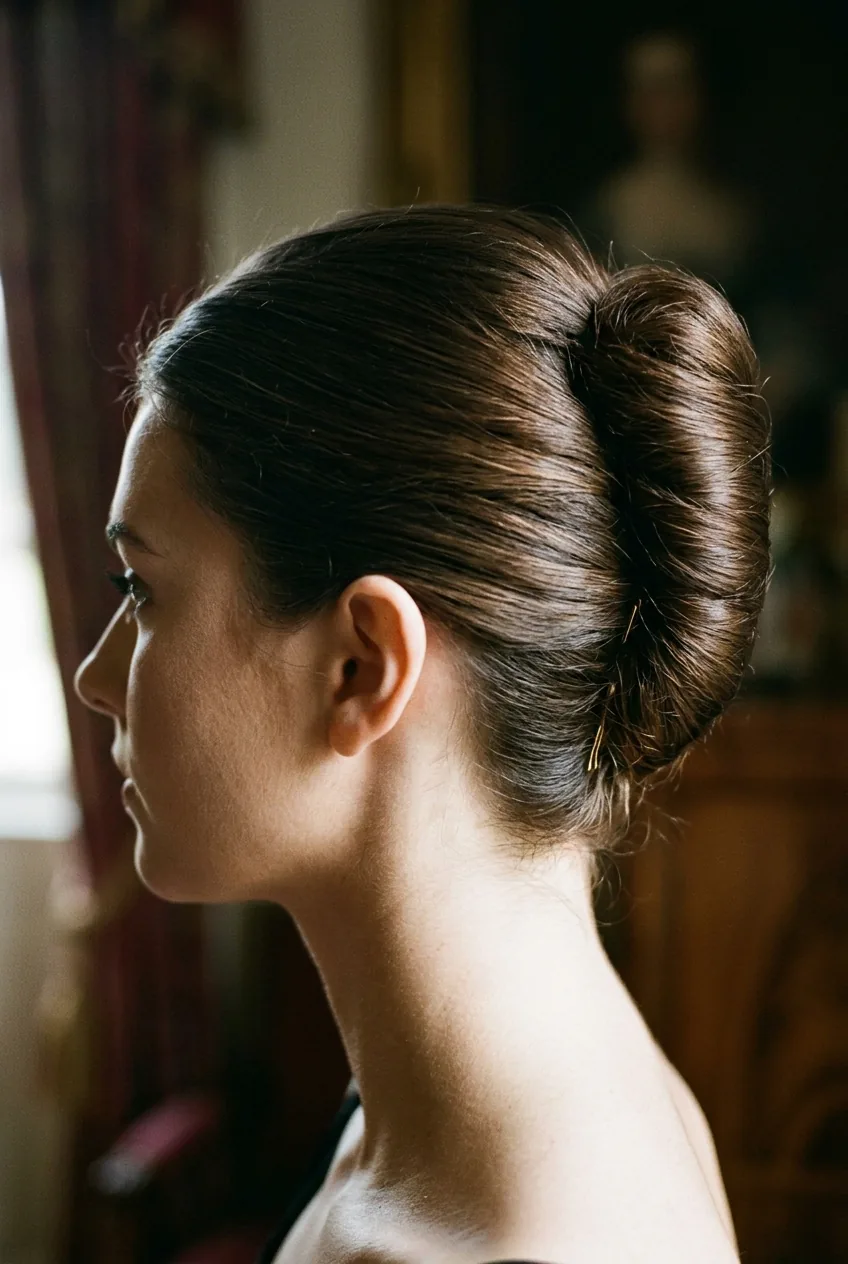
Difficulty: ⭐⭐⭐ (3/5)
Time: 10 minutes
Tools needed: Bobby pins, comb, hairspray
The French twist intimidated me for years until I realized it’s basically just rolling your hair up and securing it. Start by brushing everything to one side, then use your fingers to roll the hair upward while tucking the ends under.
Here’s what nobody tells you: the first few attempts will look wonky. That’s normal. Your fingers need to learn the motion, and your hair needs to understand what you’re asking it to do. Practice this one a few times before the big night. You’ll find some great elegant updos for prom that complement this classic style beautifully.
Watch the Rolling Technique
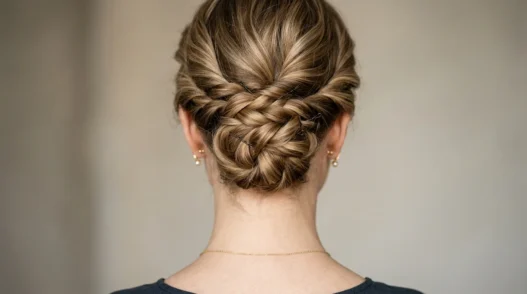
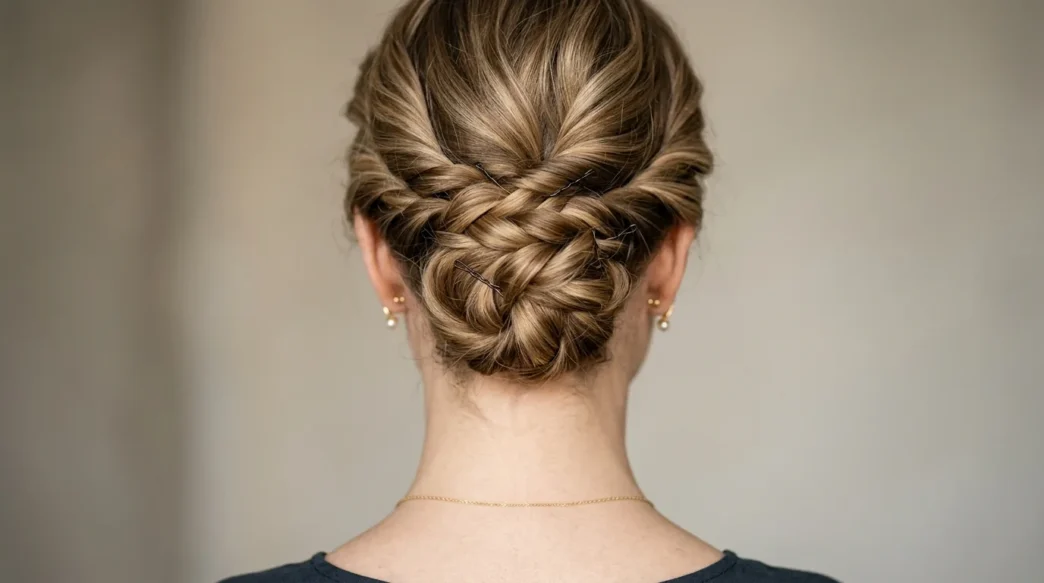
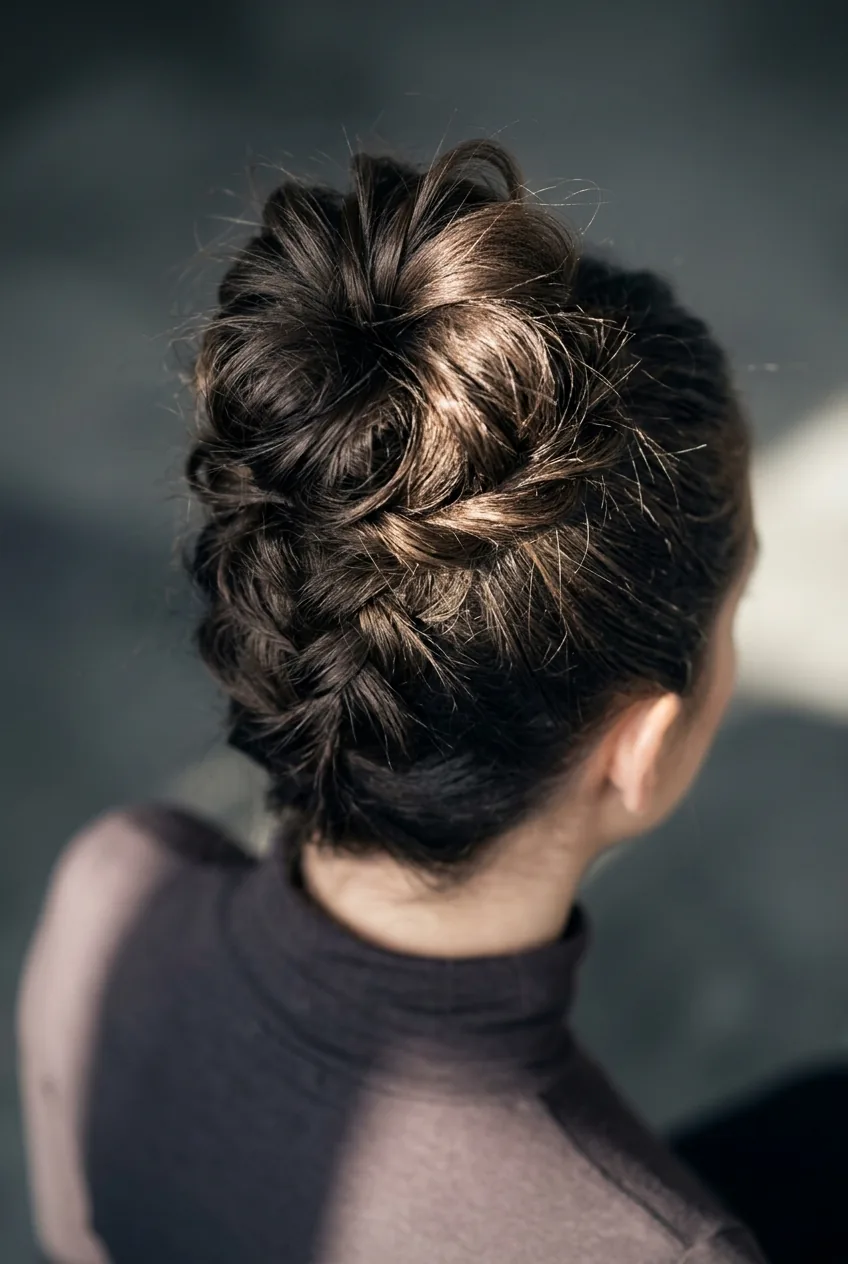
7. Intermediate Challenge: Braided Updo
Difficulty: ⭐⭐⭐ (3/5)
Time: 18 minutes
Tools needed: Multiple hair ties, bobby pins, texturing spray
This combines multiple braids into one cohesive updo, and it’s absolutely stunning when you nail it. I typically do two or three loose braids, then pin them up in an overlapping pattern that creates incredible dimension.
The learning curve here is spatial awareness — figuring out how the braids will lay when folded and pinned. Start with the bottom braid as your foundation, then layer the others on top. Braiding techniques become second nature with practice.
8. Advanced Friendly: Textured Top Knot
Difficulty: ⭐⭐⭐⭐ (4/5)
Time: 15 minutes
Tools needed: Teasing comb, bobby pins, strong hairspray, hair donut (optional)
A top knot sounds simple, but creating the perfect textured, voluminous version requires some finesse. You’re essentially building height and fullness before securing everything at the crown of your head.
The secret is in the teasing phase. I section my hair horizontally and backcomb each layer before smoothing the surface. It creates this gorgeous, lived-in texture that photographs beautifully and holds all night.
9. Skill Required: Romantic Side Bun
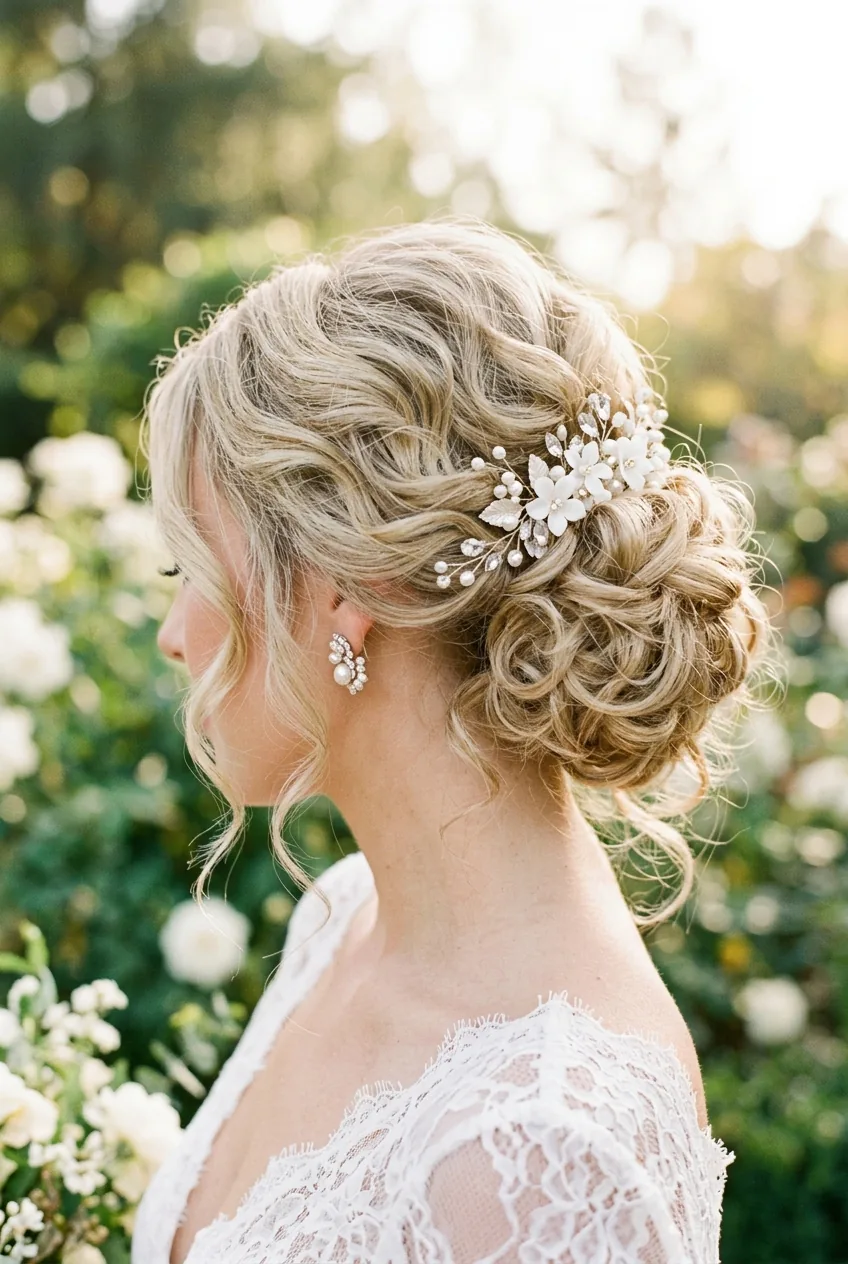
Difficulty: ⭐⭐⭐⭐ (4/5)
Time: 20 minutes
Tools needed: Curling iron, bobby pins, hair tie, texturing spray
This is my favorite formal updo, but I won’t lie — it takes practice. You’re creating loose curls, pinning them individually to build a asymmetrical bun that sits elegantly at the nape of one side of your neck.
What makes this challenging is the pinning technique. Each curl needs to be secured invisibly while maintaining its shape and contributing to the overall silhouette. But when you master it? Absolutely breathtaking. For stylish updos for thin hair, this technique adapts beautifully.
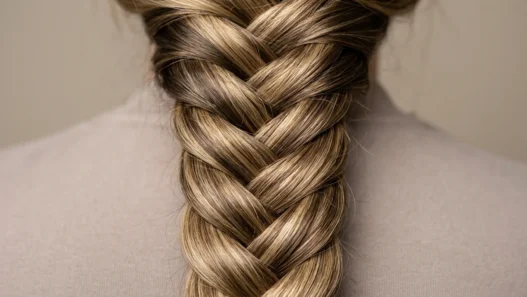
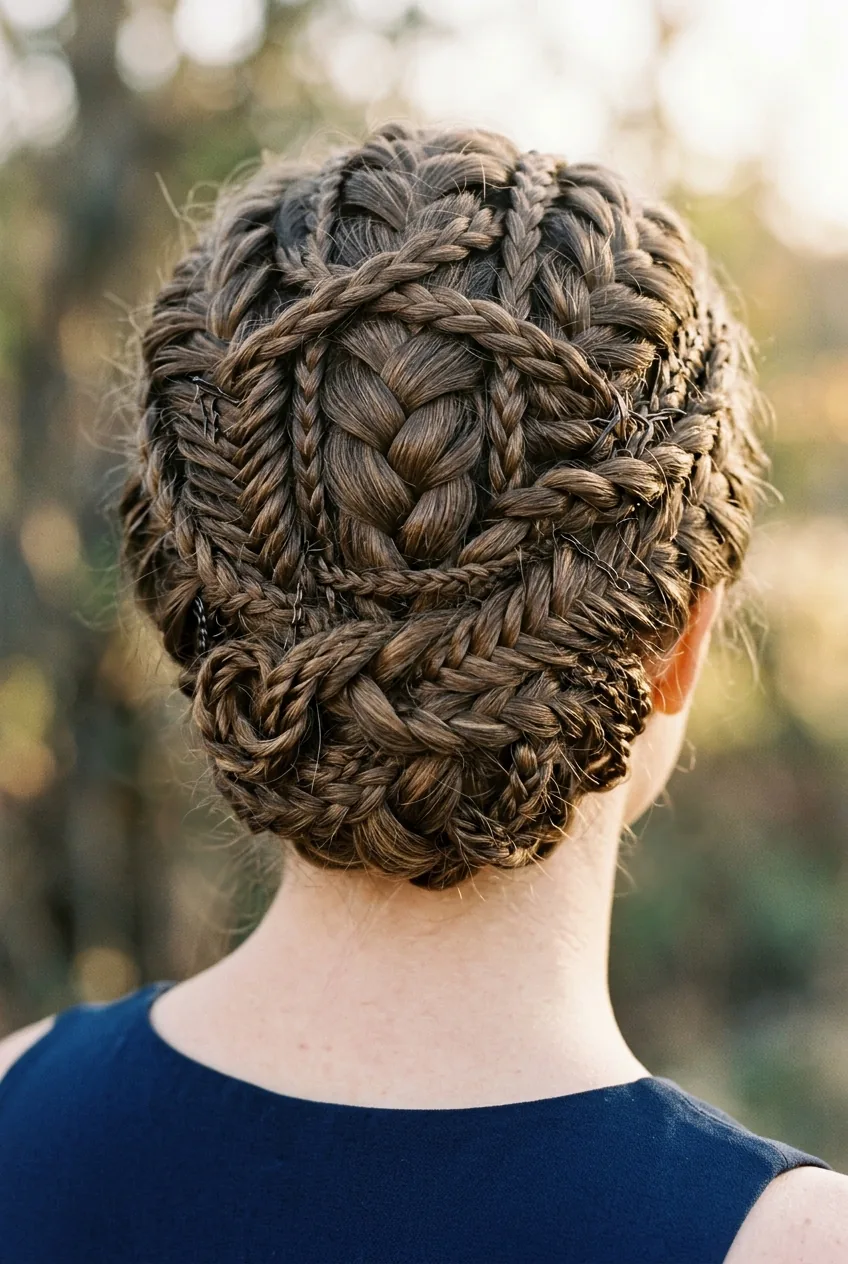
10. Most Advanced: Multi-Braid Crown Updo
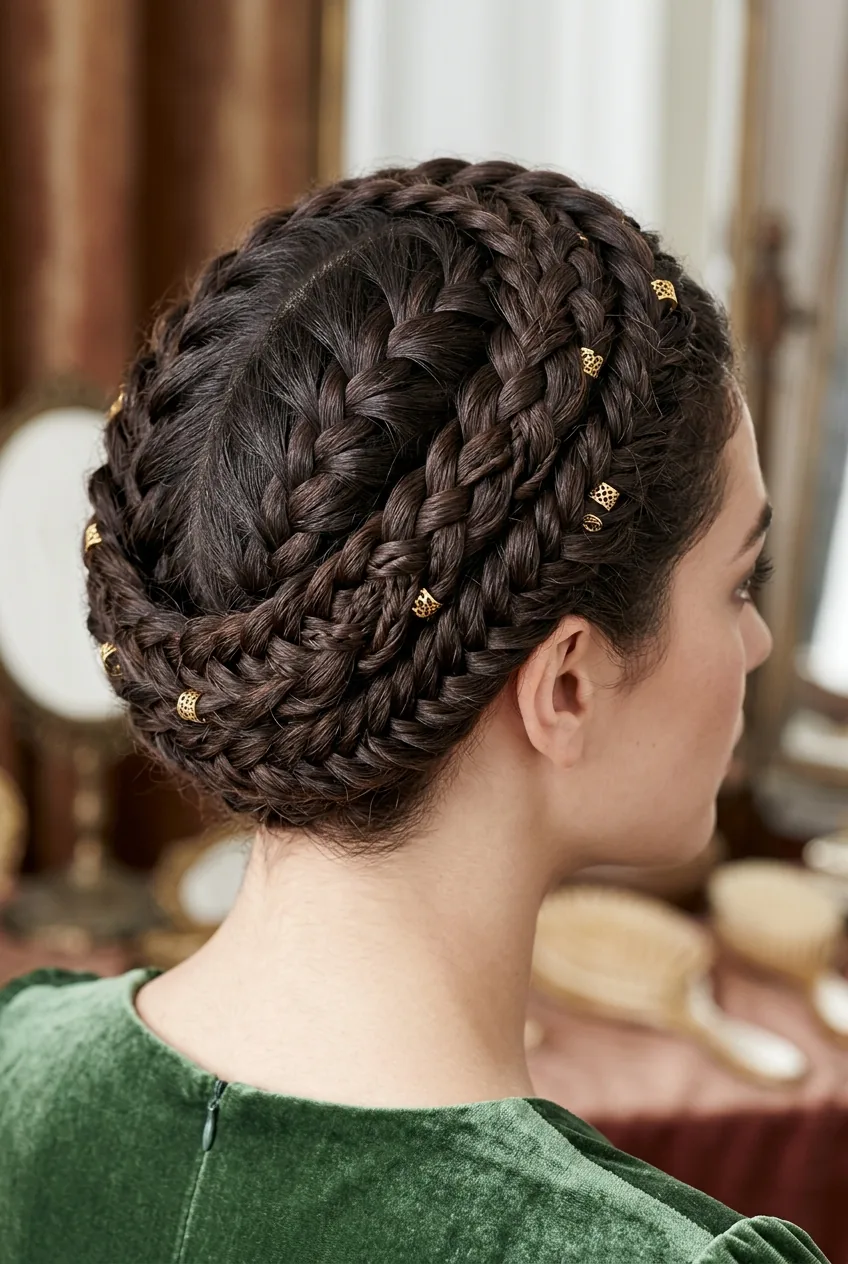
Difficulty: ⭐⭐⭐⭐⭐ (5/5)
Time: 35 minutes
Tools needed: Multiple hair ties, countless bobby pins, strong hairspray, patience
This is the showstopper — multiple intricate braids woven together to create an elaborate crown effect with the remaining hair styled into a low updo. I’m talking Dutch braids, fishtails, and regular three-strand braids all working together.
Honestly? I’ve only successfully completed this look twice, and both times took over 40 minutes. It requires serious braiding skills, an understanding of how different braid textures interact, and the kind of patience I usually reserve for assembling IKEA furniture.
But if you’re up for the challenge and have the time to practice beforehand, the result is absolutely magazine-worthy. This is the style that makes other people ask, “Did you go to a salon?”
Questions I Get About Prom Hair
Should I wash my hair the day of prom?
Actually, no. Day-old hair holds styles better because it has more texture and grip. Wash it the night before, sleep on it, and style the next evening.
How do I keep my updo secure all night?
Use more bobby pins than you think you need, and spray each section with hairspray before pinning. The combination of texture spray and strategic pinning keeps everything locked in place through hours of dancing.
What if my hair is too short for most updos?
Focus on the first four styles in this list — they work beautifully on shorter lengths. Half-up styles and side-swept waves are especially flattering on bob-length hair.
Should I practice these styles beforehand?
Definitely practice anything rated 3 stars or higher. The beginner styles you can wing, but the intermediate and advanced looks need at least one trial run to work out the kinks.
Remember, the best prom hair is the style that makes you feel confident and comfortable. I’ve seen girls look absolutely radiant in simple ponytails and others stress themselves out trying to recreate elaborate Pinterest looks. Choose based on your skill level, practice if needed, and most importantly — have fun with it. Your prom night memories shouldn’t include hair disasters!