


I used to think high buns were just for ballerinas and bad hair days. Then I discovered there’s actually a whole world of gorgeous high bun variations — some you can master in minutes, others that take serious practice. After years of experimenting (and plenty of bobby pin disasters), I’ve ranked my favorite high bun hairstyles by difficulty level so you can start where you’re comfortable and work your way up.
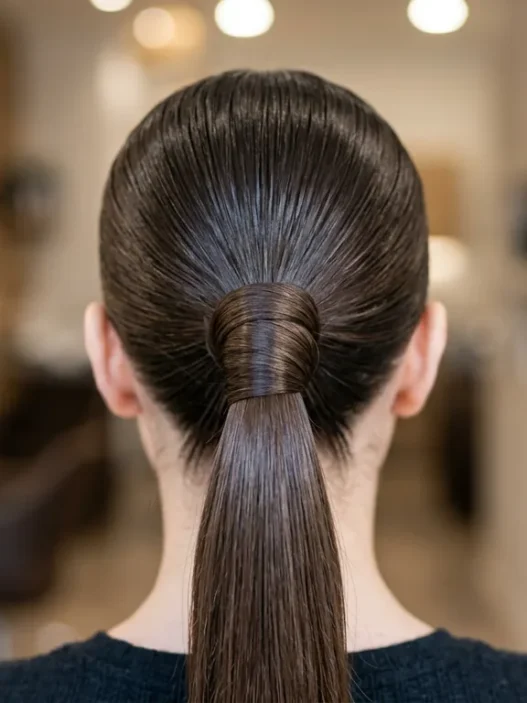
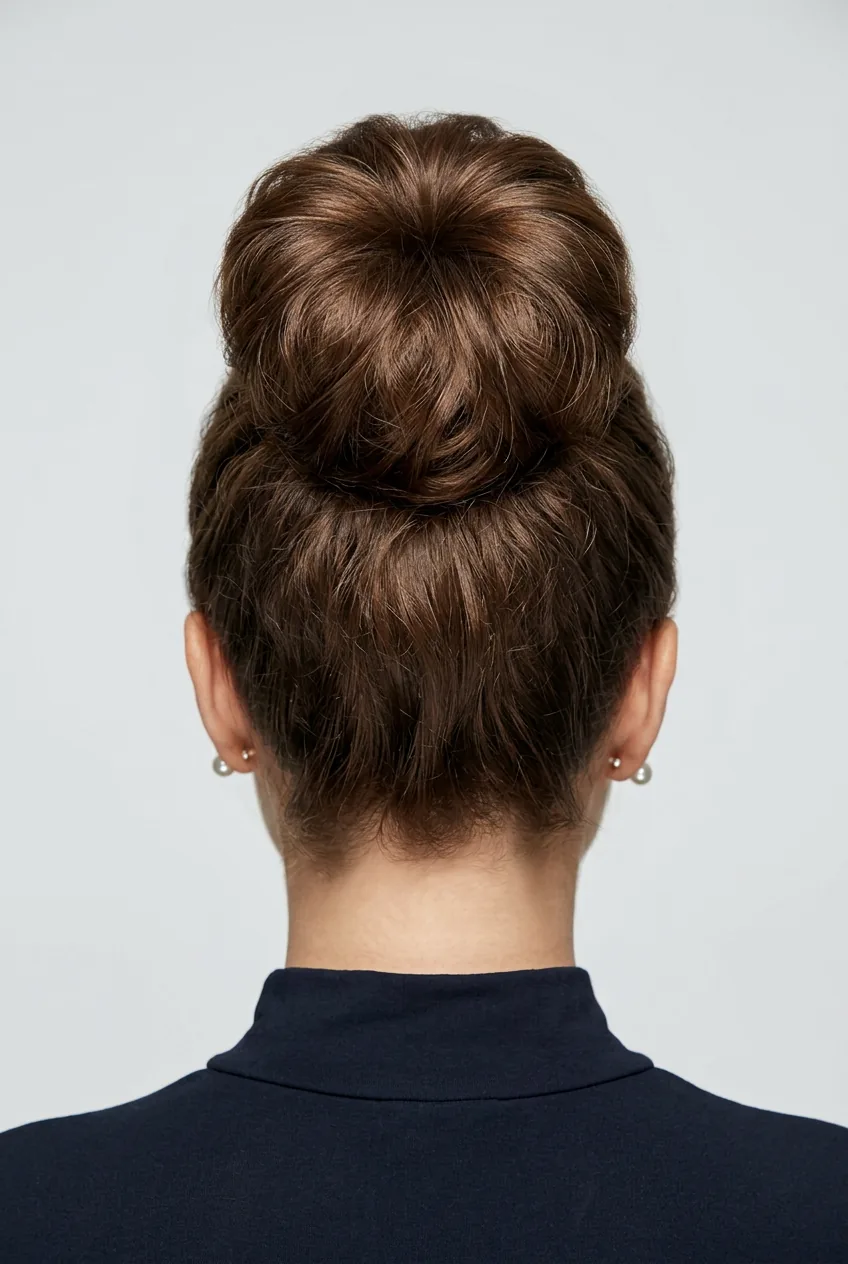
1. Beginner-Friendly: Basic High Bun
Difficulty: ★☆☆☆☆ | Time: 2 minutes | Tools: Hair tie, 4-6 bobby pins
This is where everyone should start. Honestly, if you can make a ponytail, you can do this bun. I love how forgiving it is — messy actually looks intentional with this style.
Brush your hair straight up to the crown, secure with an elastic, then twist the ponytail and wrap it around the base. Pin down the loose ends and you’re done. The key is placing that initial ponytail high enough — I aim for the spot where the top of my head starts to curve.
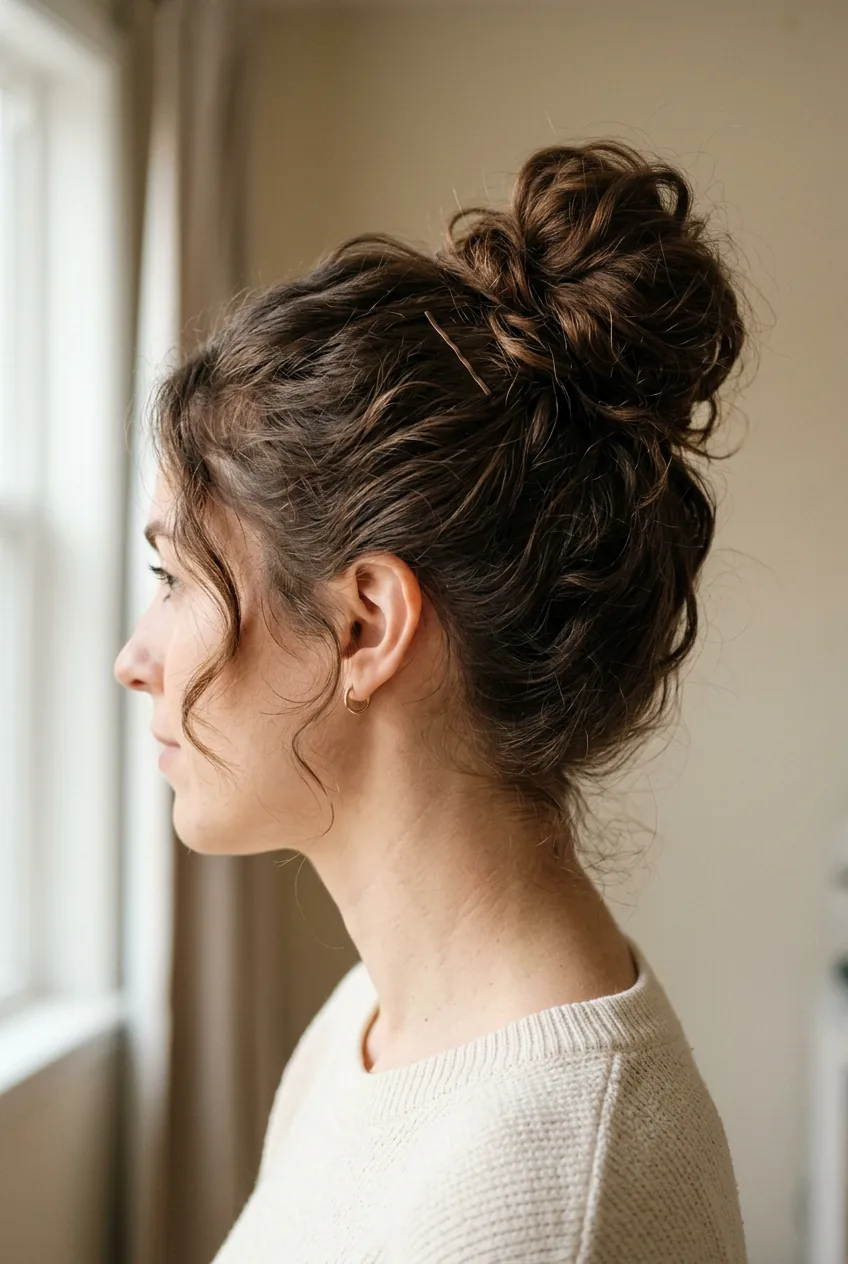
2. Beginner-Friendly: Simple Textured Top Knot
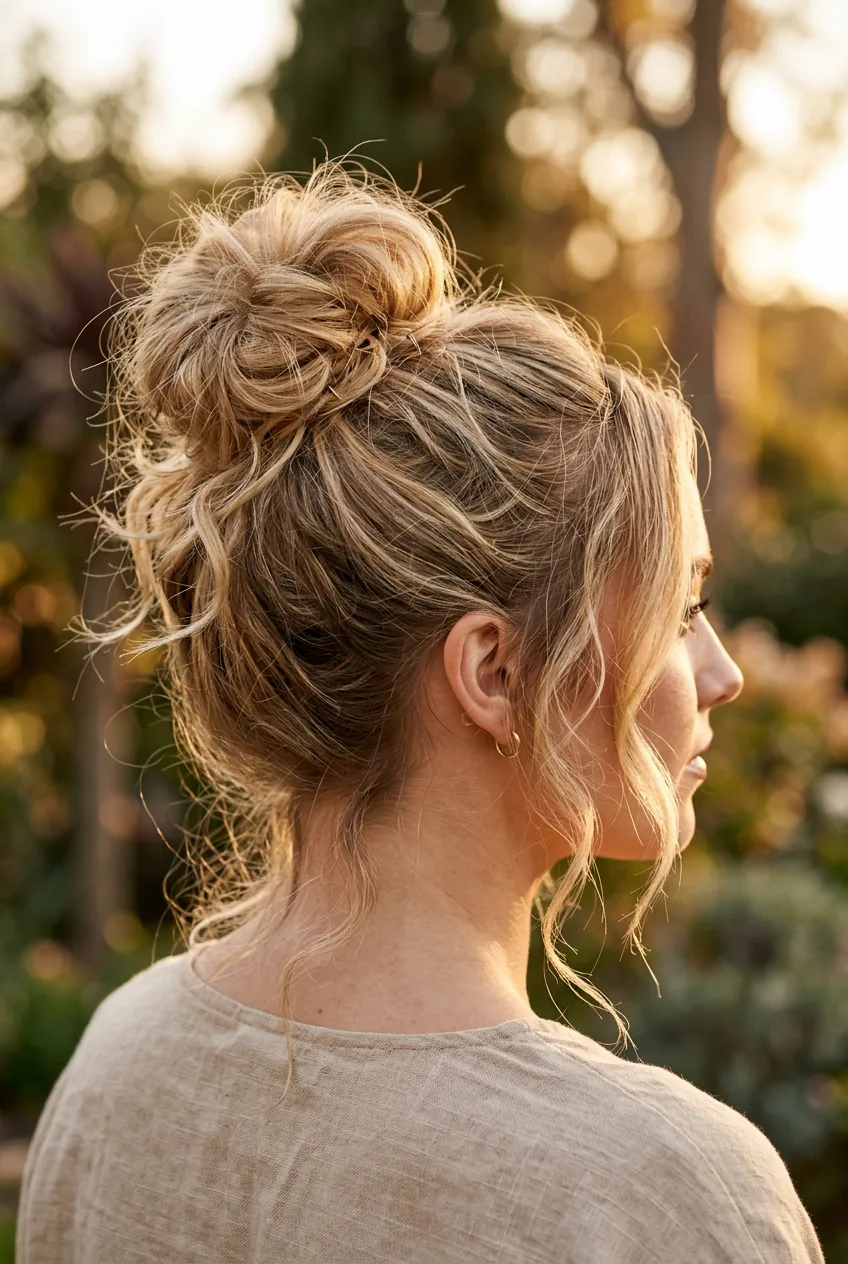
Difficulty: ★☆☆☆☆ | Time: 3 minutes | Tools: Hair tie, texturizing spray, bobby pins
This one’s perfect when you want that effortless, just-rolled-out-of-bed vibe that somehow looks intentional. I spray my hair with texturizing spray first — it gives you that grippy texture that makes everything hold better.
Gather your hair loosely at the crown, leaving some pieces around your face free. Twist the ponytail just once, then loop it through the elastic again but don’t pull it all the way through. Let those ends stick out. Pull a few face-framing pieces loose and you’ve got that perfectly imperfect look.
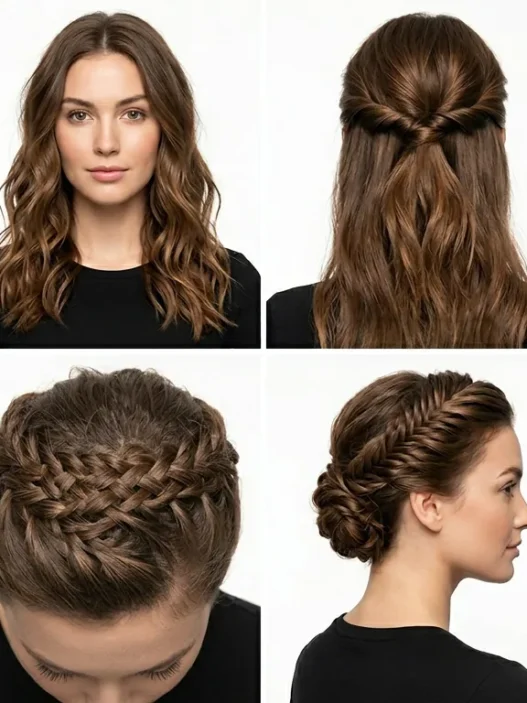
3. Beginner-Friendly: Easy Braided Base Bun
Difficulty: ★★☆☆☆ | Time: 4 minutes | Tools: 2 hair ties, bobby pins
Adding a simple braid elevates the basic bun without requiring advanced skills. I discovered this when I was trying to add some interest to my everyday style but didn’t have time for anything complicated.
Start with a high ponytail, then braid the entire length. Don’t worry about making it perfect — loose braids actually wrap better. Secure the end with a small elastic, then coil the braid around the base of your ponytail. The braid creates natural texture and gives you more grip for pinning.
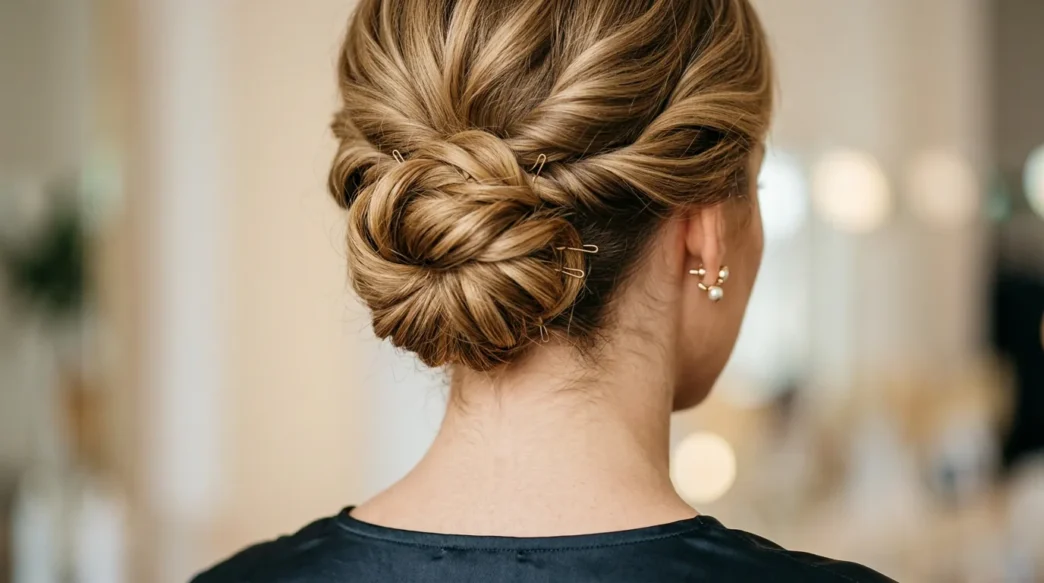
4. Intermediate Challenge: Twisted Crown Bun

Difficulty: ★★★☆☆ | Time: 8 minutes | Tools: Hair tie, bobby pins, small comb
Now we’re getting into territory that requires some coordination. This style incorporates twists from the sides that meet at the crown — it’s like a French twist’s sophisticated sister.
Section off hair from your temples back to behind your ears. Twist these sections back toward your crown, securing temporarily with clips. Gather the remaining hair into a high ponytail, then incorporate your twisted sections into the bun. The tricky part is making sure the twists lay smoothly — I use the handle of my comb to guide them into place.
My personal favorite is the sock bun with volume (#5). It gives me that runway-ready height without the advanced technique requirements. I’ve probably done this style a hundred times and it still makes me feel put-together in minutes.
5. Intermediate Challenge: Sock Bun with Volume
Difficulty: ★★★☆☆ | Time: 6 minutes | Tools: Sock bun maker, hair tie, bobby pins, teasing comb
The sock bun maker is a game-changer for creating that perfect donut shape. But the volume part — that’s what separates this from the basic version you see everywhere.
Before you put your ponytail through the sock bun, tease the length to create texture. Then as you roll the sock bun down, pull sections of hair forward to create fullness. The key is not rolling too tightly — you want that hair to billow out around the bun maker. I also pull gently at the finished bun to create even more volume.
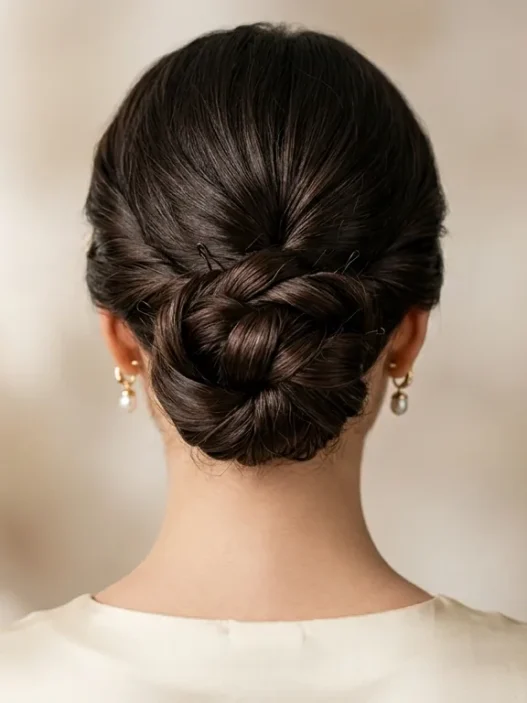
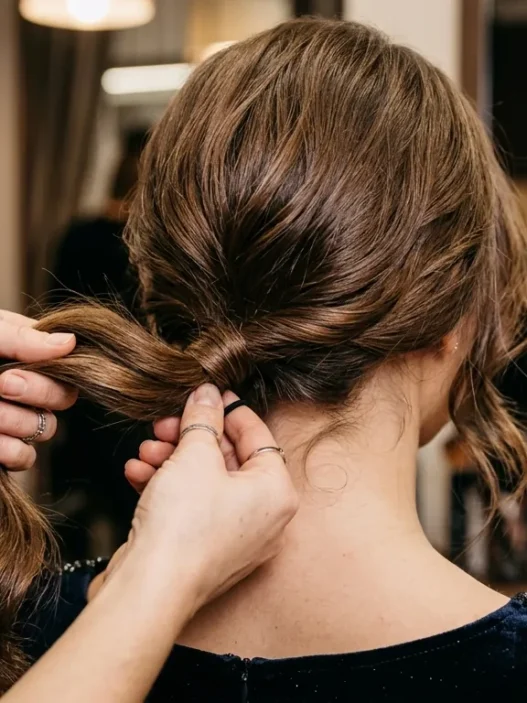
6. Intermediate Challenge: French Twist High Bun
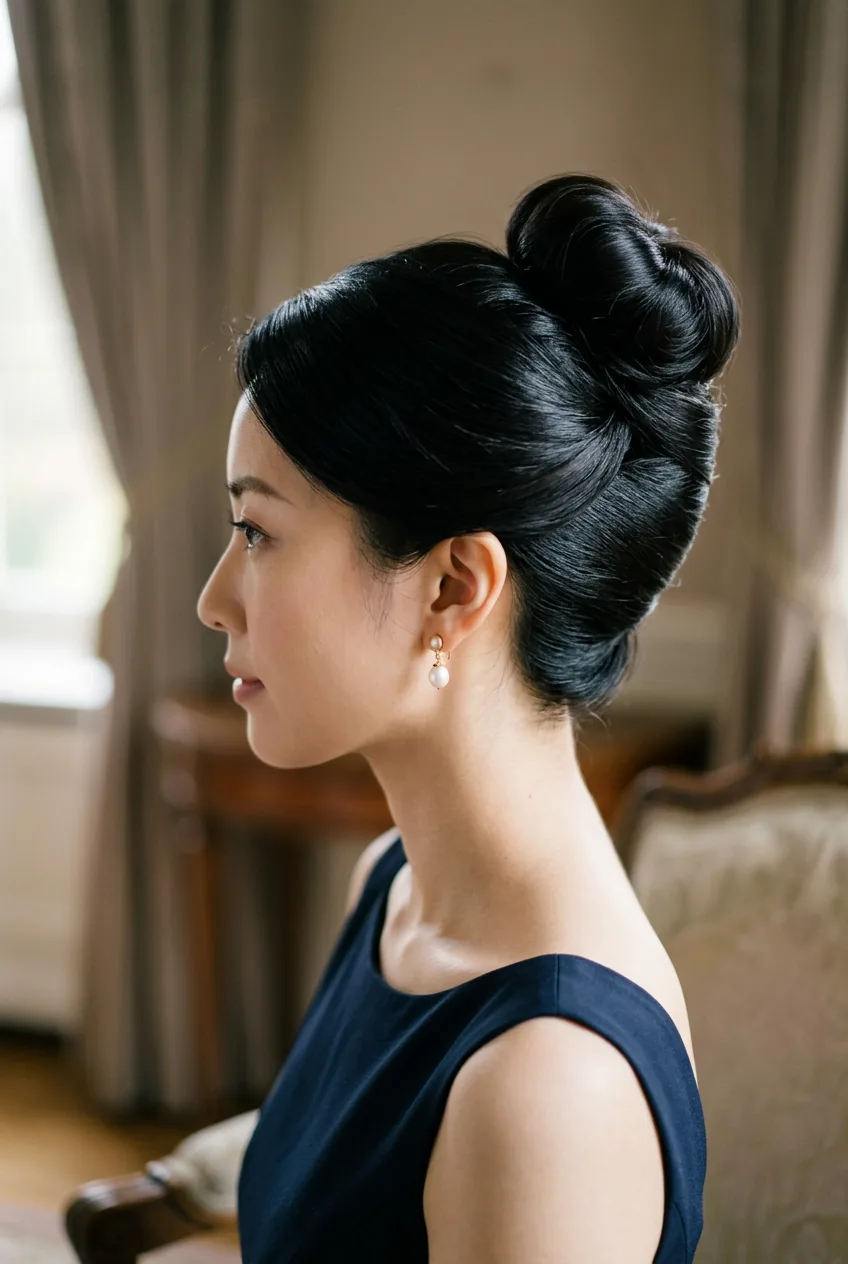
Difficulty: ★★★☆☆ | Time: 10 minutes | Tools: Bobby pins, hair tie (optional), strong-hold hairspray
This is where things start getting elegant. The French twist leading into a high bun creates this beautiful flowing line that’s perfect for special occasions. It took me several attempts to get the twist smooth.
Brush all your hair to one side, then begin twisting from the nape of your neck upward. The trick is keeping tension consistent as you twist — too loose and it falls apart, too tight and it looks severe. When you reach the crown, secure the twist temporarily and coil the remaining length into a bun. French twist techniques can help you perfect that smooth roll.
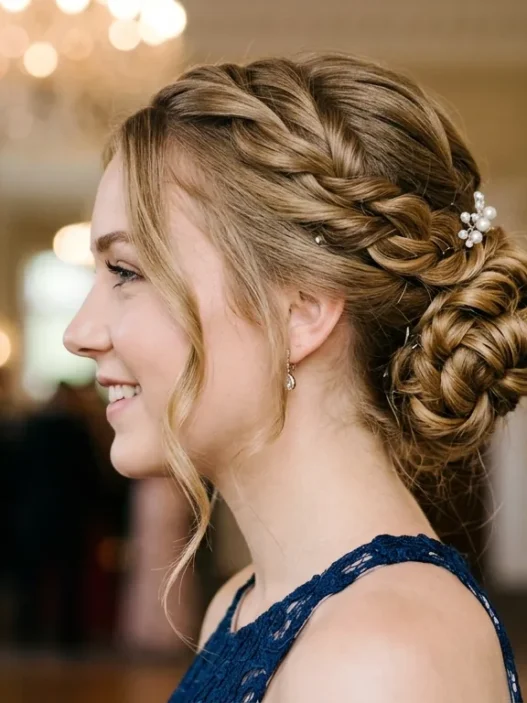
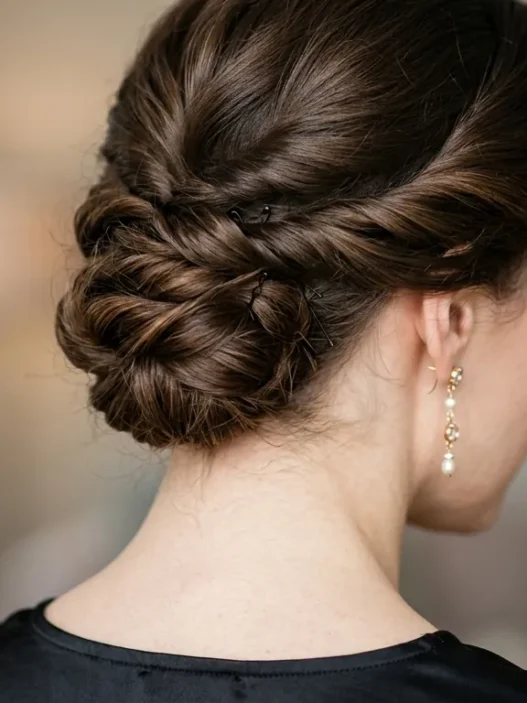
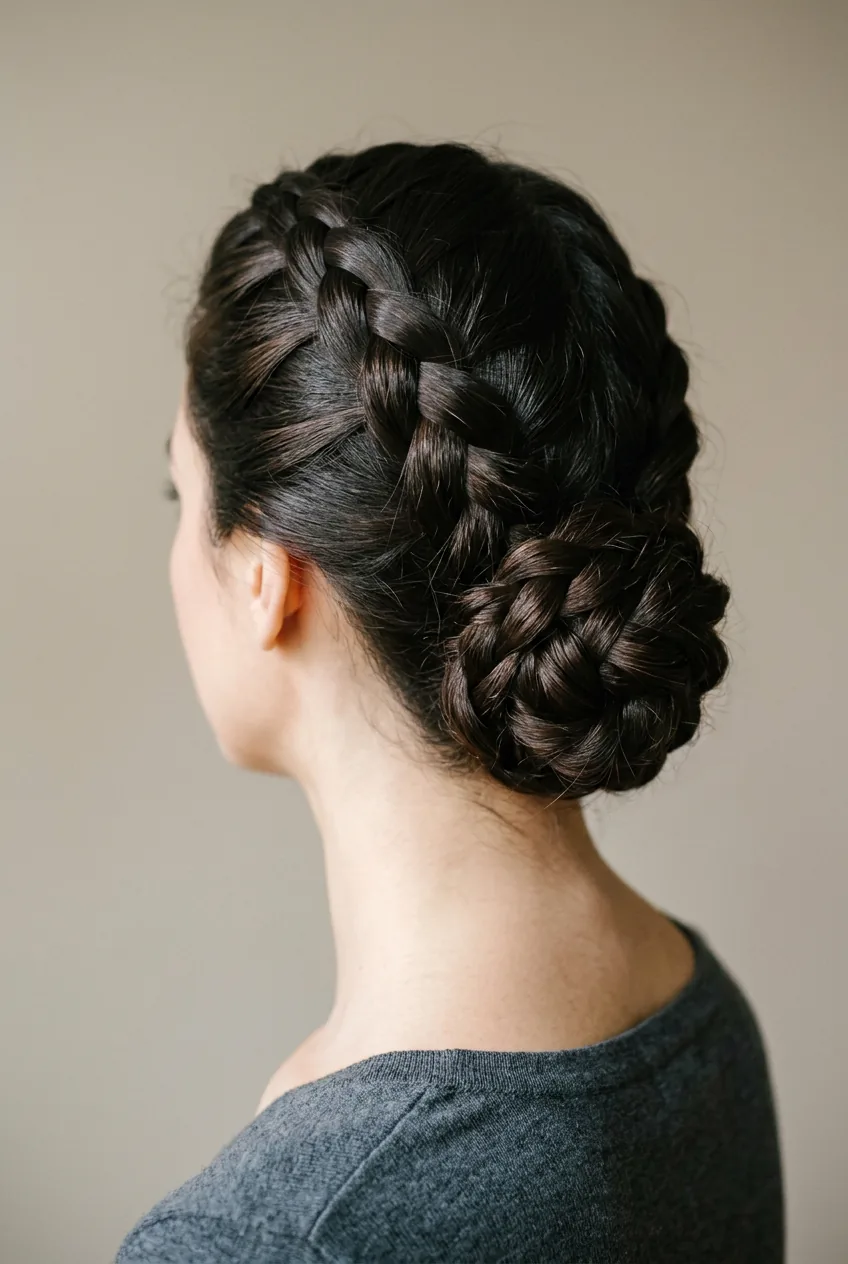
7. Advanced Level: Rope Braid Crown
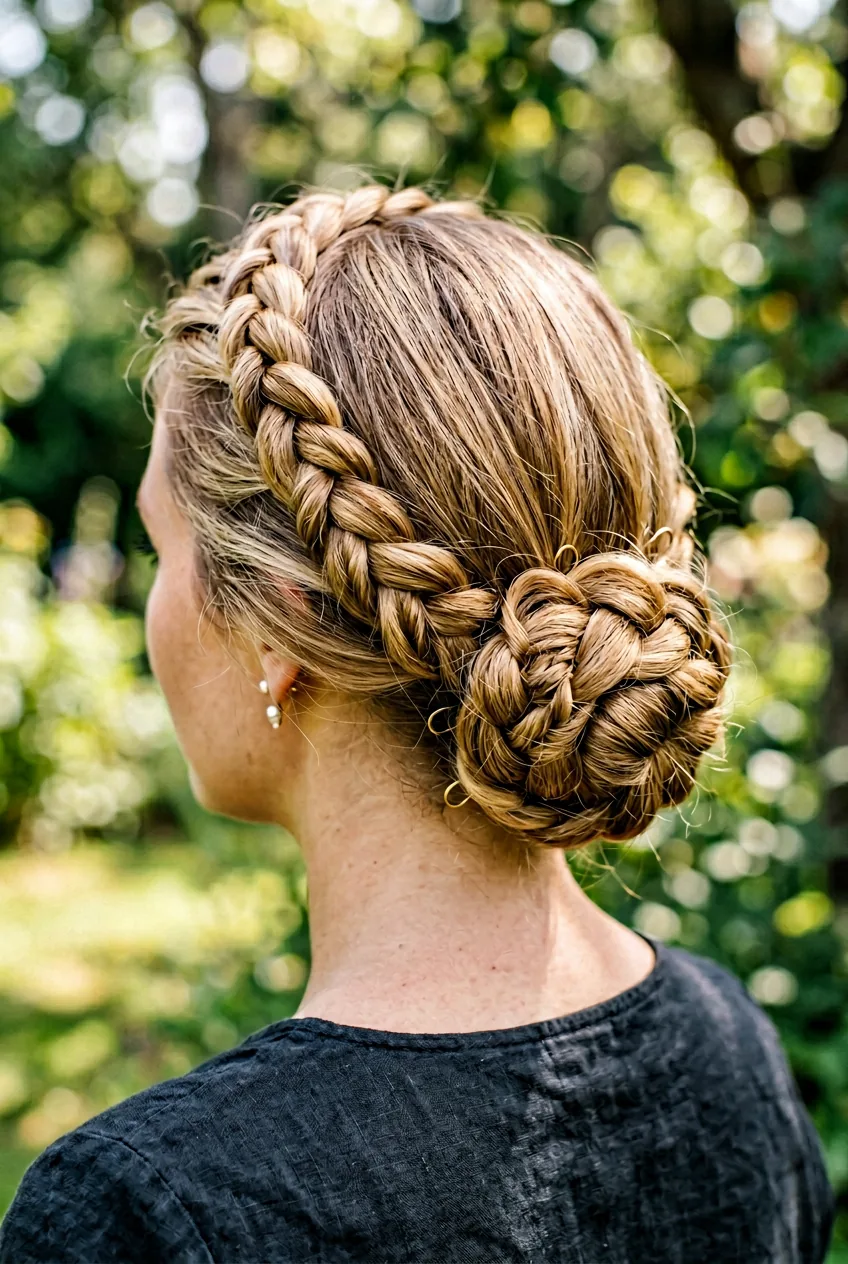
Difficulty: ★★★★☆ | Time: 15 minutes | Tools: Hair ties, bobby pins, tail comb
Rope braids require serious dexterity. You’re essentially creating two separate twisted sections that wrap around each other — all while maintaining tension and direction. But the result is absolutely stunning.
Start with a middle part and section hair from ear to ear across the top of your head. Divide this into two sections and begin your rope braid by twisting each section in the same direction, then wrapping them around each other in the opposite direction. Continue this around your head like a crown, then gather all remaining hair into a high bun at the back. The rope braid creates this incredible textural detail that looks incredibly intricate.
8. Advanced Level: Intricate Pin-Curl Chignon
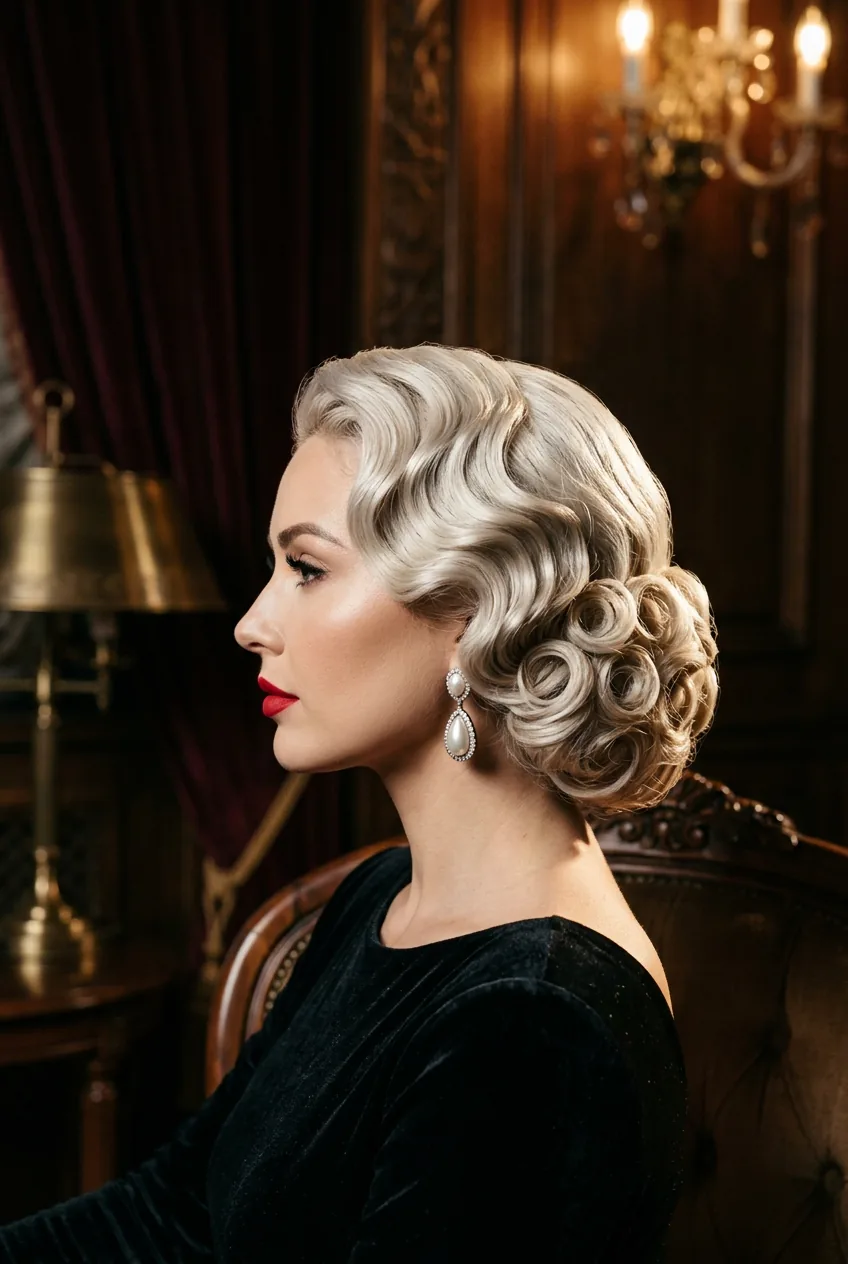
Difficulty: ★★★★☆ | Time: 20 minutes | Tools: Setting lotion, small barrel curling iron, numerous bobby pins, hairspray
This is old Hollywood glamour at its finest. Think Grace Kelly or Audrey Hepburn — those perfectly sculpted updos that look like they were crafted by artists.
You’re creating individual pin curls and arranging them into a cohesive design. Start by curling small sections of hair, then immediately pin each curl in place while it’s still warm. Let them cool completely before unpinning and arranging. This style requires patience and a good eye for symmetry. The end result is a bun that looks like it belongs on a red carpet, but it takes serious practice to master the placement.
9. Advanced Level: Editorial Deconstructed Bun
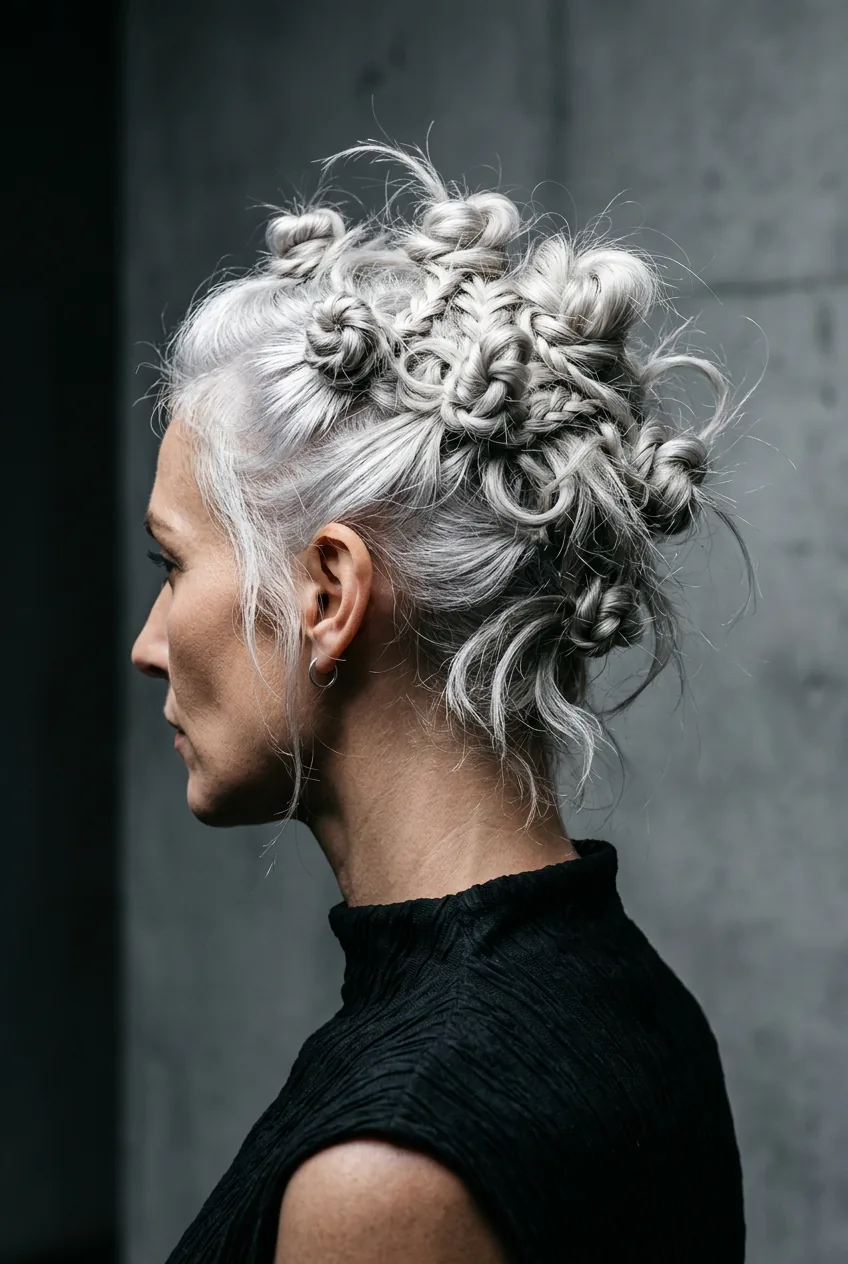
Difficulty: ★★★★★ | Time: 25 minutes | Tools: Multiple hair ties, bobby pins in different sizes, texturizing paste, strong hairspray
This is the kind of style you see in high-fashion magazines — intentionally undone but clearly requiring significant skill to achieve. It’s controlled chaos at its finest.
You’re creating multiple small buns and twists throughout the hair, then strategically pulling them apart and repositioning them to create movement and texture. Some sections get twisted, others braided, some just pinned in loose loops. The art is in making it look effortless while ensuring every piece is perfectly placed. I use different sized bobby pins to create varying levels of security — some pieces should move, others need to stay put. For special events like quinceanera hairstyles, this level of intricate styling creates unforgettable looks.
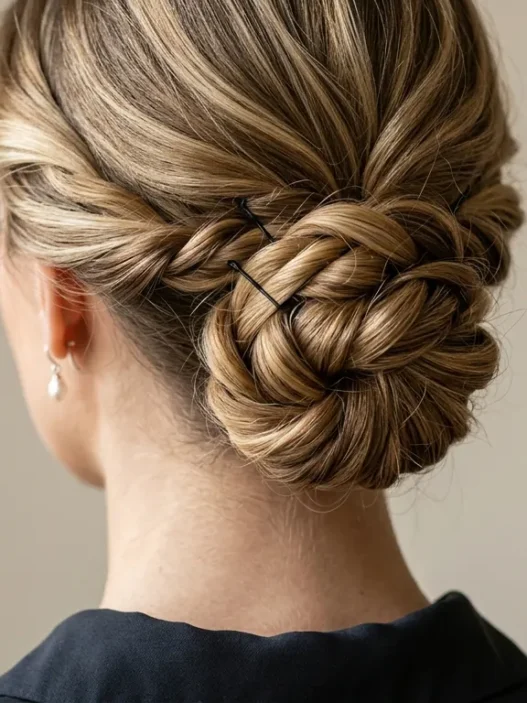
10. Master Level: Woven Fantasy Bun
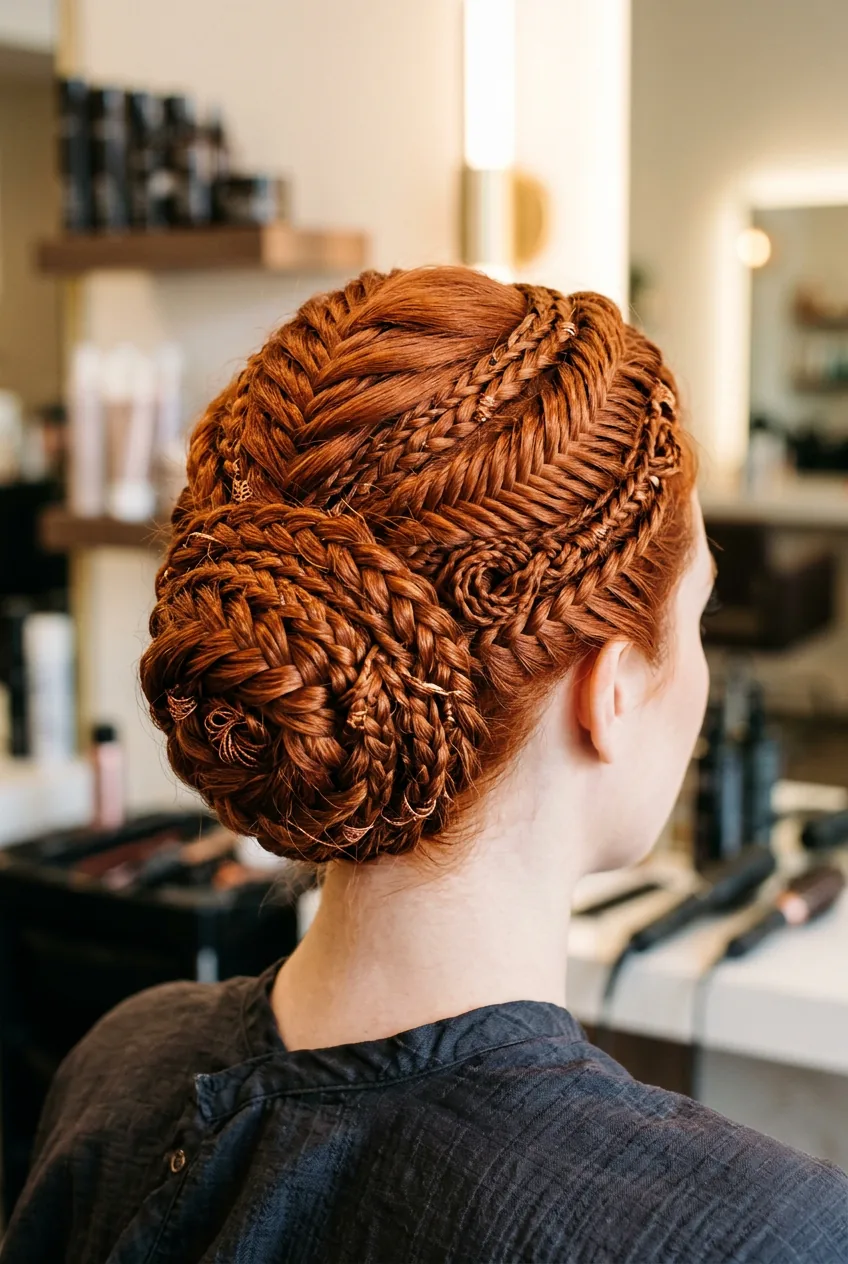
Difficulty: ★★★★★ | Time: 45+ minutes | Tools: Multiple hair ties, various bobby pins, tail comb, patience
This is the Mount Everest of high buns. I’m talking about intricate braiding patterns that weave in and out of themselves, creating what looks like a sculptural masterpiece on top of your head.
You’re incorporating multiple braid types — Dutch, fishtail, rope — and weaving them together in a specific pattern that creates depth and dimension. Some sections go over, others under, and you have to maintain the pattern while working in three dimensions around your head. Honestly, I’ve only successfully completed this style a few times, and each time felt like a major achievement. It requires not just technical skill but also spatial reasoning and a lot of practice.
The finished result is absolutely breathtaking — like wearing a crown made of your own hair. But be prepared to invest serious time and effort into mastering this technique. Advanced braiding tutorials can help you understand the complex interwoven patterns involved.
Questions I Get About High Buns
How do I make my high bun last all day?
Use texturizing spray before styling and don’t skip the hairspray at the end. I also recommend using bobby pins that match your hair color and inserting them in an X pattern for extra hold.
What if my hair is too fine for volume?
Tease your hair before creating the bun and consider using a sock bun maker for instant fullness. Dry shampoo at the roots also helps create grip and texture that fine hair often lacks.
Can these work with shorter hair?
Styles 1-3 work great with shoulder-length hair. For anything shorter, you might need clip-in extensions or focus on short hairstyles that work better with your natural length.
How do I prevent headaches from tight buns?
Don’t pull your hair too tight at the initial ponytail stage. The bun itself should feel secure but not painful. If it hurts while you’re creating it, it’s too tight.
Start with the beginner styles and work your way up — there’s no shame in mastering the basics first. I still reach for that simple textured top knot on busy mornings, and it never fails to make me feel put-together. The beauty of high buns is that there’s a perfect style for every skill level and occasion.