


I used to avoid messy buns because mine always looked more “disaster” than “effortlessly chic.” Either they’d fall apart by lunch or they’d be so tight they gave me a headache. After watching countless tutorials that promised the perfect messy bun, I finally cracked the code with a method that actually works for my fine, slippery hair.
What You’ll Need
Here’s what I keep in my messy bun toolkit. Nothing fancy — you probably have most of this already:
- One clear elastic (the small ones work best)
- 4-6 bobby pins that match your hair color
- A texturizing spray or dry shampoo
- A regular hair tie as backup
- Optional: a light-hold hairspray
The clear elastic is my secret weapon. It disappears into your hair and doesn’t create that harsh line regular hair ties do.
Step 1: Create the Perfect Base
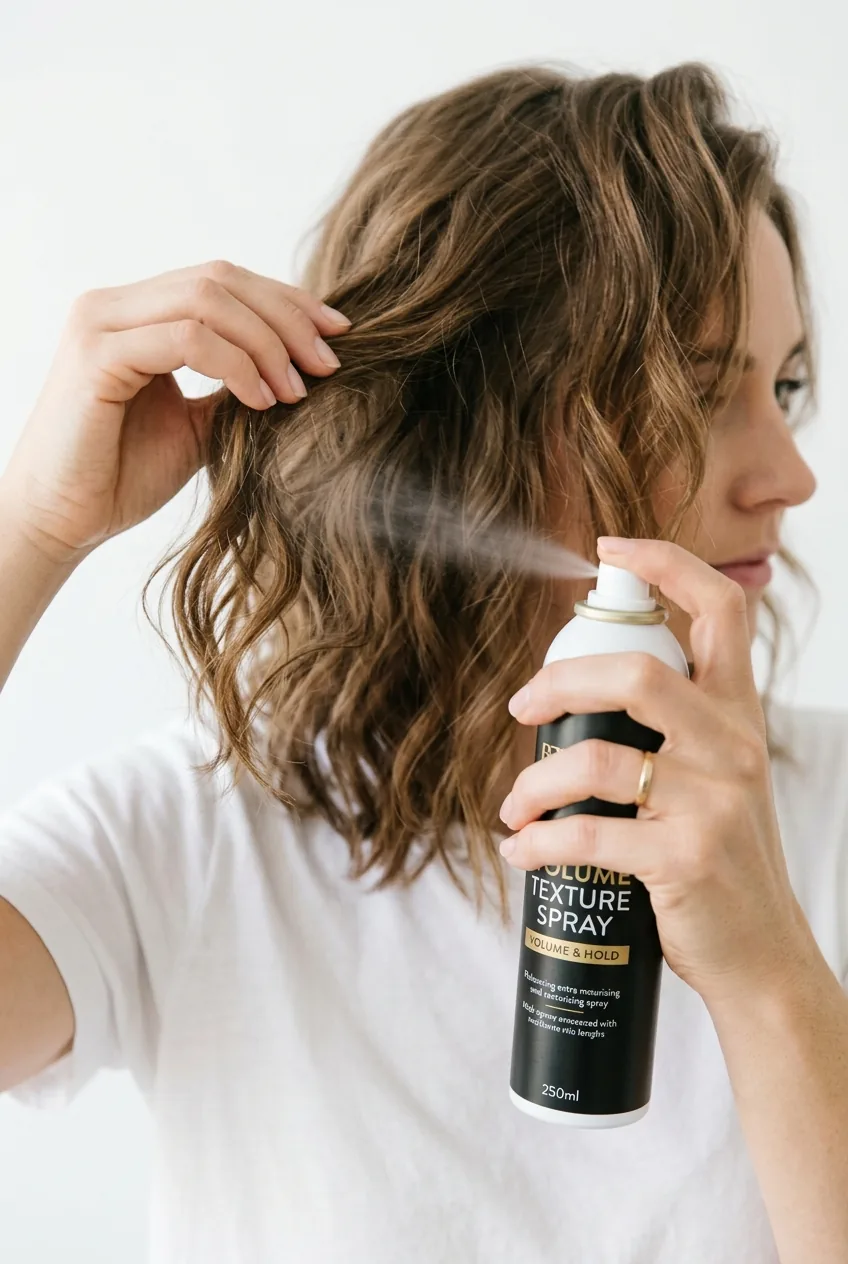

Start with day-old hair if possible. Freshly washed hair is too slippery for a good messy bun — it just slides right out. If you have to work with clean hair, spray some texturizing spray throughout your lengths.
Brush your hair back loosely. Don’t make it perfect — we want some texture and natural movement. I usually flip my head upside down and shake it out a bit to create volume at the roots.
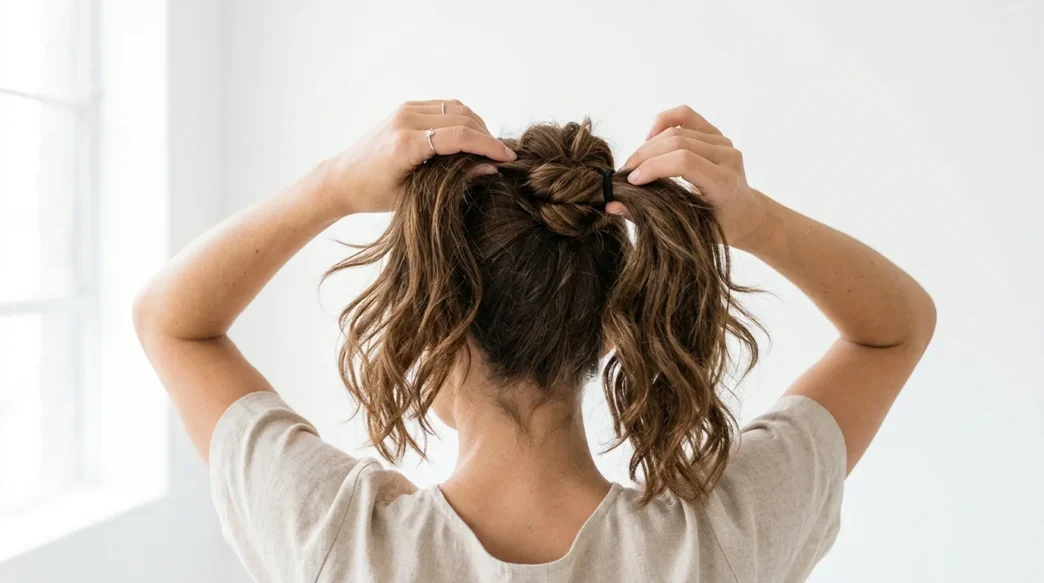
Step 2: Section and Position
Gather your hair at the crown of your head — not too high, not too low. I find the sweet spot is about where the top of your ear meets your scalp when you draw an imaginary line up.
Hold it with one hand and don’t pull it tight. This is where most people go wrong — they create a slicked-back ponytail first. That’s not what we want.
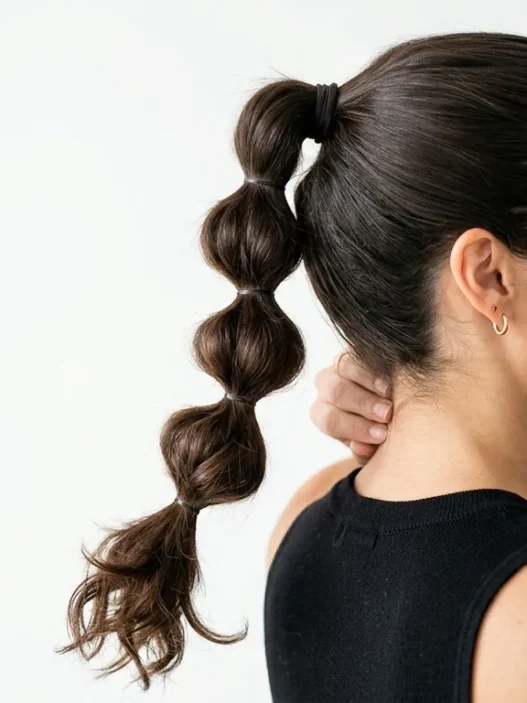
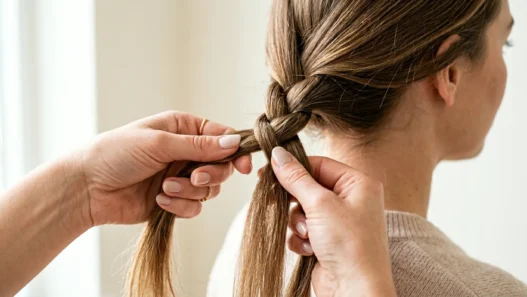
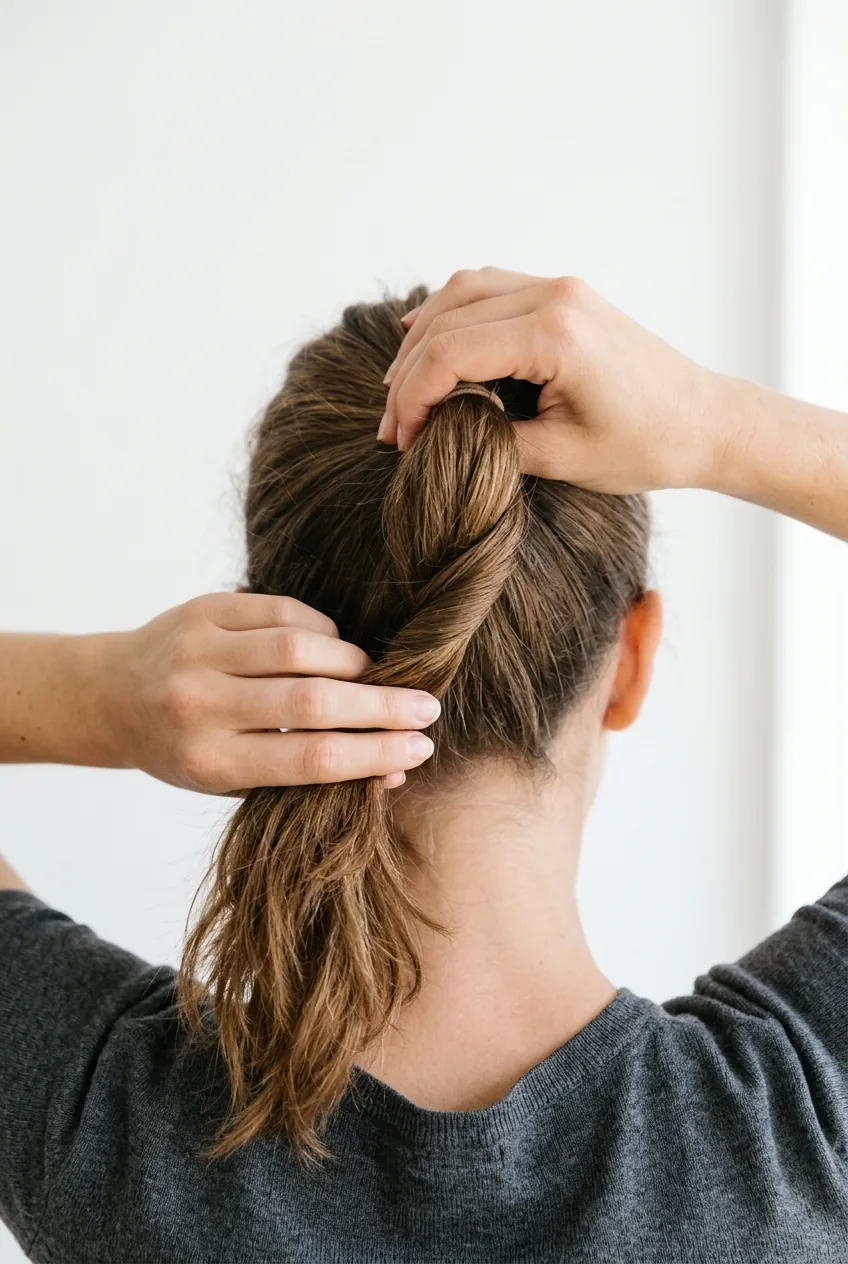
Step 3: The Twist That Changes Everything
Here’s the step that transformed my messy buns: instead of just wrapping the hair around itself, give the entire ponytail a loose twist first. Not tight — just enough to create some structure.
The twist creates natural texture and prevents that flat, pancake look. It also helps shorter layers stay in place instead of poking out everywhere.
I used to skip the twisting step because it seemed unnecessary. Big mistake — that’s what makes the difference between a messy bun that looks intentional and one that just looks messy.
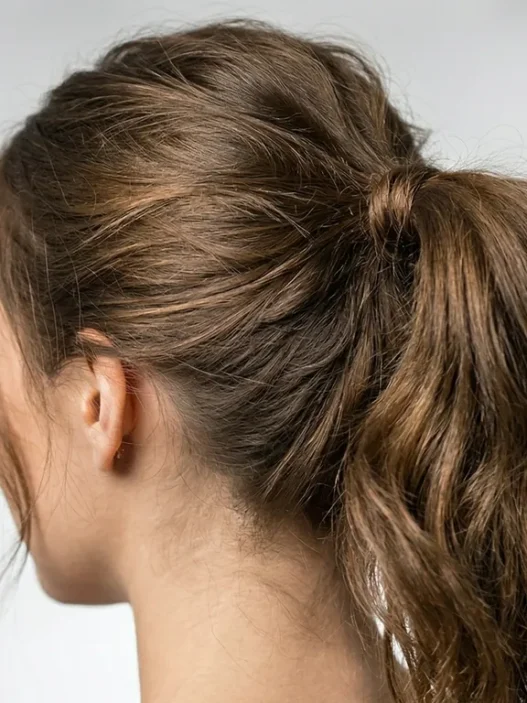
See the Twist Technique in Action
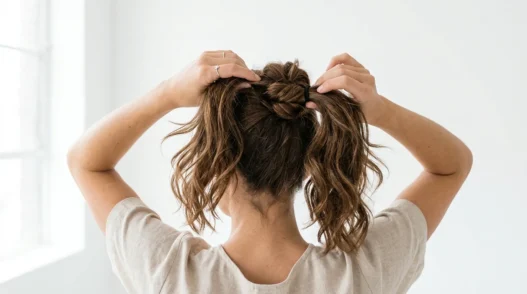
Step 4: Wrap and Secure
Now wrap the twisted hair around the base, but don’t wrap it tight. Leave it loose and let pieces fall naturally. Some texture showing is exactly what we want.
Secure with your clear elastic. I usually wrap it around twice — three times makes it too tight. The bun should feel secure but not painful.
Step 5: Perfect the Mess
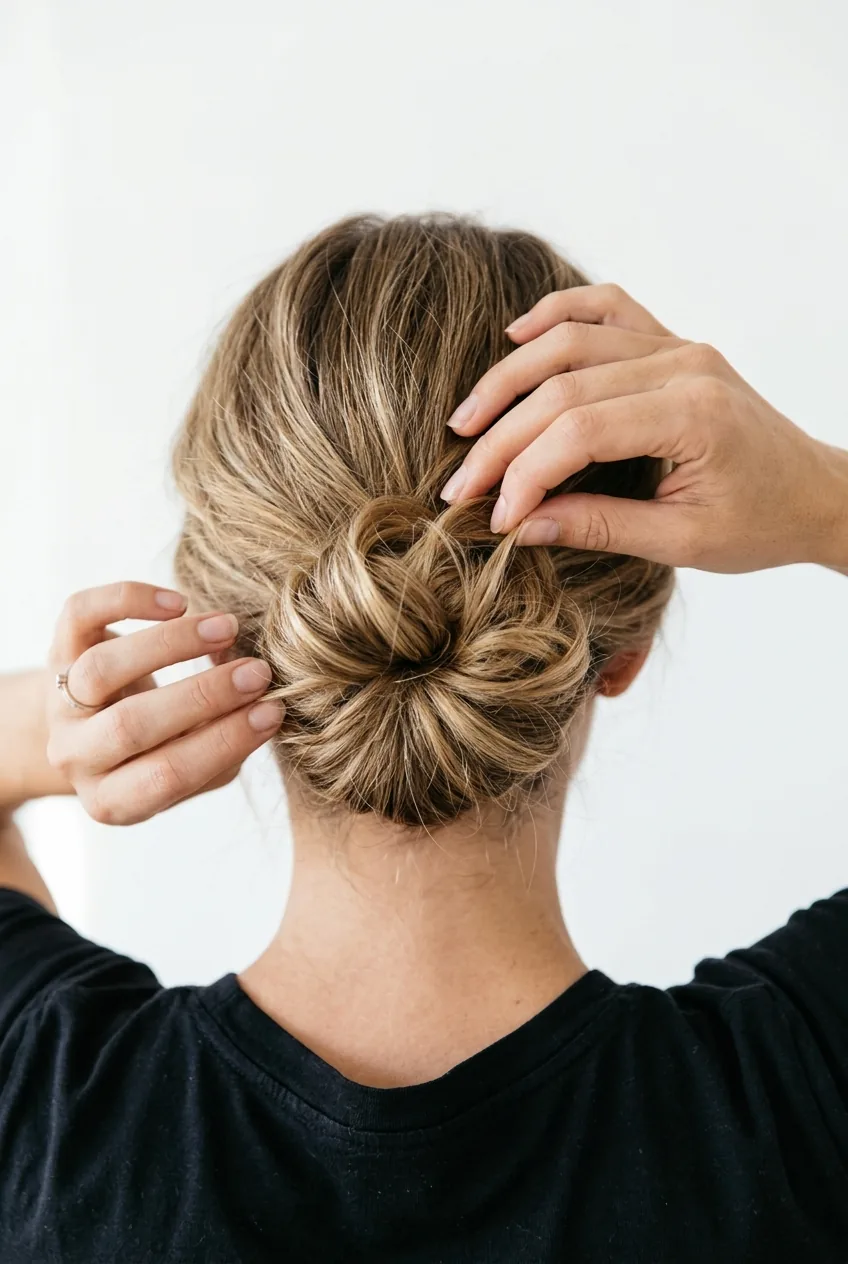
This is my favorite part. Gently tug at sections of the bun to loosen it up. Pull out a few face-framing pieces. Let some shorter layers peek out.
The key is to be intentional about the messiness. I like to pull out pieces that would naturally fall anyway — around my temples and the nape of my neck.
If you’re going for red carpet hairstyles that still feel effortless, this is where you’d smooth those face-framing pieces slightly.
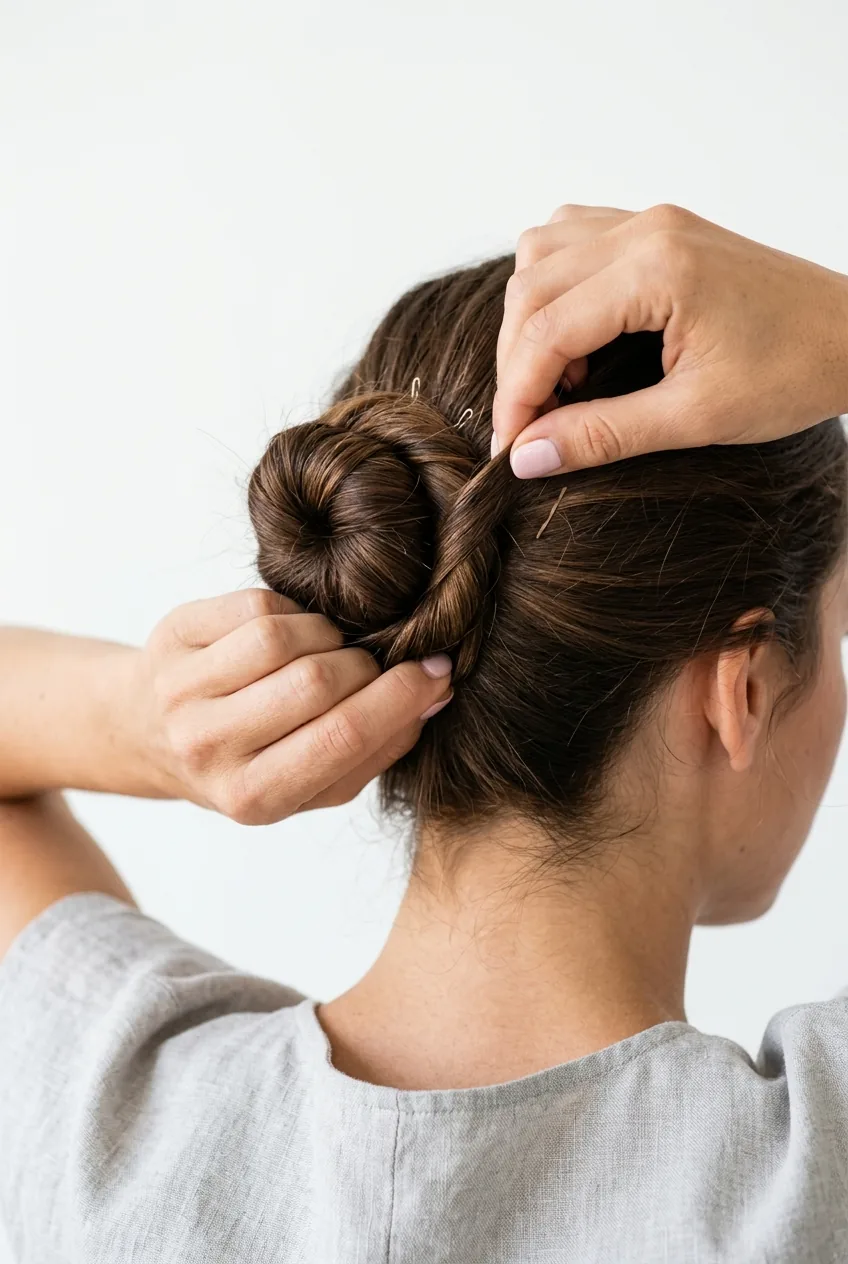
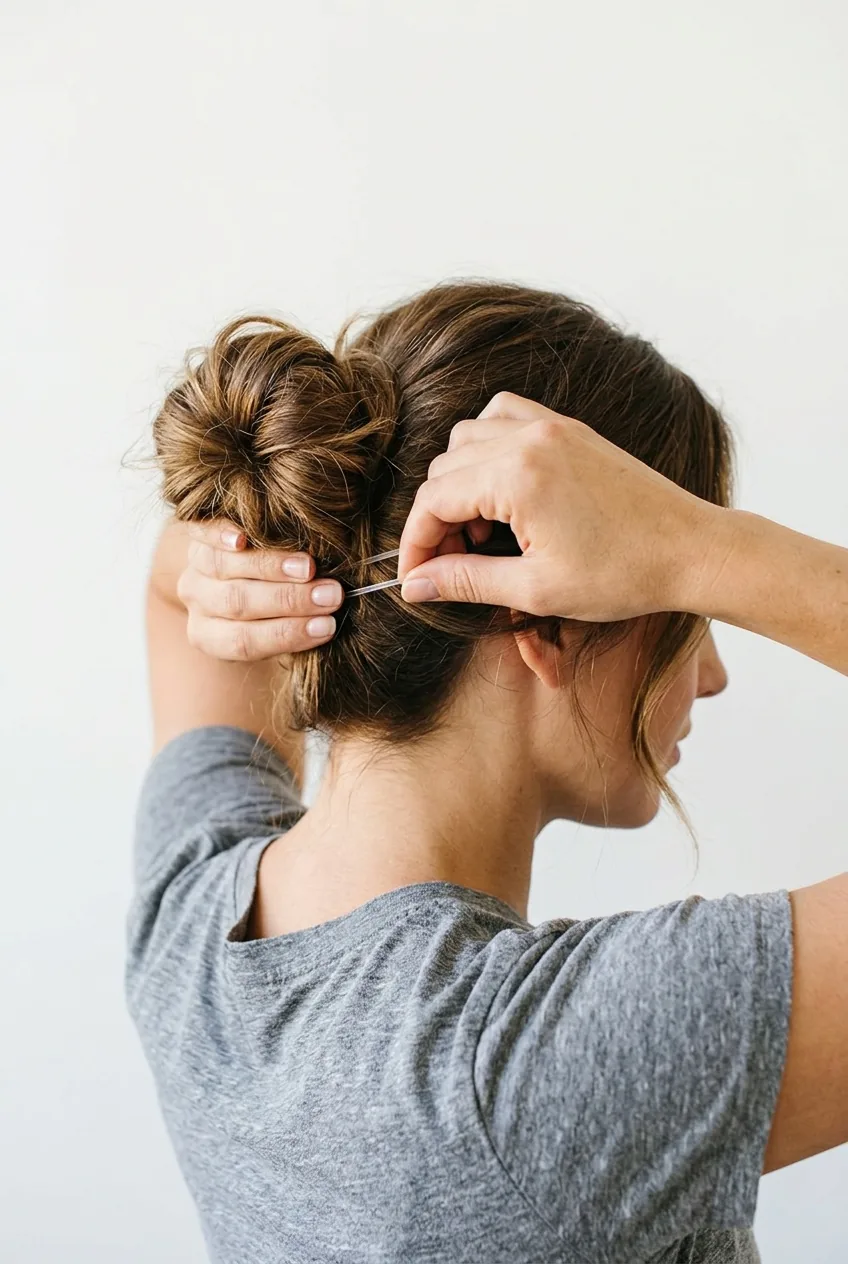
Step 6: Lock It in Place
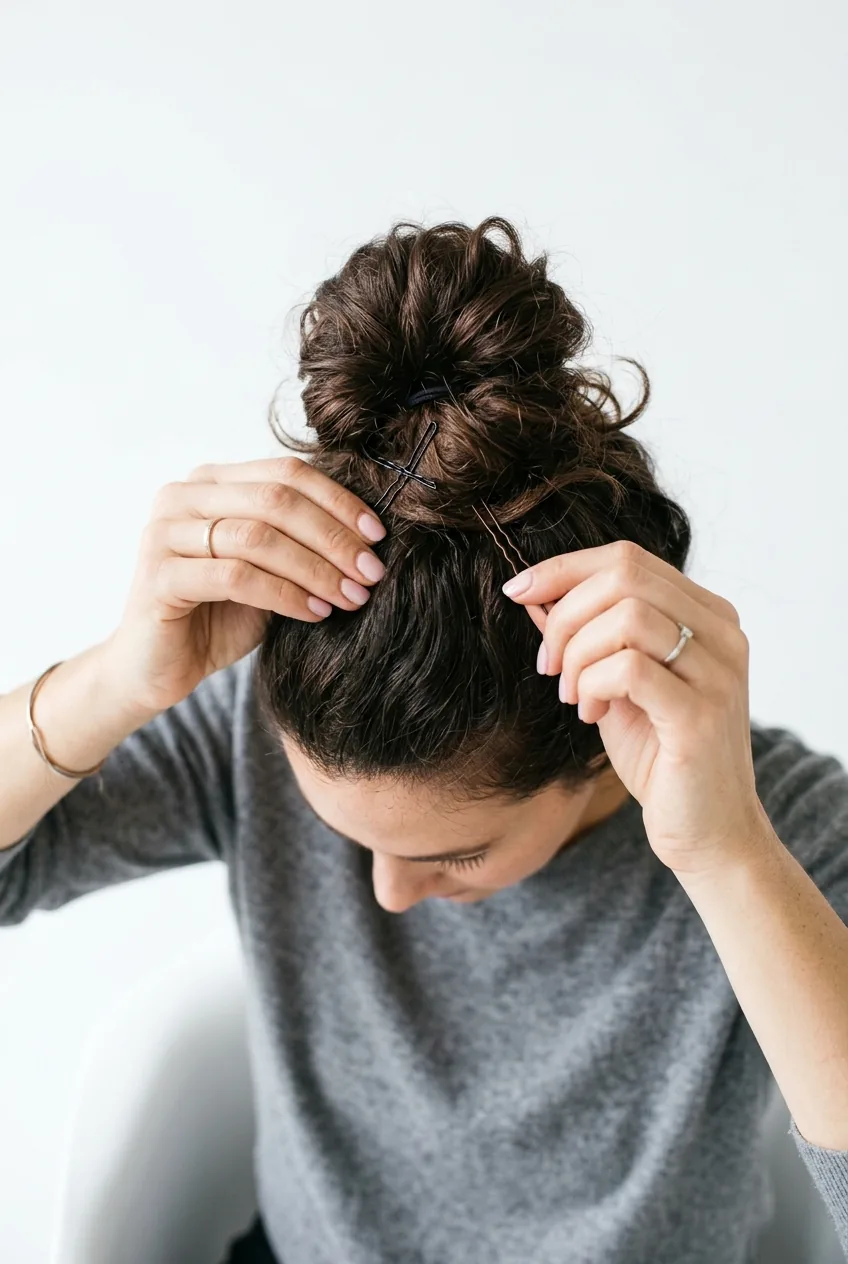
Use bobby pins strategically — not to contain every flyaway, but to secure any pieces that feel loose. I slide them in at angles so they grip better.
A light mist of hairspray helps, but don’t go overboard. The goal is a bun that moves naturally, not one that’s helmet-hard.
Texturizing products can be a game-changer here if your hair is particularly fine or slippery.
Questions I Get About This Method
How long does this messy bun actually stay put?
Mine usually lasts 8-10 hours without needing touch-ups. The twist in step 3 is what makes it more secure than other methods I’ve tried.
Will this work on really short hair?
If you can get your hair into a small ponytail, you can do this bun. You’ll just have more pieces sticking out — which actually looks great and very modern.
What if my hair is too thick for this method?
Thick hair actually works beautifully with this technique. You might need a stronger elastic and a few extra bobby pins, but the volume makes for a gorgeous, full messy bun.
Should I use this method on curly hair?
Absolutely! Skip the texturizing spray since curls already have natural texture. The twist step works especially well with curly hair texture.
Now I can throw my hair up in under three minutes and actually feel confident about how it looks. The best part? It gets easier every time you do it. Your hands learn the right tension and positioning, and soon it becomes second nature.