


I used to watch YouTube tutorials for medium-length updos and end up with a floppy mess that fell apart before I even left the house. My hair was too short for most long-hair techniques, but too long for pixie-style tricks. After years of trial and error (and some seriously bad hair days), I finally cracked the code with this 7-step method that works specifically for that tricky in-between length.
Your Complete Medium-Length Updo Guide
What You’ll Need for Perfect Updos
Let me tell you what actually works after testing dozens of products. You don’t need a salon’s worth of tools — just the right ones.
- Texturizing spray (my ride-or-die for grip)
- Fine-tooth comb for precise parting
- Wide-tooth comb for gentle detangling
- Bobby pins in your exact hair color (trust me, buy good ones)
- Small clear elastics
- Light-hold hairspray
- Hair clips for sectioning
- Optional: small hair donuts for extra volume
The texturizing spray is non-negotiable. Medium-length hair is notorious for being too slippery to hold styles, and this creates the perfect amount of grip without making your hair feel crunchy.
Step 1: Start with Clean, Textured Hair
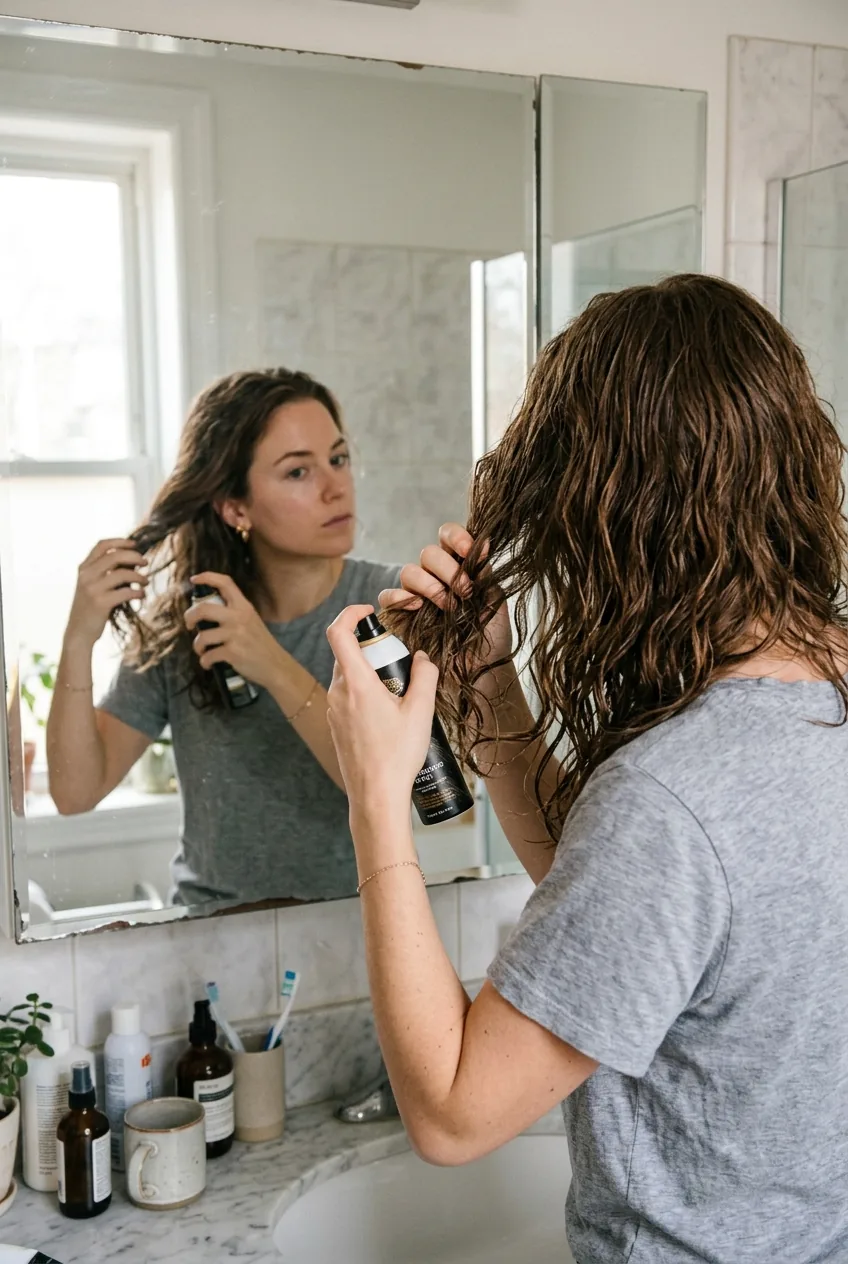
Here’s where most people go wrong — they try to style dirty hair thinking it’ll hold better. With medium-length hair, you actually need clean strands for the best grip and lasting power.
Wash your hair the night before if possible. Day-old clean hair has just enough natural oils to work with but isn’t greasy. If you’re styling same-day clean hair, skip conditioner on your roots — you want that slight texture.
Spray texturizing product through damp hair, focusing on mid-lengths and ends. I like to scrunch it in gently, then air dry or use a diffuser. The goal is hair that feels slightly grippy, not silky smooth.
Step 2: Section and Part Strategically
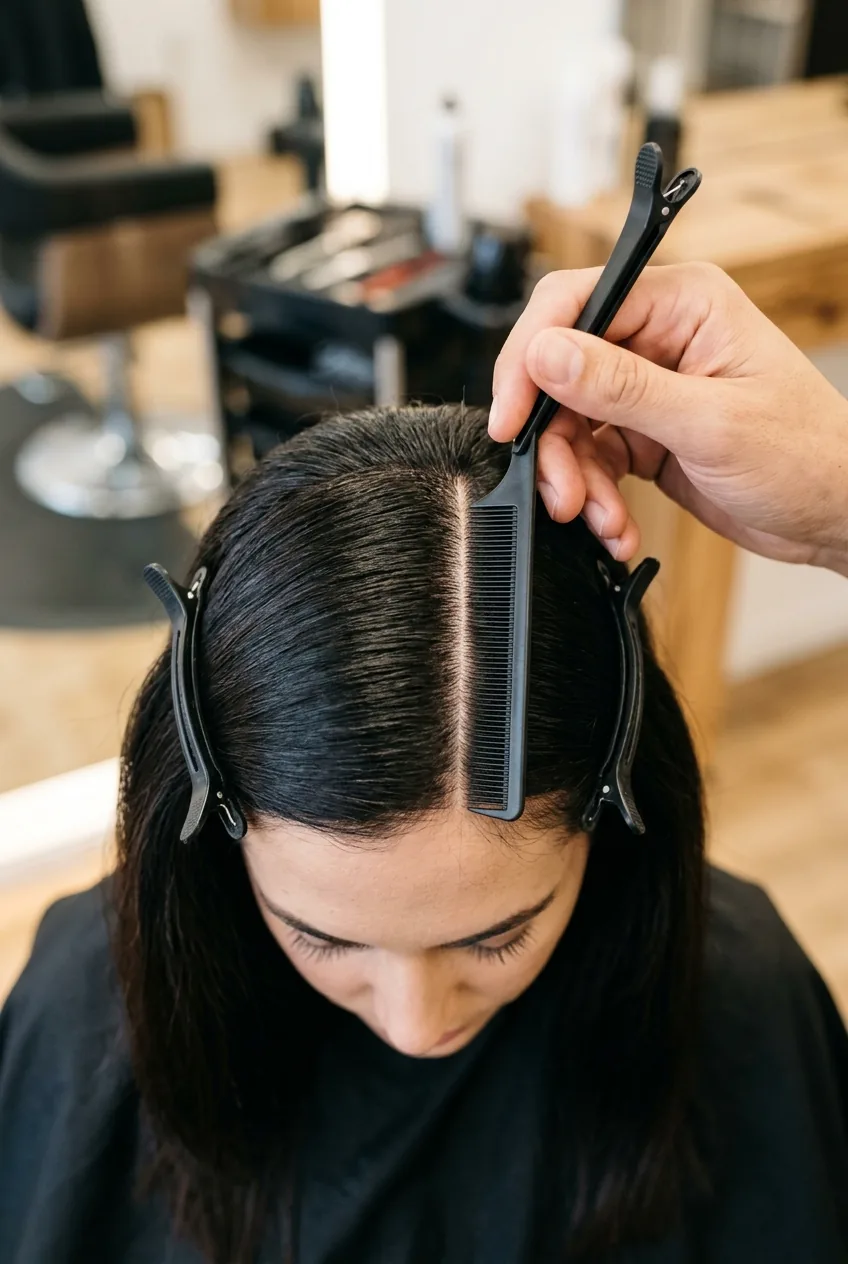
This step makes or breaks your updo. Medium-length hair doesn’t have the weight to naturally fall into place, so you need to be intentional about your sections.
Create a deep side part — this instantly adds sophistication to any updo. Use your fine-tooth comb to make it razor-straight and extend it all the way to your crown. Then section off the front pieces from temple to temple, about two inches wide. These become your face-framing elements.
Clip away everything except the bottom layer at the nape of your neck. We’re building this updo from the bottom up, and having clear sections prevents that “grabbed a handful of hair and hoped for the best” look.
Step 3: Create Your Base with Gentle Teasing

I know teasing sounds old-fashioned, but for medium-length updos, it’s pure magic. The key is being gentle — we’re creating texture and grip, not a beehive from the 60s.
Take that bottom section at your nape and gently backcomb just the roots, about an inch from your scalp. Use short, soft strokes with your fine-tooth comb. You’ll feel the hair building up some body — that’s exactly what we want.
Work through the entire bottom section this way. The teasing creates an invisible foundation that helps your updo hold its shape without requiring a can of hairspray.
Step 4: Form the Foundation Twist
This is where the magic happens. Instead of trying to wrestle all your hair into one ponytail (which never works with medium length), we’re creating a twisted base that actually holds.
Take that teased bottom section and loosely twist it to one side — whichever direction feels natural. Don’t twist tightly; we want a soft, organic shape. As you twist, guide it upward toward where you want the center of your updo to sit.
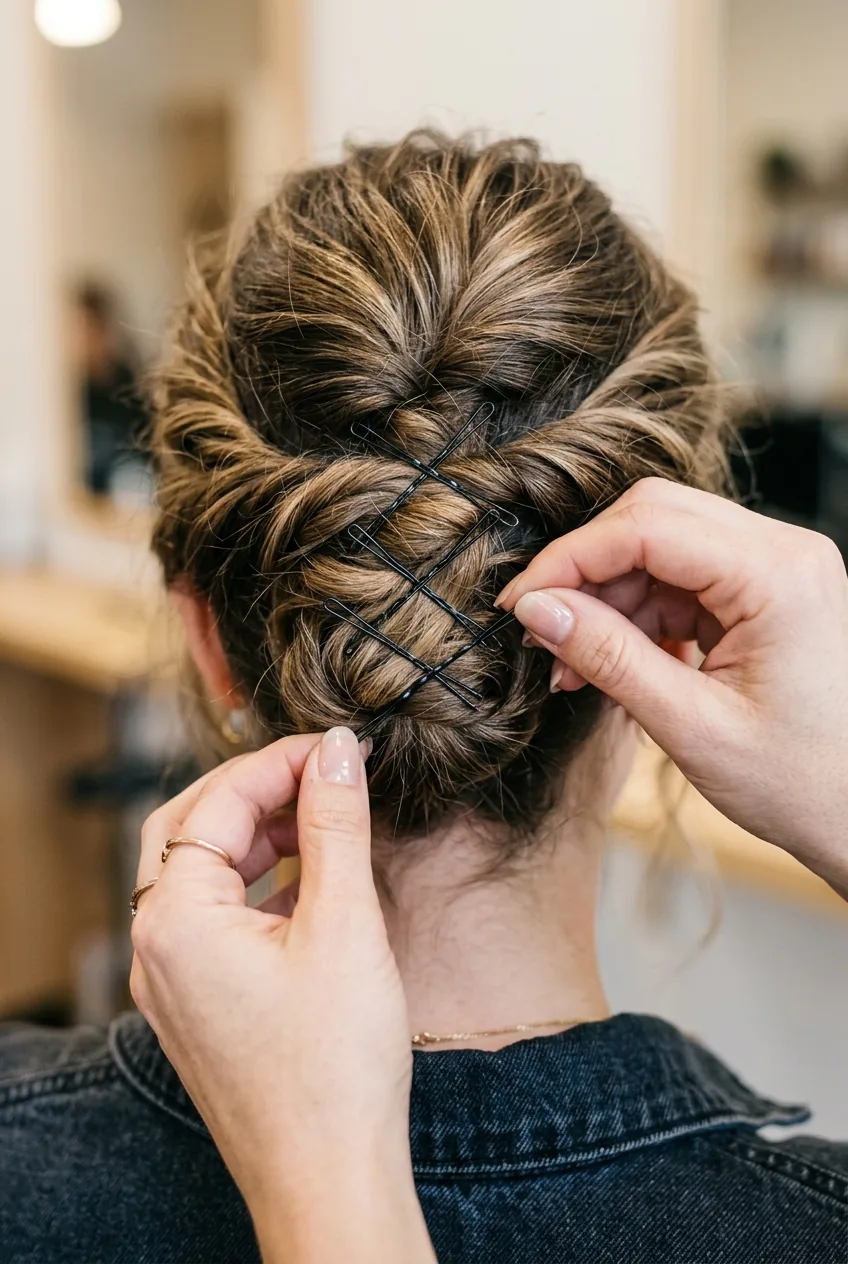
Secure this twist with bobby pins, inserting them at an angle so they grip both the twist and your head. This creates your anchor point — everything else will build from here.
I used to try pinning straight up and down, and my updos would slide right out within an hour. Angling the bobby pins like little X’s changed everything — they actually lock into place and hold all day.
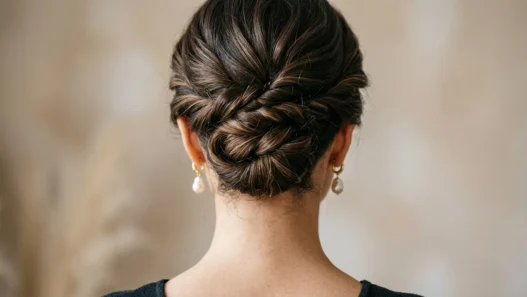
See the Twist Technique in Action
Step 5: Build Height and Volume
Now we add the next layer. Release one of your clipped sections — I usually go for the middle layer next. Give this section the same gentle teasing treatment at the roots.
Here’s the secret: instead of pulling this section tight, create a loose loop or fold as you bring it back to your anchor point. The loop adds instant volume and sophistication. Medium-length hair is perfect for this because it’s long enough to create the loop but not so long that it gets bulky.
Pin this section to your foundation twist, making sure the pins go through multiple layers for maximum security. You should start to see the updo taking shape — it should look intentionally messy in the best way.
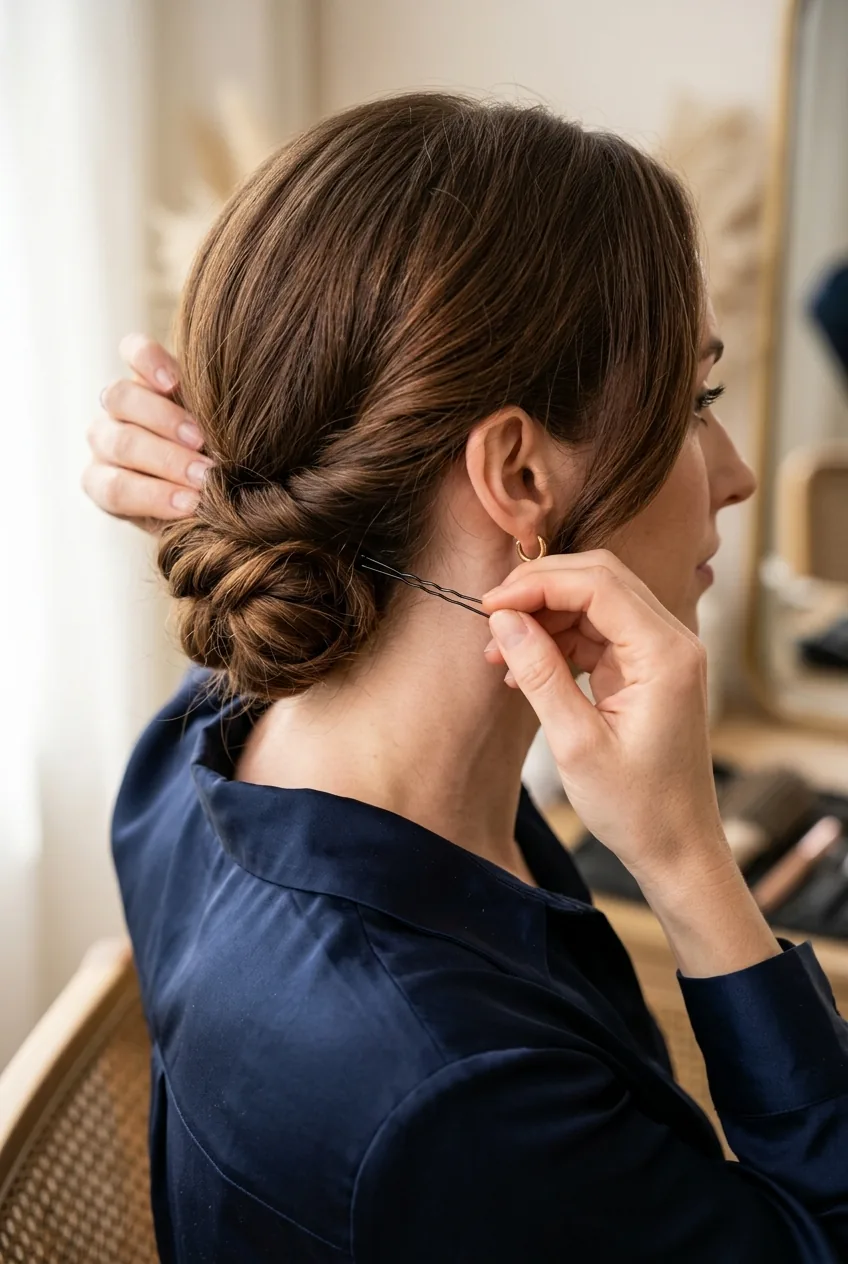
Step 6: Secure with Strategic Pinning
Time for the final sections, including those face-framing pieces we saved for last. The beauty of this method is that each section has something substantial to pin into — no more bobby pins sliding around on smooth hair.
For those front pieces, twist them gently away from your face, then bring them back to integrate with your updo. Don’t pull them tight — the slight looseness is what makes this look effortless and modern rather than severe.
As you add each section, step back and check your profile in the mirror. Medium-length updos should have movement and texture, not a slicked-back perfection. A few pieces falling softly around your face are actually a good thing.
The pinning technique here is crucial: cross your bobby pins to create X shapes wherever possible. This locking technique gives you serious staying power without using a million pins.
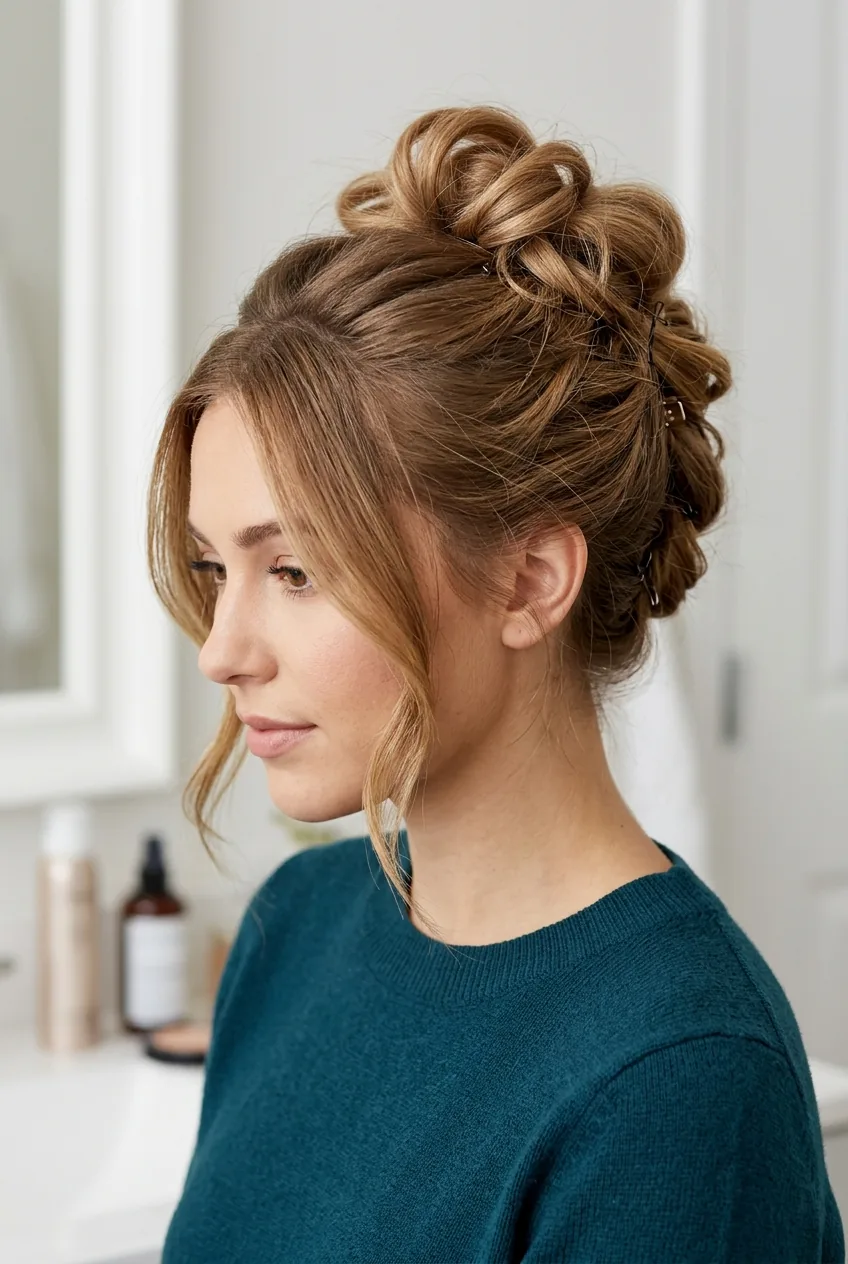
Step 7: Set and Finish the Look
We’re almost there! This final step is what separates a good updo from a great one that photographs beautifully and lasts through dinner and dancing.
Gently pull at the crown area to create even more height and softness. This “pancaking” technique makes your updo look fuller and more intentional. Don’t be afraid to really tug — the bobby pins should hold everything in place.
Mist with a light-hold hairspray, holding the bottle about 8 inches away. You want to set the style without making it feel like a helmet. I actually prefer light hold because it allows for some natural movement throughout the day.
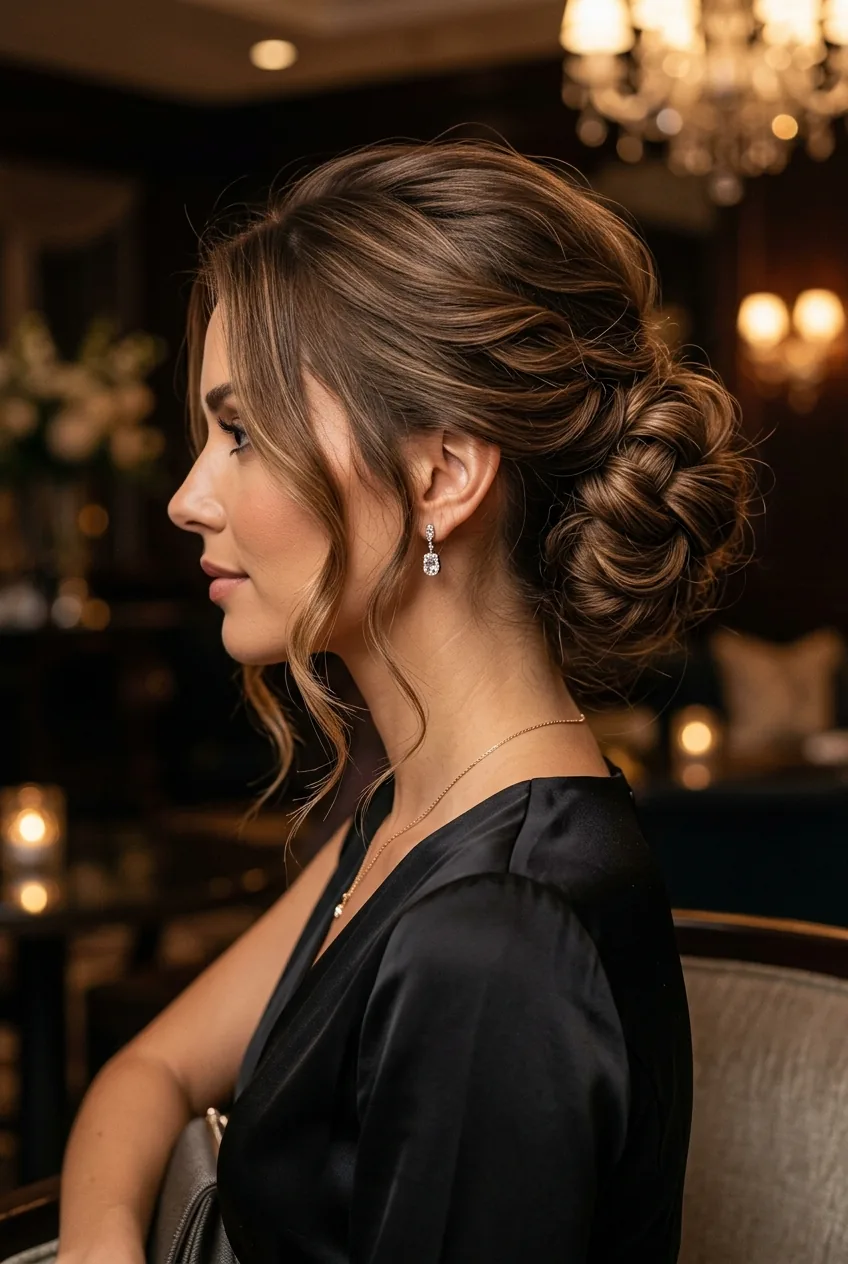
For special occasions, this pairs beautifully with prom hairstyles or can be dressed up with accessories. It’s sophisticated enough for weddings but relaxed enough for brunch with friends.
Questions I Get About This Method
Will this work on fine hair?
Absolutely! The texturizing spray and gentle teasing actually work better on fine hair than thick hair. Just use a lighter hand with the backcombing and focus on the roots only.
How long does this updo typically last?
With proper pinning technique, I get 8-12 hours of wear easily. The key is that foundation twist in step 4 — it creates a stable base that doesn’t rely on your hair being perfectly smooth.
Can I do this on curly or wavy hair?
Yes! Actually, textured hair holds this style even better. Skip the texturizing spray and go straight to sectioning. Your natural texture provides all the grip you need.
What if some pieces fall out during the day?
That’s actually part of the charm! This style is meant to look lived-in. A few loose pieces around your face look intentional and romantic, not messy.
The result? I finally have an updo that works with my shoulder-length hair and doesn’t require an engineering degree to recreate. It’s become my go-to for everything from work presentations to date nights. And honestly, the compliments I get make all those years of updo disasters completely worth it.