


I spent years trying to recreate that effortless 90s layered look at home, only to end up with choppy, unflattering cuts that looked nothing like the magazine photos. Then I worked alongside a veteran stylist who showed me why salon results look so different — it’s all about the cutting technique, not just the layers themselves. The pros use a completely different approach that creates natural movement and authentic volume.
What You’ll Need
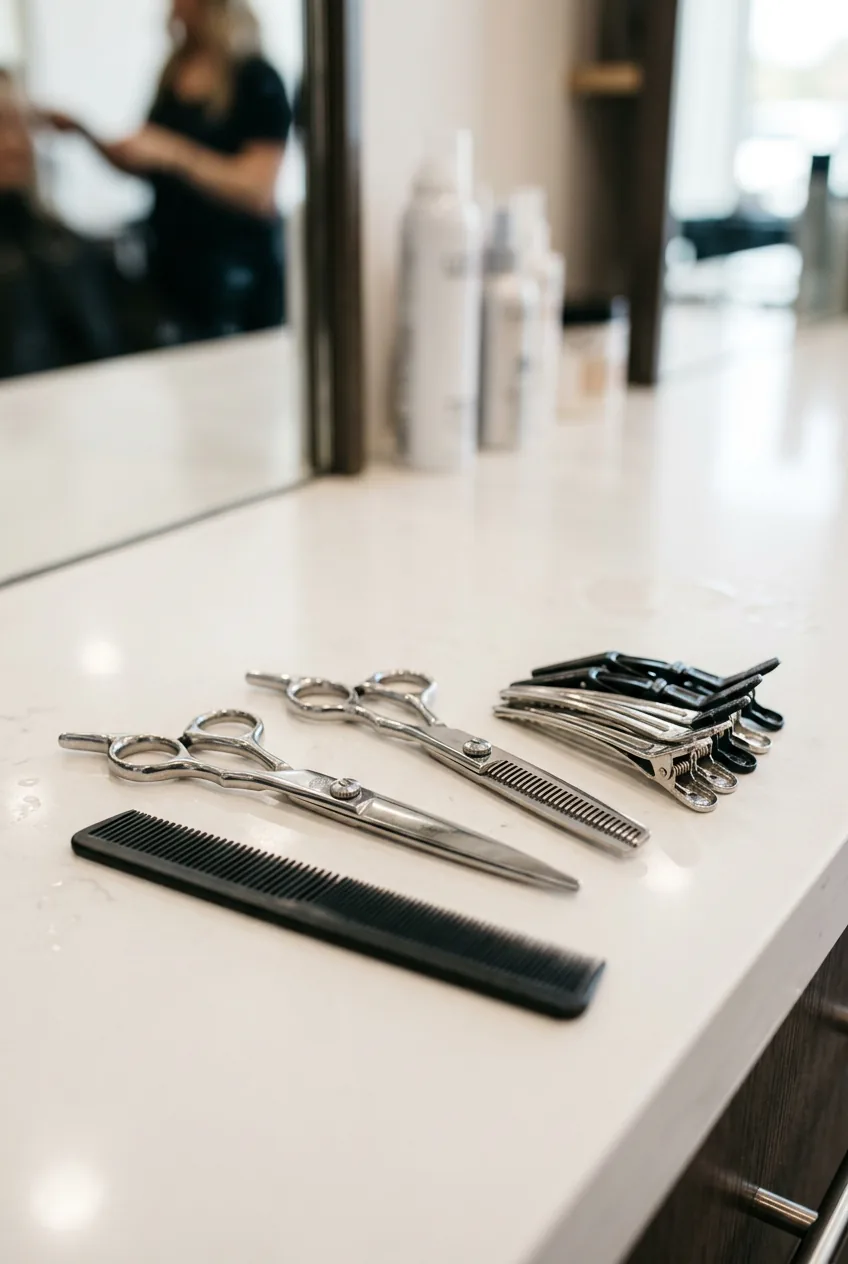
Here’s what separates amateur attempts from professional results — having the right tools makes all the difference. I learned this the hard way after ruining more than one haircut with dull scissors.
- Professional haircutting shears (at least 5.5 inches) — worth the investment
- Thinning shears with 30-40 teeth
- Fine-tooth comb
- Sectioning clips (at least 6)
- Spray bottle with water
- Round brush (medium barrel)
- Blow dryer with concentrator nozzle
- Light-hold styling cream or mousse
The thinning shears are absolutely crucial here. Regular craft scissors or even basic hair scissors won’t give you that soft, blended look that makes 90s layers so gorgeous.
Step 1: The Foundation Cut
Start with clean, damp hair — not soaking wet, just slightly moist. This is where most DIY attempts go wrong. The foundation cut establishes your perimeter and overall shape before any layering begins.
Section off the bottom inch of hair all around your head. This becomes your guide length. Cut this section straight across at your desired length — for classic 90s layers, I prefer just below the shoulders. Make small, deliberate snips rather than trying to cut it all at once.
The key here is precision. Your foundation cut determines everything that follows, so take your time. I hold the hair at zero degrees of elevation (straight down) and cut parallel to the floor.
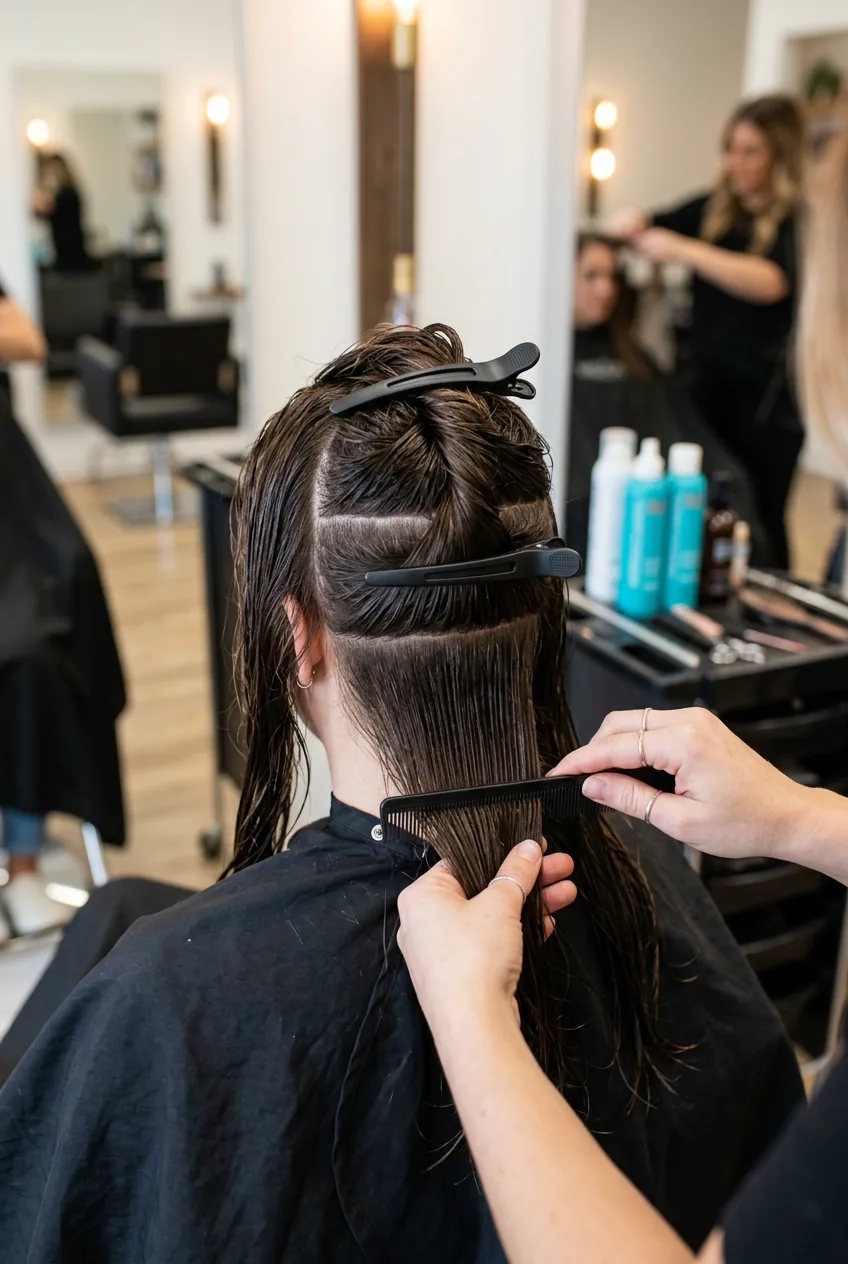
Step 2: Creating the Base Layers
Now we build the actual layer structure. Section your hair horizontally into three zones: bottom, middle, and top. The bottom section should be about 2 inches high, middle section 3 inches, and everything else becomes your top section.
Working with the middle section first, hold each subsection at 90 degrees (straight out from the head) and cut about an inch shorter than your foundation length. This creates the first true layer. The magic happens when you maintain consistent tension and elevation throughout.
For the top section, elevate the hair to 180 degrees (straight up) and cut it about two inches shorter than the middle layer. This dramatic elevation is what creates that authentic 90s volume and movement.
I made the mistake of cutting each section too short on my first attempt. You can always go shorter, but you can’t add length back. Start conservative — you’ll refine in later steps.
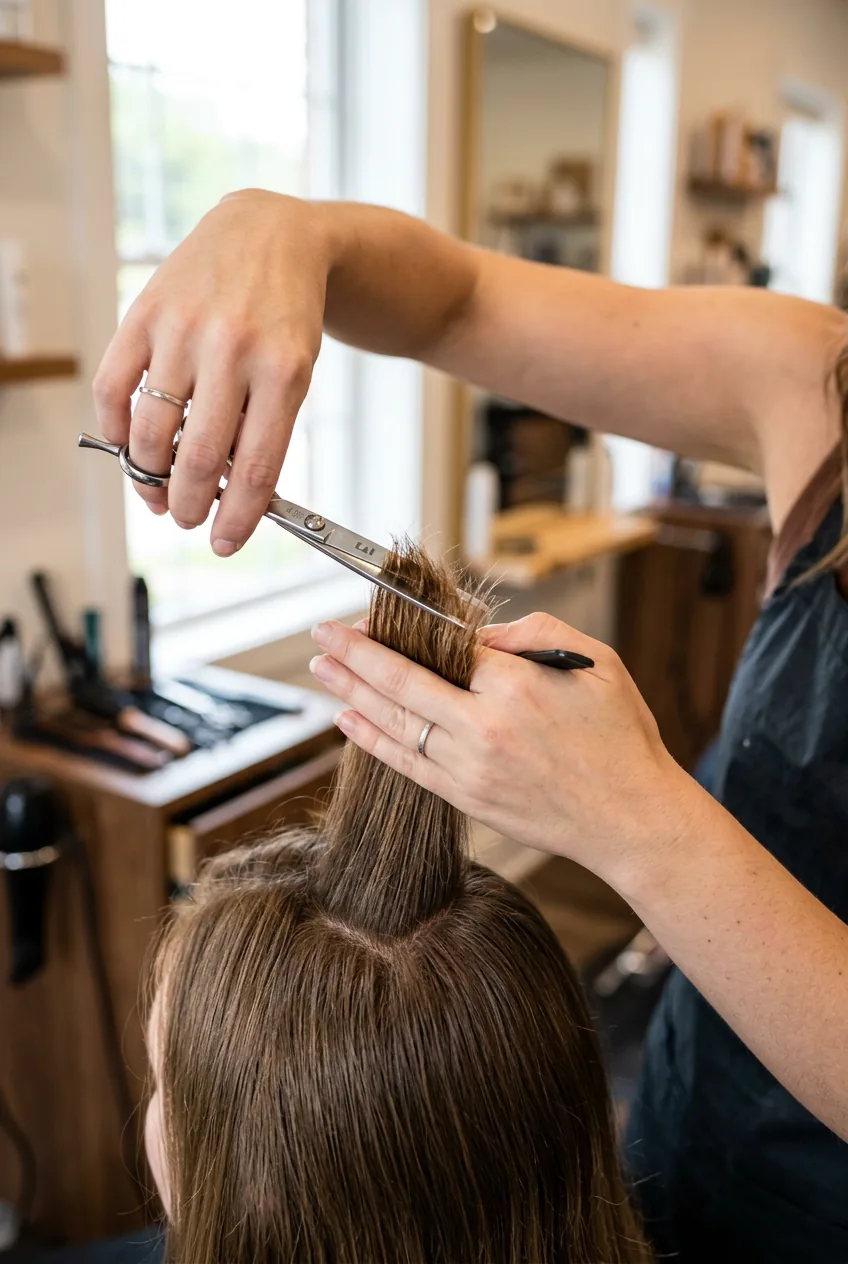
Step 3: Adding Face-Framing Pieces
The face-framing layers are what make or break the entire look. These pieces need to flow seamlessly into your existing layers while creating that signature 90s softness around your face.
Start by sectioning out a triangular piece from your crown to just behind each ear. Hold this section straight up and cut at an angle, creating shorter pieces near your face that gradually get longer as they move back. This technique is called “graduation” and it’s what creates that natural, flowing effect.
The shortest face-framing pieces should hit around your cheekbone or jaw, depending on your face shape. I prefer a softer approach — cutting these pieces about a half-inch shorter than you think you want them, then refining from there.
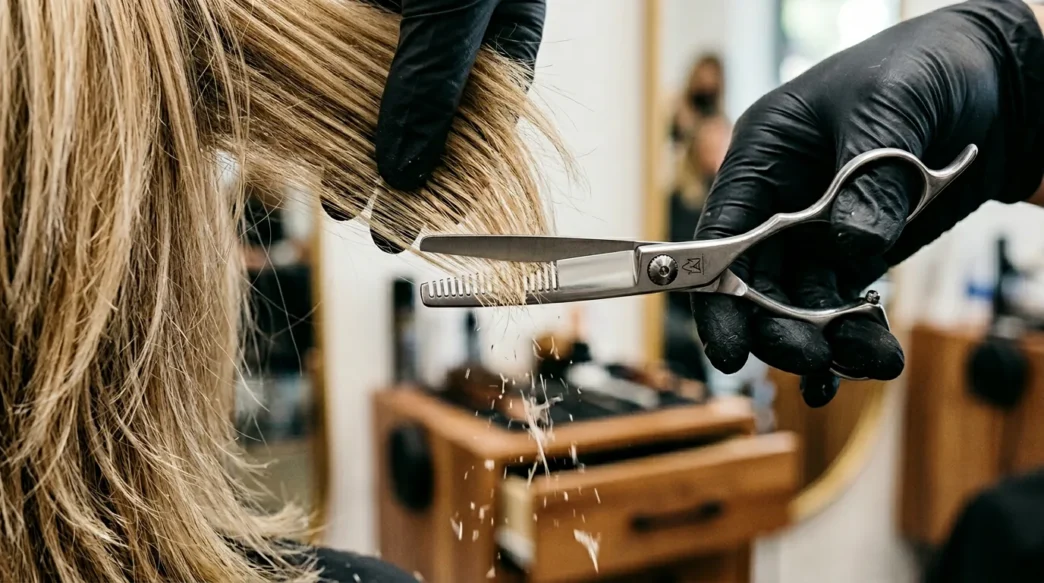
Step 4: The Texturizing Secret
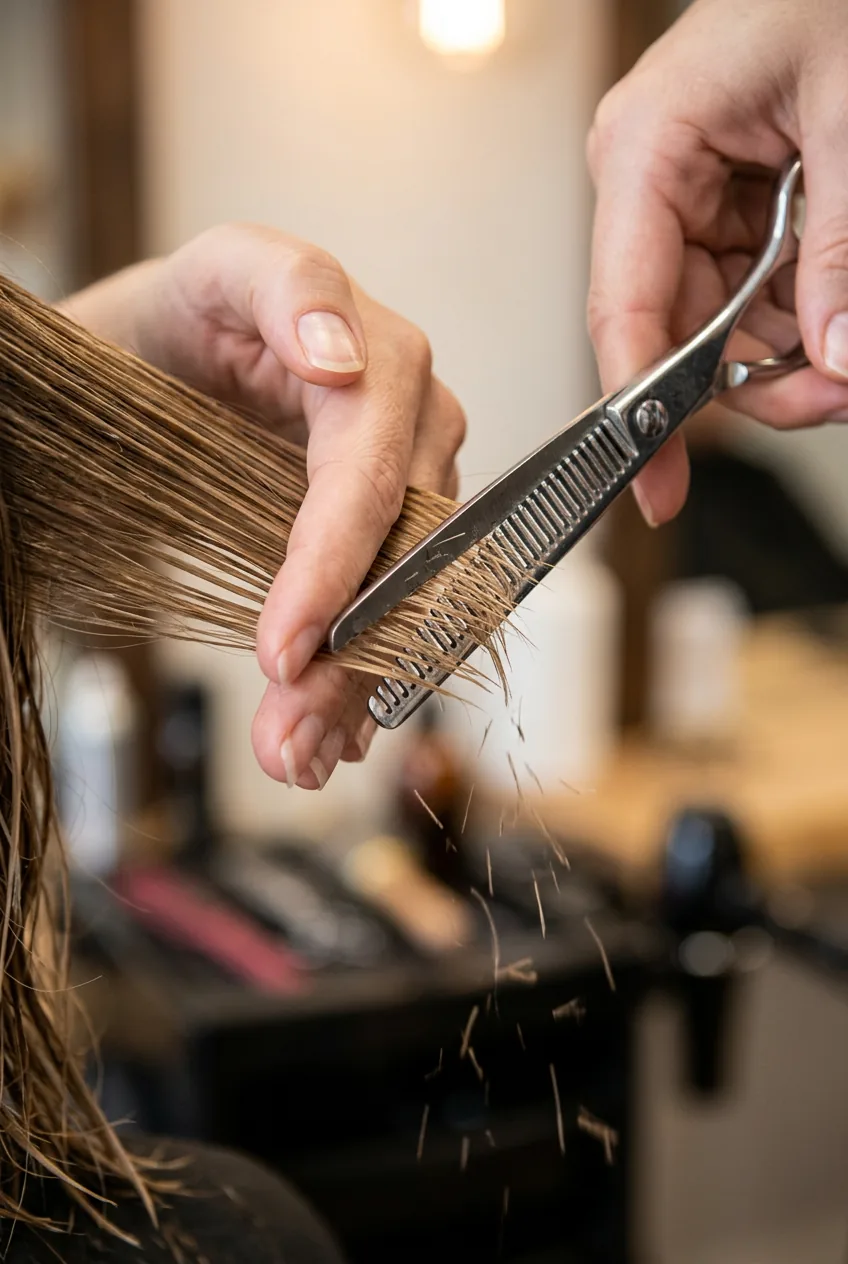
This is where the magic really happens — and what separates amateur cuts from professional results. Texturizing removes bulk without losing length, creating that effortless, lived-in look that defines great 90s layers.
Using your thinning shears, work through each section of already-cut hair. Hold the hair at its natural fall angle and make small cuts about 2-3 inches from the ends. Don’t cut straight across — instead, make tiny snips at slight angles to create natural variation.
Focus especially on the areas where your layers connect. These transition zones need the most blending to look seamless. I typically make 3-4 small cuts per inch-wide section, always working with the natural direction of hair growth.
Professional stylists know that 90s layered bob cuts that are dominating right now all have this subtle texturizing that creates movement without looking choppy.
Watch the Texturizing Technique Live
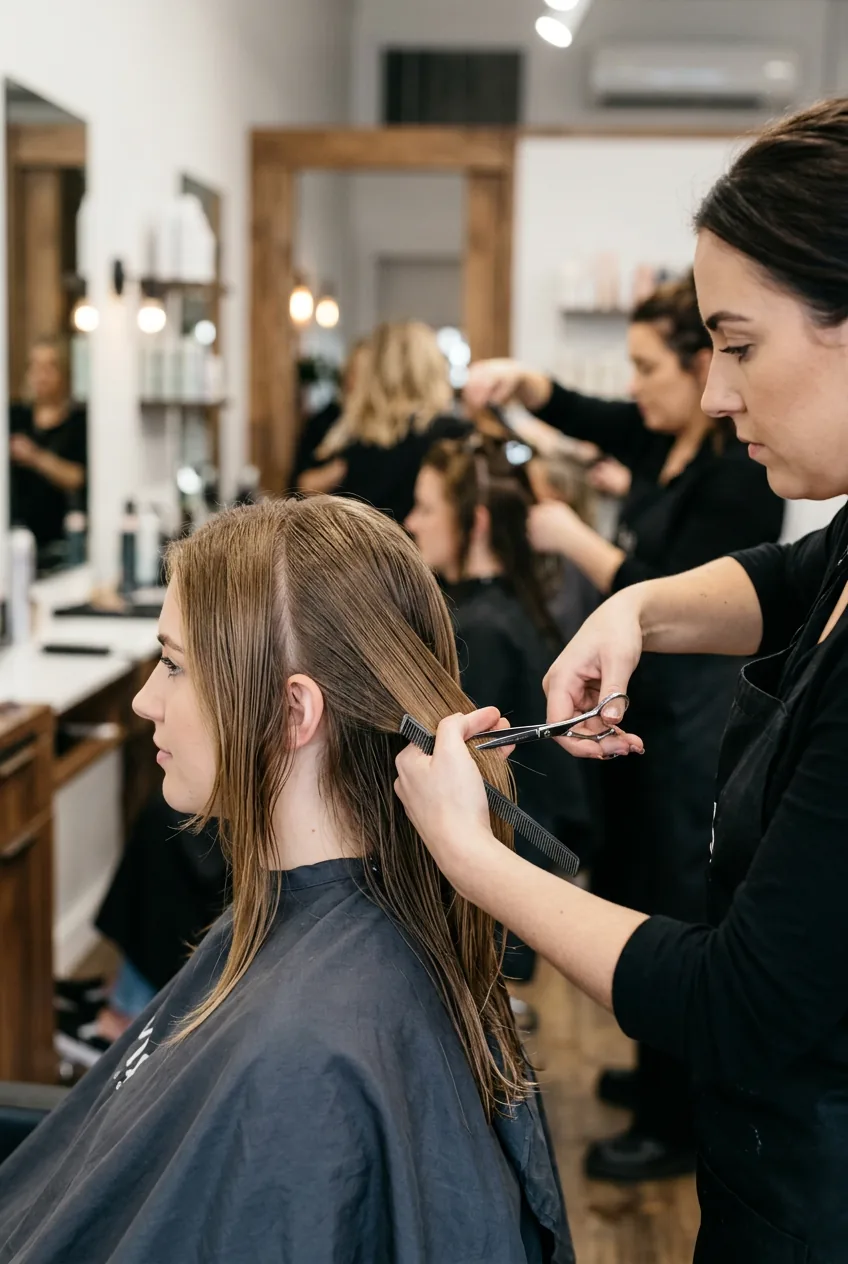
Step 5: Perfecting the Ends
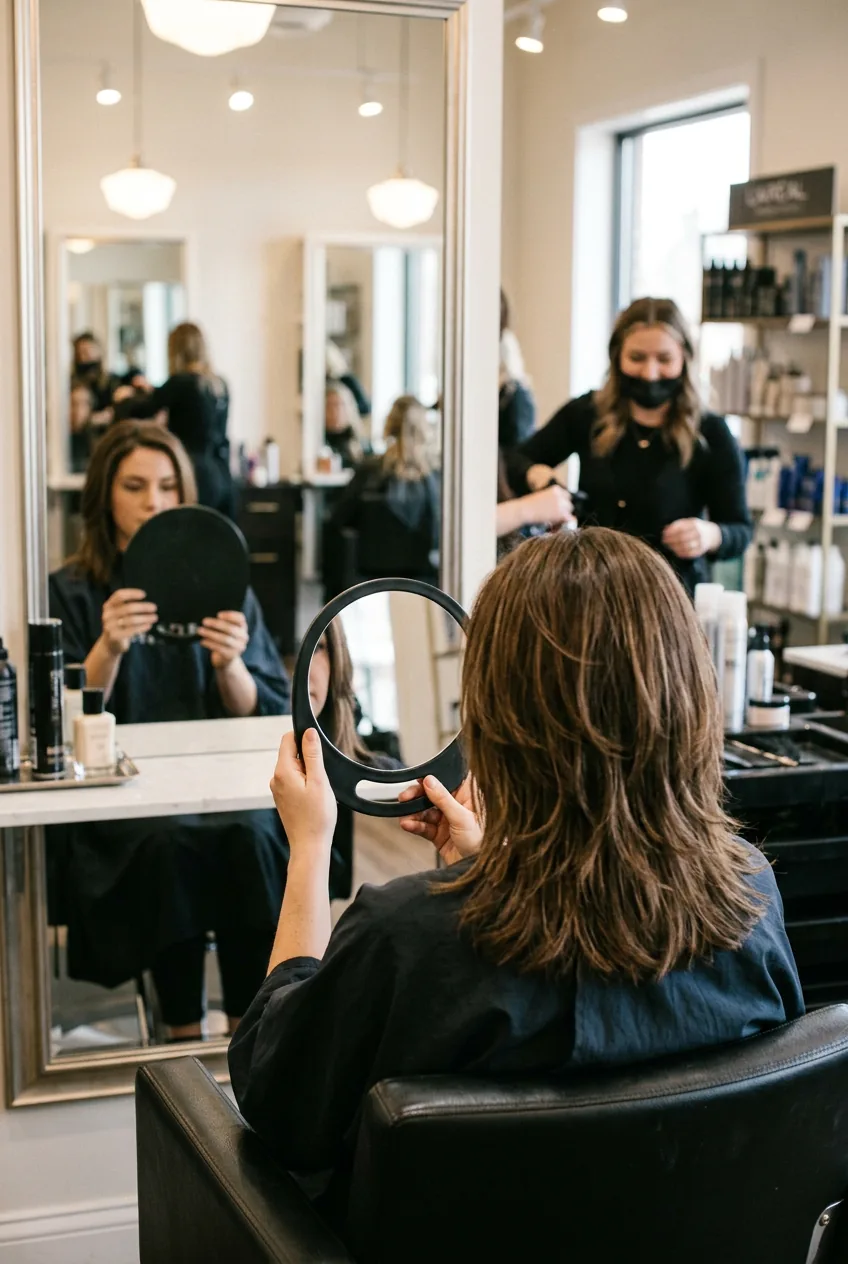
Now we refine and perfect. Look at your cut from multiple angles — use a handheld mirror to check the back. You’re looking for any obvious disconnections or pieces that stick out awkwardly.
This is when you make tiny adjustments. Maybe the left side needs a bit more taken off, or the back layers need better blending. Work in small increments — literally snipping a quarter-inch at a time.
Pay special attention to your nape area. This is where layers can look the most obvious if they’re not properly blended. Use your thinning shears to soften any harsh lines you see.
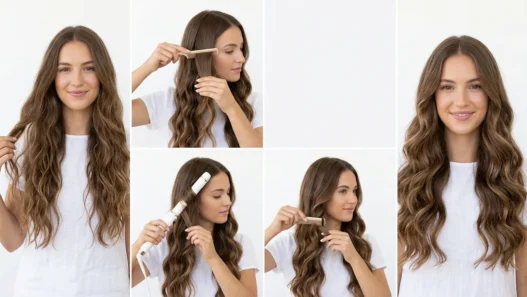
Step 6: Final Styling and Shape Check
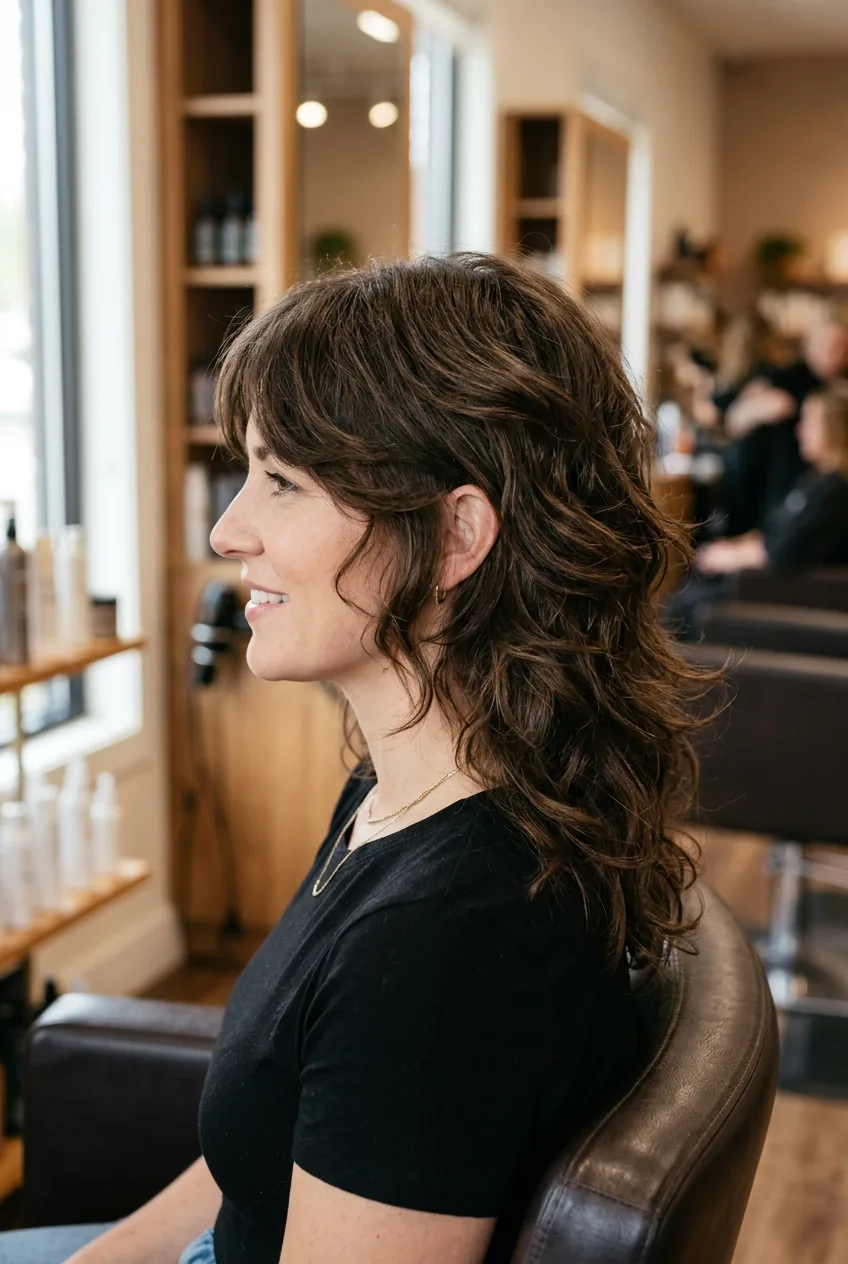
Time to see your work in action. Apply a light styling cream through damp hair, focusing on mid-lengths and ends. The goal is to enhance your natural texture, not create a heavily styled look.
Blow-dry using the round brush, lifting sections at the root for volume but not over-directing. The beauty of proper 90s layers is that they should look good with minimal styling. You want that effortless, “I woke up like this” vibe.
Once dry, check your shape one final time. The layers should flow into each other naturally, with no obvious “steps” or disconnected pieces. If you spot any issues, this is your last chance to make tiny corrections.
Understanding different texturizing methods can help you maintain this look between salon visits.
What People Usually Ask
Can I do this cut on myself?
While possible, I strongly recommend having someone help, especially with the back sections. If you must do it solo, use multiple mirrors and work very slowly.
How often do 90s layers need maintenance?
Every 6-8 weeks for optimal shape. The beauty of this cut is that it grows out relatively gracefully, but regular trims keep the layers looking intentional rather than grown-out.
Will this work on fine hair?
Absolutely — layers actually add the illusion of thickness to fine hair. Just be more conservative with how much hair you remove during texturizing.
What if my layers look too choppy?
Usually this means you need more blending with the thinning shears. Focus on the transition areas where different layer lengths meet and soften those connections.
I’ve been using this professional approach for two years now, and honestly? My layers have never looked better. There’s something so satisfying about mastering a technique that actually delivers the results you see in magazines. The key is patience and having the right tools — once you understand how pros approach layering, you’ll never go back to the old choppy methods.