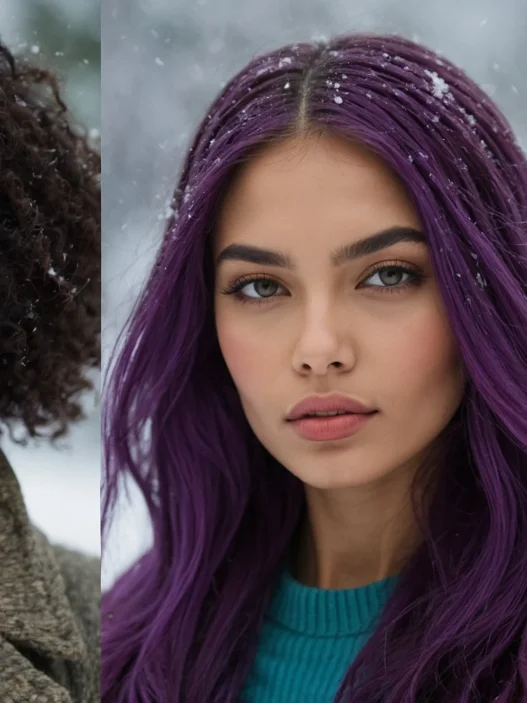


I used to think bold colors on bobs were only for Instagram influencers and rock stars. Then I saw this woman at a coffee shop with the most gorgeous purple-tinted bob that somehow looked both edgy and professional. I knew I had to figure out how she did it. After months of research, some spectacular failures, and finally nailing the technique, I’m sharing exactly how to get bold colored bob hairstyles that actually work in real life.
What You’ll Need for This Transformation
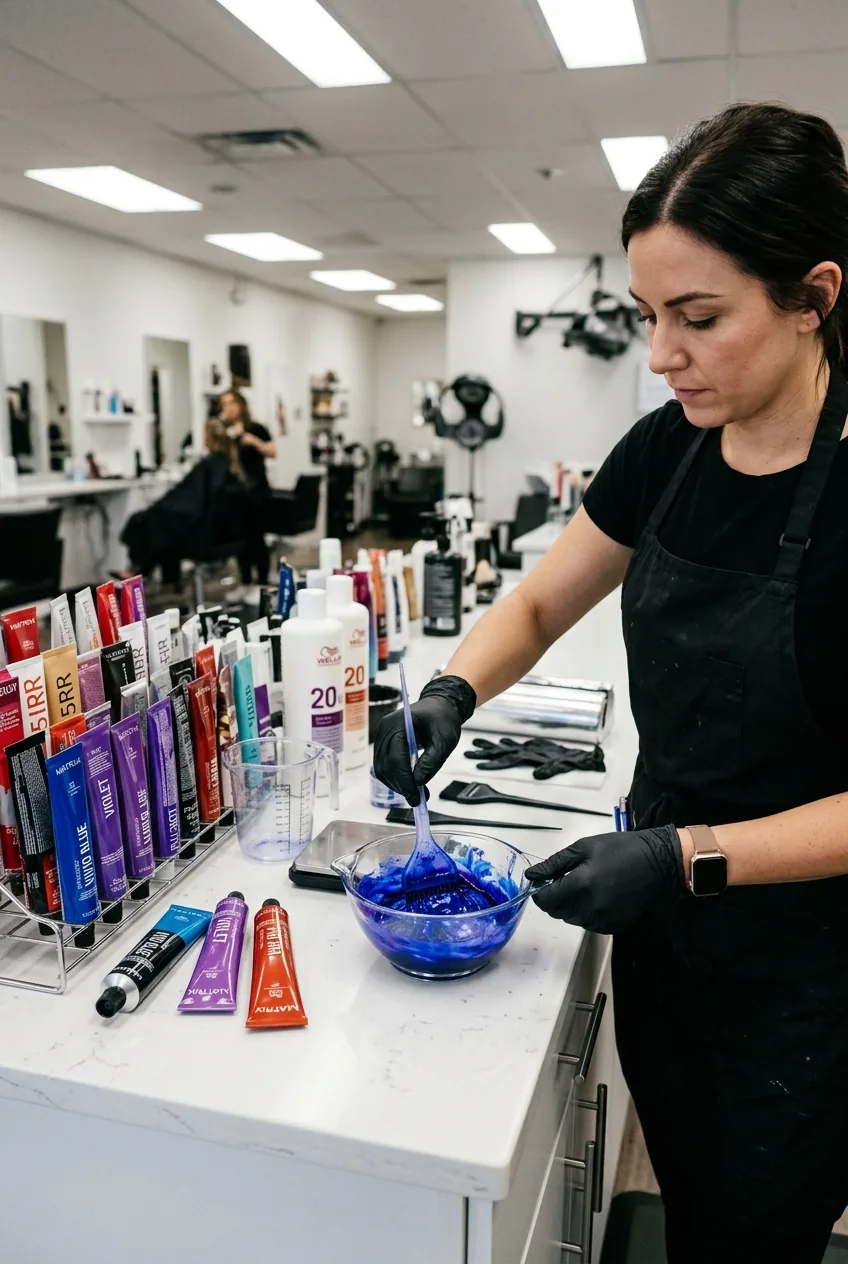
Here’s what I keep in my color kit now. Don’t skimp on the gloves — I learned that the hard way when my hands looked like I’d murdered a rainbow.
- Semi-permanent color in your chosen shade (I swear by brands like Arctic Fox or Manic Panic)
- Hair bleach and developer (only if you’re going lighter first)
- Sectioning clips — at least 8 of them
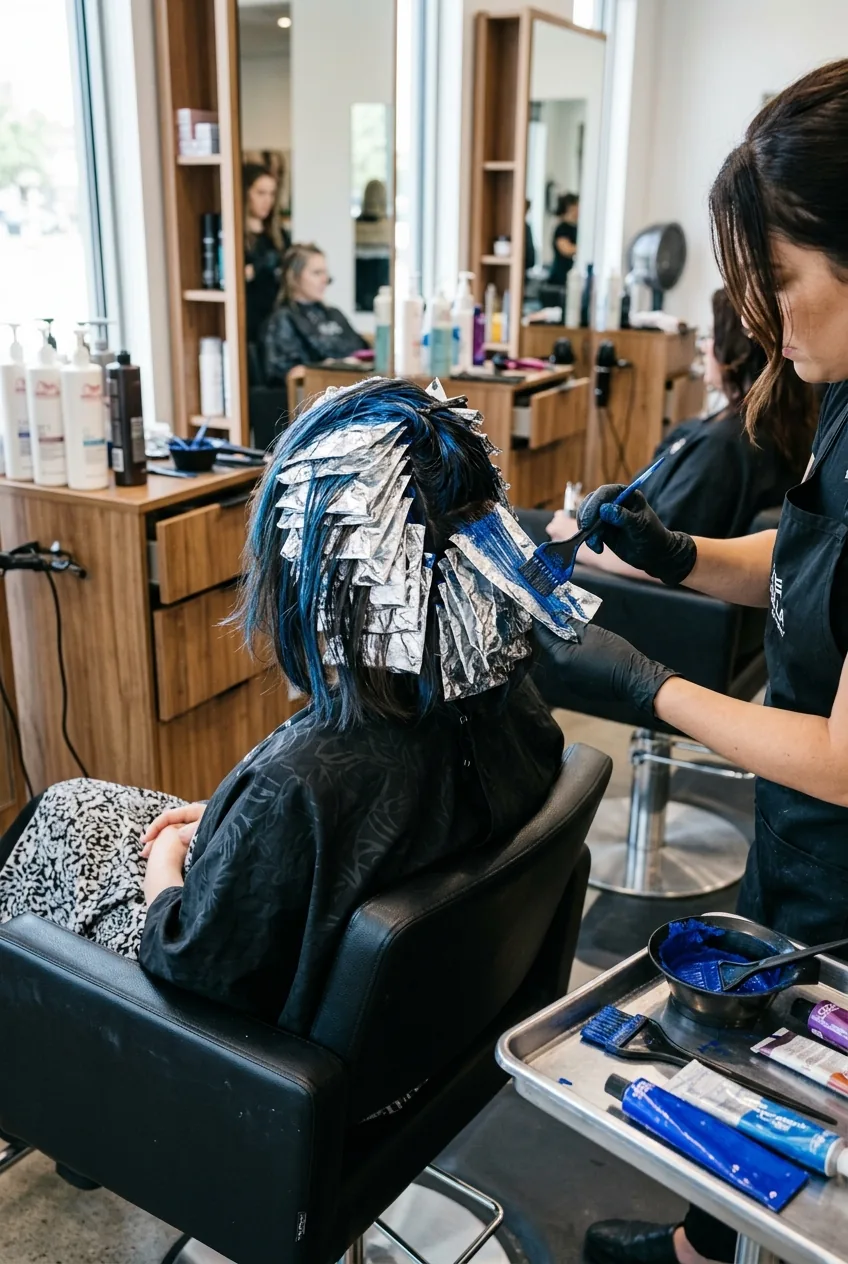
- Foil sheets or plastic wrap
- Tint brush with fine tip
- Plastic mixing bowl
- Nitrile gloves (way better than latex)
- Old towels you don’t mind staining
- Deep conditioning mask
- Color-safe shampoo and conditioner
Step 1: Choose Your Bold Color Strategy
This step makes or breaks everything. I see too many people diving straight into neon pink without considering their lifestyle or natural color. Smart color choice is half the battle.
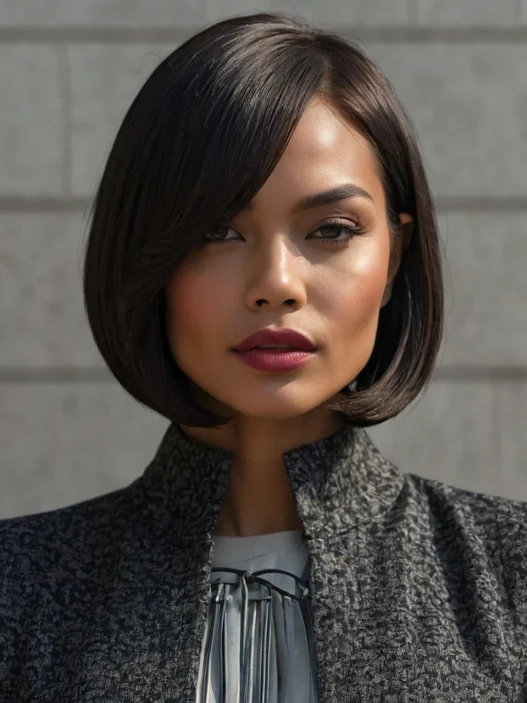
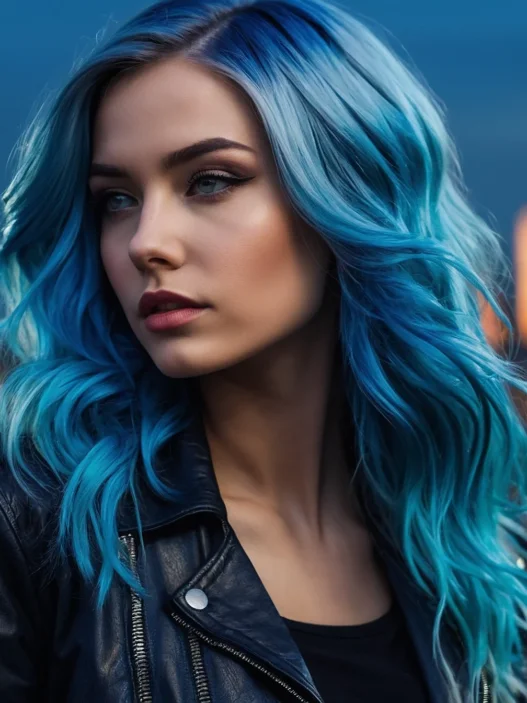
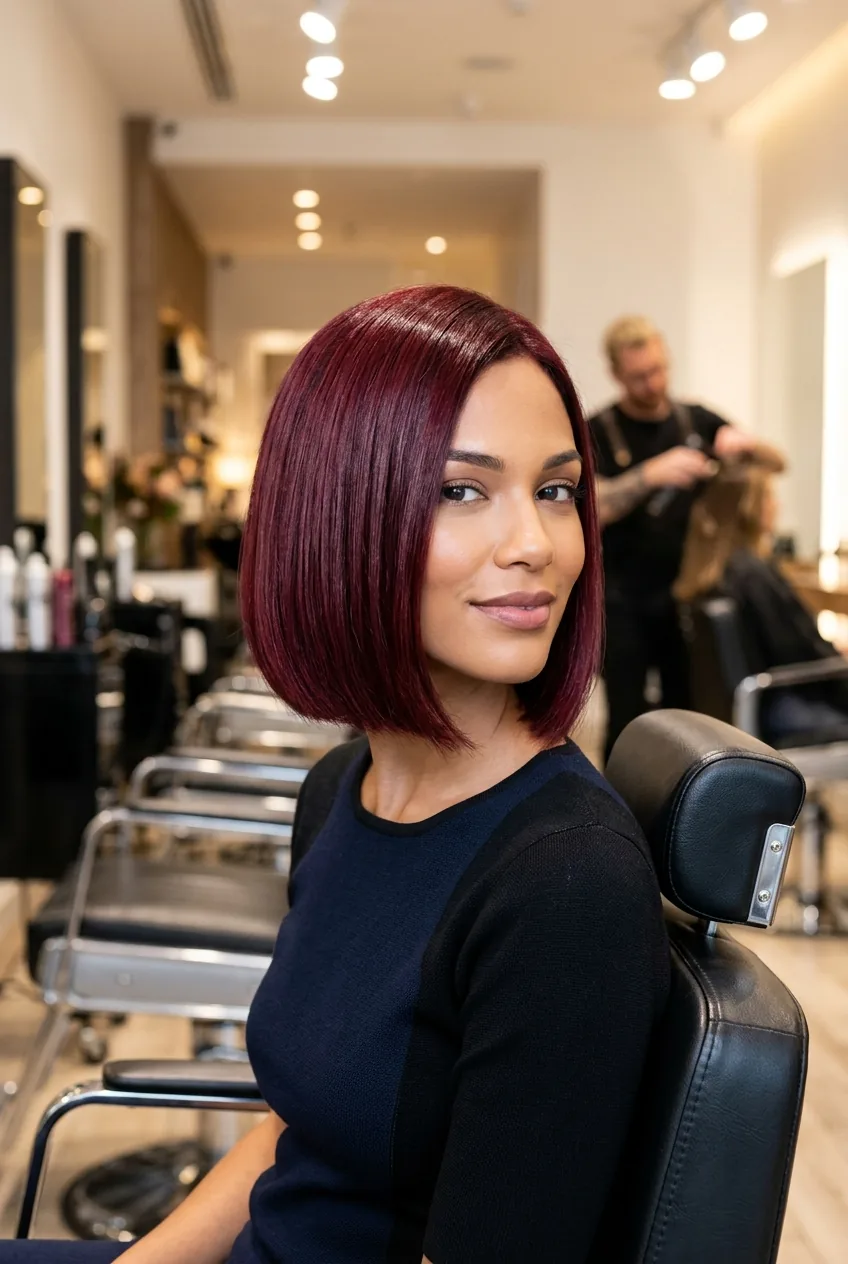
For professional settings, I’ve found that deep jewel tones work beautifully on bobs. Think emerald green, sapphire blue, or rich burgundy. They read as sophisticated rather than rebellious. If you’re feeling more adventurous, pastels like lavender or mint can be surprisingly wearable when done right.
Consider your natural color too. Darker hair needs bleaching for vibrant results, while lighter hair can often take color directly. Professional lightening methods vary depending on your starting point, so don’t guess — test a small section first.
Step 2: Prep Your Hair Properly
Nobody talks about this enough, but preparation is everything. I used to think I could just slap color on and call it good. Wrong.
Start with clean, completely dry hair. But here’s the trick — don’t wash it the day of coloring. That natural oil buildup actually protects your scalp. Weird, right? I learned this from watching too many salon videos at 2 AM.
If you’re bleaching first, work in small sections and test your timing. My first attempt left me with uneven patches that looked like I’d dunked my head in chlorine. Not cute. For bobs specifically, you want to maintain those clean lines, so precision matters more than with longer styles.
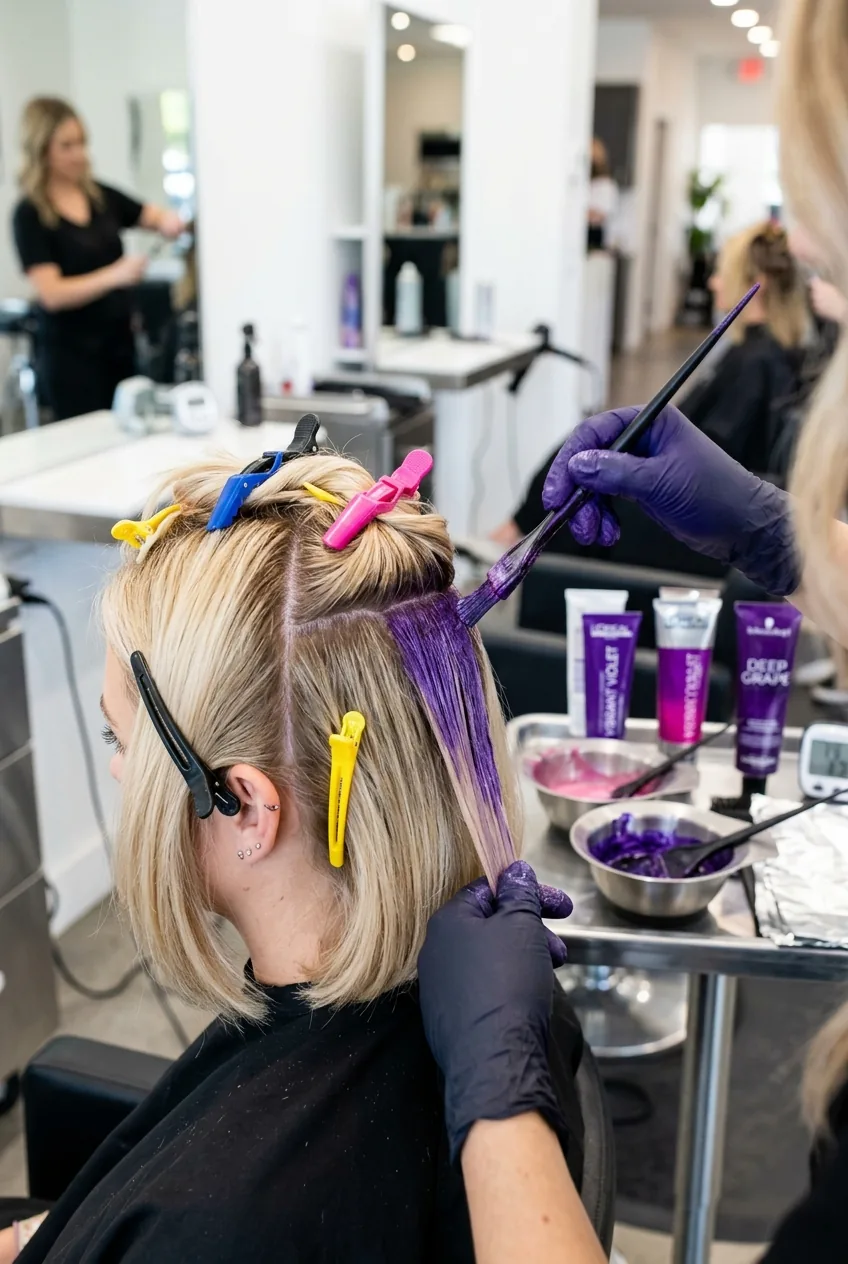
Step 3: Section Like a Pro

This is where most DIY jobs go sideways. Good sectioning is like having a roadmap — skip it and you’ll get lost halfway through.
I start by parting my hair exactly how I’ll wear it. Then I create horizontal sections about an inch wide, working from the nape up. Each section gets clipped away as I go. The key is consistency — uneven sections mean uneven color, and with a bob’s precise lines, every mistake shows.
I made the rookie mistake of trying to color too-thick sections my first time. The middle pieces barely took any color while the edges were vibrant. I looked like I had reverse highlights. Learn from my disaster — thin sections are your friend.
For short hairstyles like bobs, you can actually see each section clearly, which makes the process more manageable than with longer hair. Just don’t rush it.
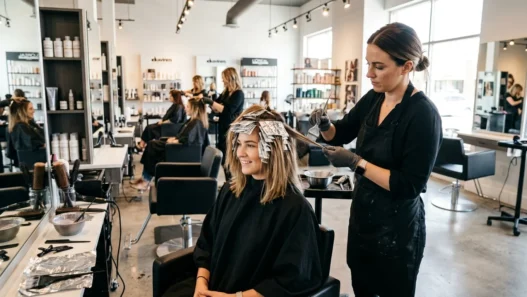
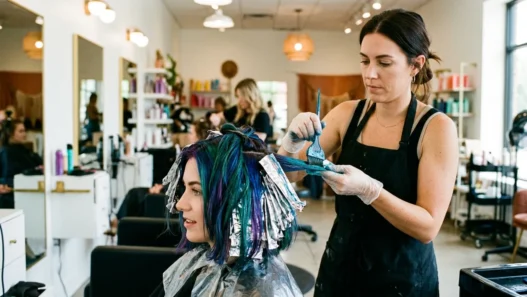
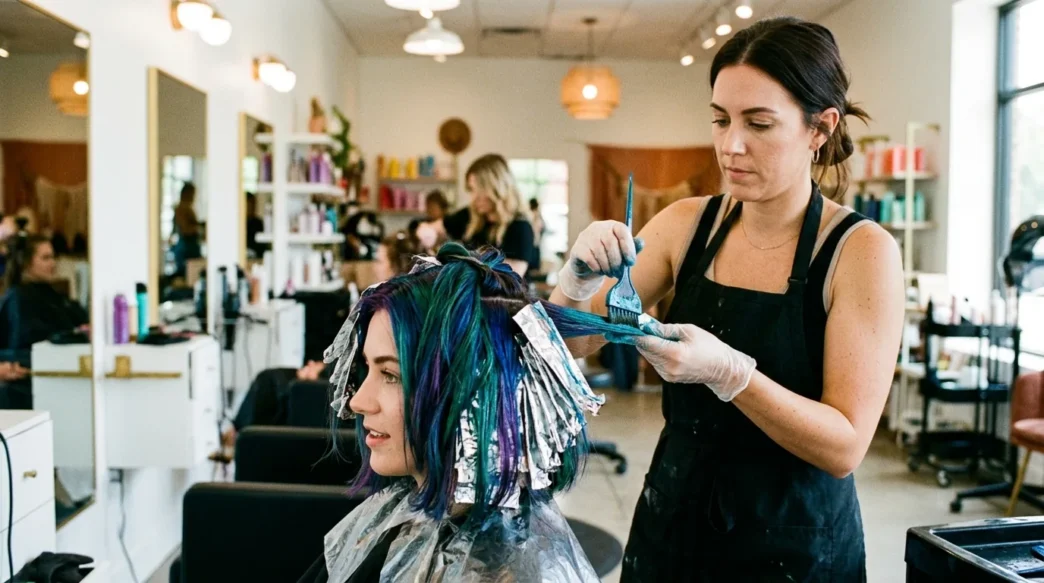
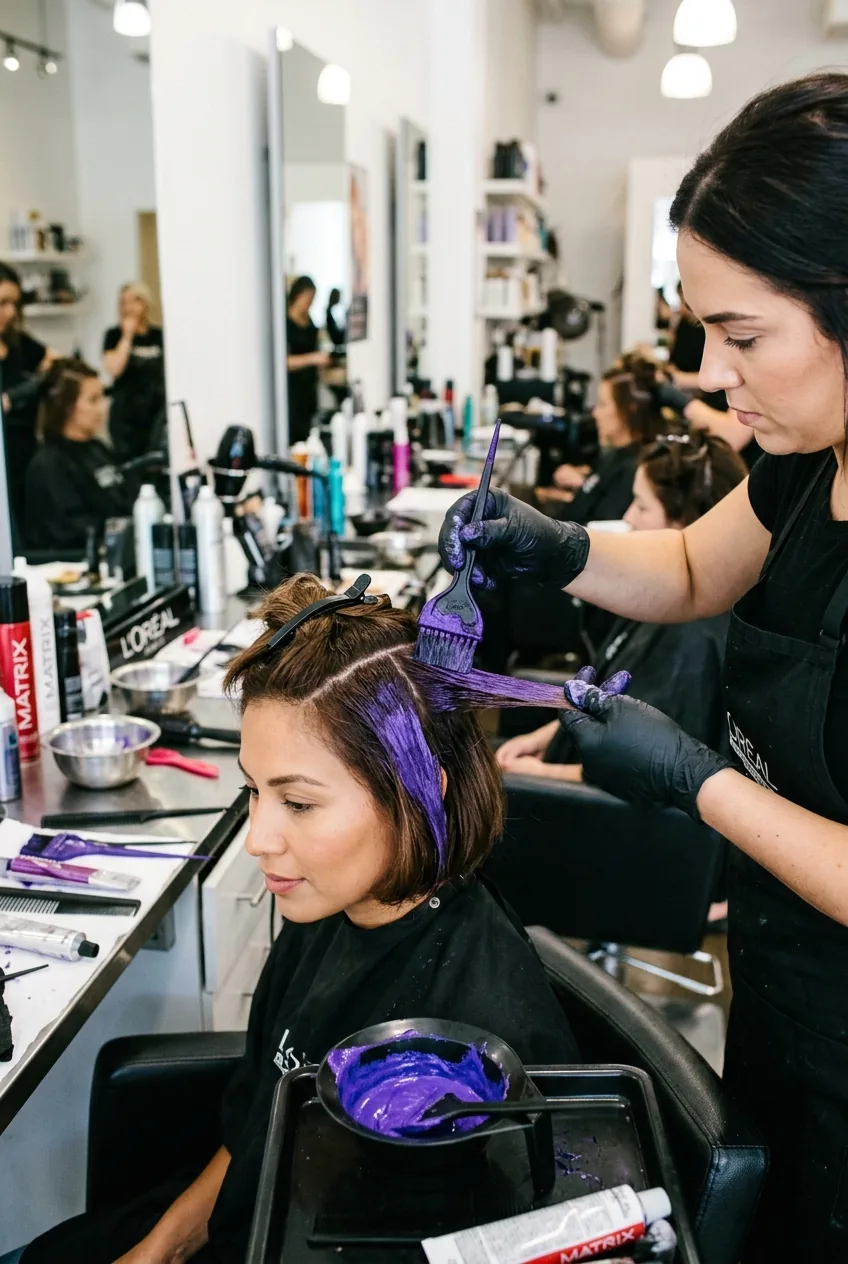
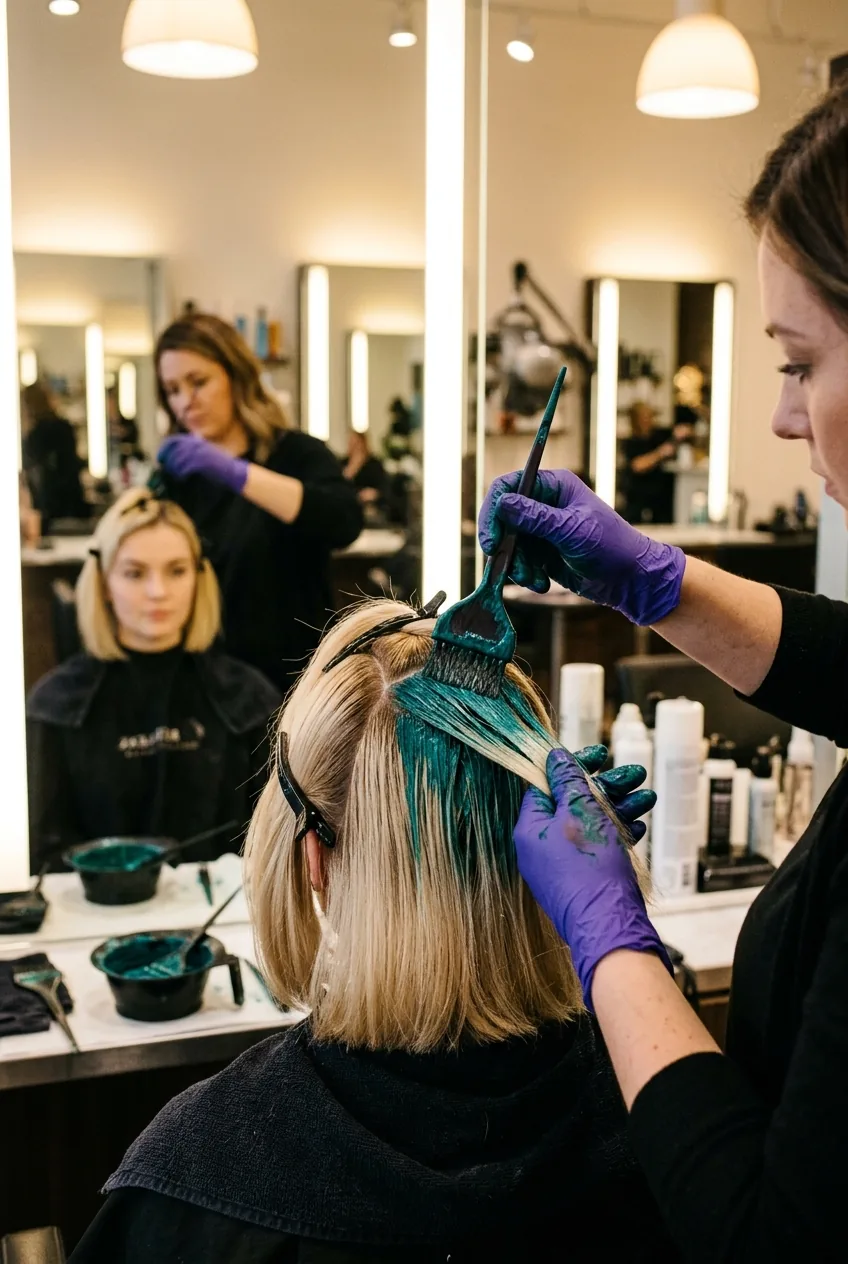
Step 4: Apply Color with Precision
Here’s where the magic happens. I work systematically, starting from the back where mistakes are less visible. The goal is saturation without oversaturation — you want every strand coated but not dripping.
I use a tint brush to paint each section from root to tip, then gently massage the color through with gloved fingers. The foil wrapping helps with heat retention and prevents bleeding between sections. This technique gives you that professional, even result you see in salons.
Timing varies by product, but I usually process for 30-45 minutes for vibrant semi-permanent colors. Set multiple timers — I learned this after accidentally leaving purple on for two hours and ending up with hair that looked like Barney the dinosaur.
The bob length actually works in your favor here. Less hair means more control over the process, and you can see results developing more easily than with longer styles. Professional timing guidelines can help you nail the perfect processing time.
Watch This Professional Technique
Step 5: Seal and Style Your New Look
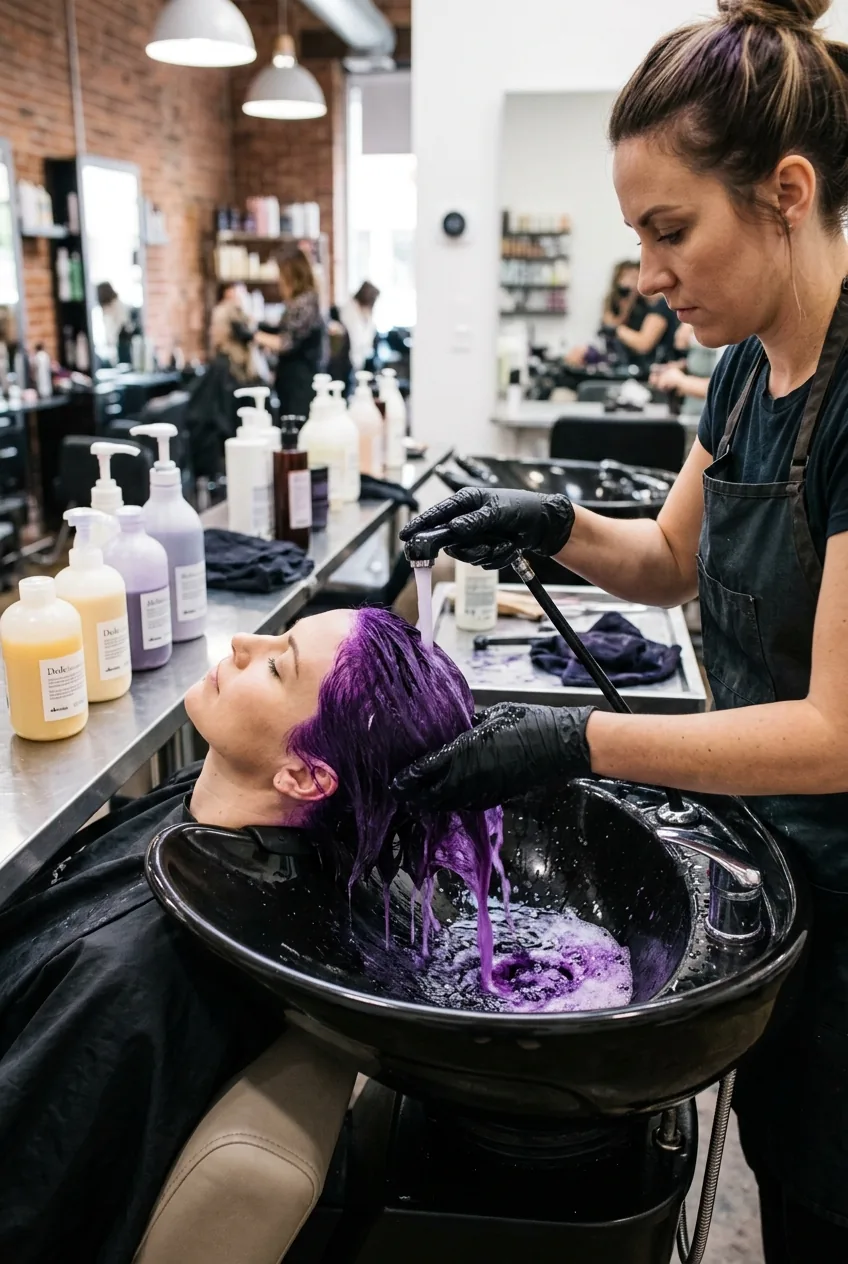
The rinse-out process makes or breaks your color longevity. I rinse with cool water until it runs clear, then immediately follow with a deep conditioning treatment. Hot water is the enemy of bold color — it opens the cuticle and lets all your hard work wash away.
Once your hair is clean and conditioned, the styling becomes crucial. Bold colors on bobs need the right cut to truly shine. The clean lines of a well-cut bob actually enhance vibrant colors by providing structure. If your bob needs a refresh, this is the perfect time to get it trimmed.
I style my newly colored bob with a round brush and low heat, focusing on smooth ends and subtle volume at the crown. The goal is to let the color be the star while maintaining that polished bob silhouette. A light mist of color-protecting spray helps seal everything in.
For maintenance, I wash with cool water and use sulfate-free products exclusively. My bold colors now last 6-8 weeks instead of fading after two washes like they used to. The difference is night and day.
Questions I Get About Bold Bob Colors
Will bold colors damage my bob’s shape?
Not if you do it right. The coloring process itself doesn’t affect the cut, but bleaching can cause some texture changes. I always recommend getting your bob trimmed within a week of coloring to maintain those crisp lines.
How often do I need to touch up bold colors on short hair?
Every 4-6 weeks for vibrant results, but it depends on your washing frequency and water quality. I refresh mine monthly with a diluted color gloss to keep it looking fresh between full applications.
Can I go from dark to bright colors in one session?
Usually no, especially for pastels or neons. Dark hair needs multiple lightening sessions to reach the right base level. I learned this the hard way — rushing the process just leads to muddy colors and damaged hair.
What’s the best bold color for a professional environment?
Deep jewel tones work beautifully — think rich burgundy, forest green, or deep navy. They read as sophisticated rather than rebellious, and they complement the polished look of a well-cut bob perfectly.
My purple-tinted bob gets compliments everywhere I go now. It took some trial and error, but mastering this technique opened up a whole world of color possibilities. The key is patience, preparation, and not being afraid to start over if something goes wrong. Trust me, the confidence boost from nailing your perfect bold bob color is worth every minute spent perfecting the process.